My Blinkie

Subscribe for Updates
Contact Me
Followers
Blog Archive
-
►
2022
(7)
- ► 09/04 - 09/11 (1)
- ► 08/28 - 09/04 (3)
- ► 06/12 - 06/19 (1)
- ► 05/29 - 06/05 (1)
- ► 05/15 - 05/22 (1)
-
►
2018
(1)
- ► 03/04 - 03/11 (1)
-
►
2013
(109)
- ► 11/24 - 12/01 (1)
- ► 10/27 - 11/03 (2)
- ► 10/20 - 10/27 (1)
- ► 10/13 - 10/20 (1)
- ► 10/06 - 10/13 (1)
- ► 09/15 - 09/22 (1)
- ► 09/01 - 09/08 (2)
- ► 08/25 - 09/01 (1)
- ► 08/11 - 08/18 (7)
- ► 08/04 - 08/11 (4)
- ► 07/28 - 08/04 (2)
- ► 07/14 - 07/21 (1)
- ► 07/07 - 07/14 (6)
- ► 06/30 - 07/07 (6)
- ► 06/23 - 06/30 (5)
- ► 06/16 - 06/23 (4)
- ► 06/09 - 06/16 (5)
- ► 06/02 - 06/09 (6)
- ► 05/26 - 06/02 (3)
- ► 05/19 - 05/26 (6)
- ► 05/12 - 05/19 (6)
- ► 05/05 - 05/12 (7)
- ► 04/28 - 05/05 (3)
- ► 04/21 - 04/28 (4)
- ► 04/14 - 04/21 (4)
- ► 04/07 - 04/14 (6)
- ► 03/31 - 04/07 (7)
- ► 03/24 - 03/31 (1)
- ► 03/17 - 03/24 (2)
- ► 03/10 - 03/17 (2)
- ► 03/03 - 03/10 (2)
Thursday, April 13, 2023
1:52 PM | Edit Post
I'm using Paint Shop Pro X for this tutorial.
I also use PSP 2022 and 2023.
Keep in mind, whatever is black gets completely removed.
Whatever is white stays.
Anything is between, (gray scale) varies in transparency.
Step 1 :
Getting some awesome brushes.
A couple of good sites I use are:
Brusheezy
So select a few of those and download and save to a folder called Brushes.
I believe that with the newer versions of PSP (version 15 and higher) you can install Photoshop brushes (ABR File) with no problem.
Older versions of PSP will not support PS brushes, therefore you will need to convert them.
You will need a program called abrMate
and a script that converts PNGs to brushes.
It's all in the tutorial.
Check it out and come back to make your mask.
CASSEL'S TUTORIAL
28 Ink and Watercolor Brushes
Download and unzip.
Step 2:
Open a new canvas 800 x 800 with a black background.
Add a new layer.
For every single brush I use, I add a new layer. Nothing worse than wanting to change position of one of the brushes and you have to hit the back button (undo) 40 times! This way I just select the layer and using my mover tool I adjust the location of brush.
Step 3:
Select your brush tool.
Left click on your first layer. Should be white, since left click is Foreground.
If it's too big you can resize in the tool bar. You can use your mover tool to position this brush wherever on your canvas. Just make sure to re-select your brush tool once you've moved your layer.
Add a new layer.
Let's rotate this brush in the tool bar, enter 75 and click on your new layer.
Now, duplicate this layer and change the blend mode to screen.
Add a new layer. Let's choose a new brush. Click on little drop-down arrow and click the letter i,
this gets you to the name Ink quickly.
Click on your layer and position your brush where you want.
***PLEASE BE AWARE to not use the brush outside of the parameters of your 800 x 800 canvas. No one likes cutoff on a tag, at least I don't.
Here is my mask so far.
This is about 4 layers of brushes and I moved them randomly on my canvas.
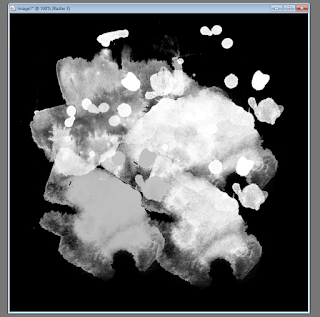
Just remember, you can play with size, rotation, blend mode etc.
You are only limited by your creativity.
Keep adding layers and brushes.
Add new brushes for cute little designs. Little stars, fish, circles, lines, splatter, grunge, etc
The list is endless.
You can use text, and you can use any of your plug-ins.
Mura copies is great for making perfect circles and for doing scatter.
Just add brush of choice in center of canvas and select "encircle" in Mura.
Play around with the different options, they are all great.
Also, if you have a lot of black background, what you can do is x-out your last layer (black bg) and using your crop tool, select "Snap crop rectangle to:Merged Opaque".

Un-hide the black layer. Everything will be nice and tight.
I never close any project or merge any project until I'm good and done.
I've had so many crashes over the years that I save often and leave all my layers un-merged until I'm completely done.
Minimize the one you are working on.
Step 6:
Test your mask.
Open some papers and test your new mask on a few different colors, textures etc.
Look to see if your mask has cutoff around the edges, if it does, you can go to original mask with all the layers and fix that, either with eraser took or selection tool.
Step 7:
Merge flatten and save.
I would love to see your masks once completed.
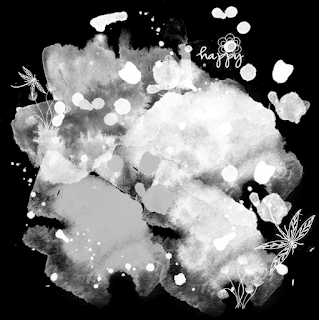
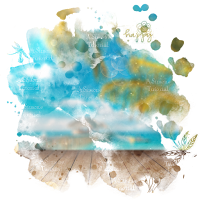
Here are 3 examples of this mask on papers from Bella Caribena scrap-kit
A Tropical Beach Party.
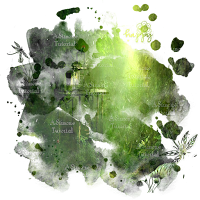
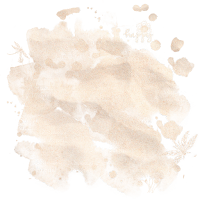
Hope this was helpful and well explained.
Simone xox

Labels:Mask Tutorial,PSP tutorial | 4
comments
Subscribe to:
Posts
(Atom)
Leave Some Love
Categories
- 2 animations same tag using Photoshop (2)
- 2 animations using PSP and AS (1)
- adding 2 animations to tag (2)
- Al Rio (1)
- aldodark (1)
- Alex McMillan (4)
- Alex Prihodko (1)
- AmyMarie Kits (2)
- Angelica S (6)
- Animation (63)
- ARMY (1)
- Barbara Jensen (2)
- Baseball (1)
- Bibi's Collection Kit (38)
- bling (9)
- BLOOD (1)
- bubbles (12)
- CDO Tutorial (1)
- Christine Marie Kotlark (6)
- Christmas (1)
- circles (1)
- Cowgirl (1)
- CU Animations (1)
- Danny Lee (6)
- Design by Joan (3)
- Diana Gali (9)
- Disturbed Scraps (9)
- Easter (1)
- Fairy Dust (3)
- Fire (3)
- Fish (1)
- Forum Set (2)
- Freebie Kit (1)
- FTU Kit (1)
- Glitter (17)
- Goth (9)
- Grunge (6)
- Gunshot (1)
- Hania Designs (1)
- Heatbeatz Creationz (2)
- Jay Trembly (4)
- Jose Cano Tubes (25)
- July 4th (1)
- Lady Mishka Tubes (2)
- LizquisScraps (7)
- Marc Duval (1)
- Mask Tutorial (1)
- Max-13-Tulmes (1)
- Meine Bastelwelt (1)
- Misticheskaya (5)
- Money (1)
- Music (1)
- P-O Concept Kits (4)
- Particle Illusion (1)
- PFD (2)
- PFD Tutorial (1)
- Pink (1)
- Pinup Bombshells (3)
- PIRATE (1)
- Popcorn (1)
- PSP tutorial (1)
- ptu animation (5)
- PTU kit (45)
- PTU tube (46)
- PTU Tutorial (1)
- Rock n Roll (3)
- Roses (1)
- S&Co Store (1)
- SATC (5)
- Scrapz n Pleazure (1)
- SkyScraps Kits (25)
- SkyScraps Tubes (8)
- Sparkle (5)
- Spazz (1)
- Spring (5)
- stars (1)
- Steam Punk (1)
- Summer (1)
- Sweet Occasion Designs (1)
- Teaching Tutorial (5)
- The Hunter (8)
- Timeline Banner (3)
- Tiny Turtle Designs Kits (6)
- Tutorial (43)
- tuts by Rene (1)
- USA (1)
- VeryMany (6)
- Video Tutorial (1)
- waterfall (1)
- ZlataM Tube (5)


