My Blinkie

Registered with TWInc

About Me
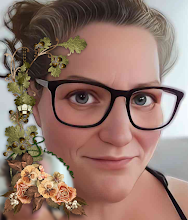
- Simone aka Lorraine
- Hi everyone! I'm a 52 year old scrap and Paint Shop Pro addict. I've been PSPing since 2004. I love creating and I love sharing. Programs I use: Paint Shop Pro 10 Particle Illusion 3.0 Animation Shop 3.0 CS3 PS 7
Showing posts with label Bibi's Collection Kit. Show all posts
Showing posts with label Bibi's Collection Kit. Show all posts
Tuesday, November 26, 2013

♥♥♥
Please click on TAG to see in full size.
••• Supplies needed to complete this tutorial. •••
________________________________________________________________________
Programs: Paint Shop Pro, I'm using version 10. Animation Shop 3.
Plugin : Eye Candy: Gradient Glow for name.
Font used: Gitchgitch
Tube of choice: I'm using "Sexy Gift" by The Hunter from S&Co.
Scrap Kit : I'm using "Xmas Mess" by Bibi's Collection from S&Co.
Animation: SimoneAni-LogFire available at CDO
Mask: 0183
________________________________________________________________________
♥♥♥
Save your tag often. Nothing like working long and hard on a tag and PSP crashes.
♥♥♥
Canvas size should be 698 x 655, transparent background.
Go to Selections, select all.
Open paper 3 and copy and paste INTO selection. De-select.
Open Mask of choice or the one I used, Mask0183, apply and merge group.
Duplicate layer. On top layer change blend mode to multiply and thhen go to Adjust, Noise, random noise of 6.
Merge layers.
Copy paste tube and re-size by 66%, 72 dpi, move to the right side of canvas.
Add drop shadow.
C/P element 30 as a new layer and position below tube layer and to the left side of tag. We will by animating
this layer so don't over crowd it. In layers palette, double click on fireplace and place checkmark next to
highlight. Chose a color and click ok.
C/P element 50 as a new layer and re-size by 56%. Position in front of tube between her legs. Add drop shadow.
Let's make the Christmas Tree. I had to re-size my canvas to get this tree done. Change to width of 888 for
time being.
C/P element 18 as a new layer and place behind your tube on HER right lower side (behind her back).
Duplicate this layer and mirror. Using your mover tool adjust this element to peek out from behind HER left
side ( right side of tag).
C/P element 18 again as a new layer and place slightly above the first branch element on HER right side. You'll
need to tuck it in so it appears like the branch is shorter. Duplicate and mirror. Adjust.
C/P element 18 again, re-size by 75%. Do the third tier of tree, duplicate and mirror.
Now Duplicate this layer and free rotate by 90 degrees to the left. Make this your top branch of tree.
Add drop shadows to each layer.
Add element 17 as a new layer and re-size by 75%, position on lower left branch.
Duplicate and re-size by 46% and position on top right branch.
Merge all your tree layers, including the flowers.
C/P element 34 as a new layer and re-size by 46%. Position beside the tube. Add drop shadow.
C/P element 36 as a new layer and re-size by 80%. Position top of tag. Add drop shadow.
C/P element 53 as a new layer and re-size by 44%. Position bottom of tag in front of tube, near her knee. Add
drop shadow.
C/P element 35 as a new layer and re-size by 40%. Position on lower branch on the right side of tag.
Duplicate and mirror, position on middle branch on left side of tree. Add drop shadow to each layer.
Make sure they are behind your tube layer. You can merge these down to the tree.
Activate top layer.
C/P element 37 as a new layer and re-size by 36%. Position at bottom of tag. Add drop shadow.
C/P element 16 as a new layer and re-size. Position on mantel. Add drop shadow.
Add any other elements to your mantel if you like.
Hide your bottom layers = Mask and fireplace.
Click on any other layer to activate.
Merge all visible.
Unhide mask and fireplace and merge them together.
To animate, go to Selections, select all and copy the bottom layer that has the mask and fireplace.
Paste as New Animation in Animation Shop.
Hold your Ctrl key down and repeatedly hit letter L on your keyboard for a total of 15 frames.
You can watch the count on the lower right hand side of your screen in AS.
Open SimoneAni-LogFire.psd
Go to Edit, select all.
Go to Edit, copy.
Activate your tag.
Go to Edit, select all.
Go to Edit, make sure Propagate Paste is selected.
Go to Edit, Paste, paste into selected frames.
Position on your tag and click into place. I placed mine in the fireplace.
Go back to PSP now and highlight (activate) your tube layer and copy.
Paste as a NEW animation in AS.
Go to Edit, copy.
Activate your tag.
Go to Edit, Paste, paste into selected frames.
Play and save.
Don't forget to add your name.
To save:
Go to File, Save as, enter the name of your file and select the folder to save to.
Now click on Customize:
Under COLORS TAB:
Number of colors: 255 Colors
Create palette by: OPTIMIZED OCTREE
Reduce colors by: Error Diffusion
Under OPTIMIZATIONS TAB:
set a check mark beside the second, third and forth choices. UN-check the 1st and last.
Under PARTIAL TRANSPARENCY:
check Convert pixels less than 92
Yes, blend with this color: change to white #FFFFFF
Click OK. Click Next, next, next, next.
Play your animation.
At times your animation may or will come out terrible. Optimization in Animation Shop is not the greatest.
You can play around will your settings, especially under the Tab: Optimization. I change this setting at times
from anywhere between 70 and 100.
Some people add a white background. To add background, go to Animation: Animation Properties, select
Opaque and change color to white.
Hope you enjoyed this tutorial,
Hugs Simone
Please, always direct people to my blog to download my animations.
Do not load to any other download site and don't claim as your own.
Tutorial written by SophisticatSimone aka Lorraine Halle on Tuesday November 26, 2013.
Sunday, October 27, 2013

♥♥♥
Please click on TAG to see in full size.
••• Supplies needed to complete this tutorial. •••
________________________________________________________________________
Programs: Paint Shop Pro, I'm using version 10. Animation Shop 3.
Plugin : Eye Candy: Gradient Glow for name.
Font used: Brother Tattoo
Tube of choice: I'm using "Rose" by José Cano
Scrap Kit : I'm using "Rosso" by Bibi's Collection from SATC
Animation: SimoneAni-Sparkle Roses
Mask: none
________________________________________________________________________
♥♥♥
Save your tag often. Nothing like working long and hard on a tag and PSP crashes.
♥♥♥
Open a new image 650W x 550H, transparent background, 72 resolution.
Select all.
Open paper 4 and copy. Paste INTO selection on your tag. Deselect.
C/P element 22 as a new layer.
Copy and paste your tube as a new layer .Re-size by 68%. Position to the right side of tag. Add drop shadow.
Copy and paste element 19 and position behind your tube and in center of tag.
Add drop shadow.
Copy and paste 46 and position behind your tube and in front of petals. Add drop shadow.
Copy and paste 29 and re-size by 45%. Position in upper left hand side of tag. Add drop shadow.
Copy and paste element 4 as a new layer and mirror. Position in lower left hand side.
Add drop shadow.
Add artist copyright. Merge all visible.
Copy and paste into Animation Shop as a new animation.
Hold Ctrl key down and hit letter L repeatedly until you have 20 frames.
Open SimoneAni-SparkleRoses. Go to Edit>Select all.
Go to Edit>Copy.
Activate your tag. Go to Edit>Select All.
Go to Edit>Propagate Paste.
Go to Edit>Paste>Paste into Selected Frames.
Click into place.
Add your name and save.
To add a border, go back into PSP.
Select all, go to selection, modify, contract by 10.
Go to selection, invert. Add a new raster layer.
Using your flood fill tool, add a color from your tube.
Go to selection>invert.
Add a new raster layer. Add drop shadow. Deselect.
Ok now hide the tag layer. You should only have the frame and the drop shadow.
Activate your frame layer and go to Adjust and add noise. Gaussian, 60%.
Go to Edit, copy merged.
In AS, right click and paste as a new animation.
Back in PSP, undo noise.
Add noise of 66%. Copy merged.
In AS, right click on frame layer and paste after selected frame.
Back in PSP, undo noise.
Add noise of 72%. Copy merged.
In AS, right click on the last frame and paste after selected frame.
Go to Edit and select all.
Go to Edit and copy.
Activate your tag.
Go to Edit and select all.
Go to Edit and paste>paste into selected frames.
You may have to slightly adjust the position with your cursor. Before you click border
frame into place, make sure all four corners are covered, lined up perfectly.
Click play.
Add your name and save.
To save:
Go to File, Save as, enter the name of your file and select the folder to save to.
Now click on Customize:
Under COLORS TAB:
Number of colors: 255 Colors
Create palette by: OPTIMIZED OCTREE
Reduce colors by: Error Diffusion
Under OPTIMIZATIONS TAB:
set a check mark beside the second, third and forth choices. UN-check the 1st and last.
Under PARTIAL TRANSPARENCY:
check Convert pixels less than 92
Yes, blend with this color: change to white #FFFFFF
Click OK. Click Next, next, next, next.
Play your animation.
At times your animation may or will come out terrible. Optimization in Animation Shop is not the greatest.
You can play around will your settings, especially under the Tab: Optimization. I change this setting at times from anywhere between 70 and 100.
Some people add a white background. To add background, go to Animation: Animation Properties, select Opaque and change color to white.
Hope you enjoyed this tutorial,
Hugs Simone
Please, always direct people to my blog to download my animations.
Do not load to any other download site and don't claim as your own.
Tutorial written by SophisticatSimone aka Lorraine Halle on Sunday October 27, 2013.
Sunday, October 20, 2013

♥♥♥
Please click on TAG to see in full size.
••• Supplies needed to complete this tutorial. •••
________________________________________________________________________
Programs: Paint Shop Pro, I'm using version 10. Animation Shop 3.
Plugin : Eye Candy: Gradient Glow for name.
Font used: A&S Black Swan
Tube of choice: I'm using "Rush" by Christine Marie Kotlark from SATC.
Scrap Kit : I'm using "Roller Princess" by Bibi's Collection from SATC
My supplies HERE.
You will find the Mask 0179, the flames, the animations (SimoneAni-Rush).
________________________________________________________________________
♥♥♥
Save your tag often. Nothing like working long and hard on a tag and PSP crashes.
♥♥♥
Open a new image 700 x 700.
Select ALL.
Copy and paste INTO selection paper of choice. I used paper 3.
Select none.
Go to Adjust/ Brightness & Contrast/ Histogram Adjustment
Enter the following:
Low: 38
Gamma: 0.80
High: 239
Open Mask0179 and apply. Merge group.
Copy and paste the tube "Rush" and re-size by 82%.
If you are animating you must re-size by 82% otherwise, things won't match up.
I created the animation specifically for her hoop at this size.
Copy and paste element 29 as a new layer and re-size by 92%.
Duplicate and merge down. Add drop shadow.
Make sure this element is at bottom of tag behind your tube.
Making it appear like she's standing on the keys.
Copy and paste my frames element from supplies and position at bottom of tag behind your tube and the keyboard layers.
C/P element 42 as a new layer and move to lower left hand side of tag on the keyboard.
Add drop shadow.
C/P element 129 as a new layer. Re-size by 34% and position behind tube layer in the right upper hand corner.
Add drop shadow.
C/P element 78 as a new layer. Position behind flame layer and in the right lower hand corner of tag.
Add drop shadow.
C/P element 121 as a new layer and mirror. Re-size by 70% and position to right side of skull cone at the bottom.
Add drop shadow.
C/P element 30 as a new layer and position him on the barrel. Add drop shadow.
C/P element 112 as a new layer and re-size by 65% and position in the upper left hand side of tag.
Add drop shadow.
C/P element 66 and positon mid tag, beside the radio and below it in the layers palette.
Add drop shadow.
C/P element 26 and re-size by 75%. Position beside the pop bottle. Make it's below the drink layer in layers palette.
Add drop shadow.
C/P element 44 and move to right lower hand side of tag. Add drop shadow.
C/P element 101 and move in front of cupcake. Add drop shadow.
C/P element 27 and free rotate this layer to the left by 90 degrees. Re-size by 70% and add drop shadow.
Position over the mask layer in your layers palette and over on the right side of tag.
C/P element 45 and re-size by 28%. Move to the right side of tag and behind the cupcack layer. Add drop shadow.
C/P element 34 and position behind your tube. Using your selection tool, set to lasso, feather of zero, remove some of the pink heart. Add drop shadow.
I tripled my disco ball. Position one at top center and one to the left side of tag.
Add artist copyright.
Add your name or wait till after you've added the animations.
Merge visible.
For Animation: I'm using
I - SimoneAni-Rushbling, (will be on the hoop)
II - SimoneAni-RushSingeNote2 (single note add-on)
III- SimoneAni-RushMusicNotes (group of notes, coming from radio)
OK in PSP, select all, copy merged.
In Animation Shop, right click on your workspace and paste as a New Animation.
Holding the Ctrl key down, tap the L key repeatedly until you have 22 frames.
Open SimoneAni-Rushbling. Go to Edit, select All.
Go to Edit and Copy.
Back on your tag, activate by clicking it.
Go to Edit, Select all.
Go to Edit, make sure "Propagate Paste" is selected.
Go to Edit, Paste>Paste into selected frames.
Using your cursor, position on the right side of hoop, on the light green area.
See my screenshot.

Click play. If it looks good, move to the next step.
If not, go to Edit > Undo paste and try again.
Open SimoneAni-RushMusicNotes.
Repeat steps. Positon the note on the radio.
See screenshot.

Open SimoneAni-RushSingeNote2. Select all and copy.
Paste on your tag just above the radio handle.
If happy with your tag, save.
Don't forget to add your name
To save:
Go to File, Save as, enter the name of your file and select the folder to save to.
Now click on Customize:
Under COLORS TAB:
Number of colors: 255 Colors
Create palette by: OPTIMIZED OCTREE
Reduce colors by: Error Diffusion
Under OPTIMIZATIONS TAB:
set a check mark beside the second, third and forth choices. UN-check the 1st and last.
Under PARTIAL TRANSPARENCY:
check Convert pixels less than 92
Yes, blend with this color: change to white #FFFFFF
Click OK. Click Next, next, next, next.
Play your animation.
At times your animation may or will come out terrible. Optimization in Animation Shop is not the greatest.
You can play around will your settings, especially under the Tab: Optimization. I change this setting at times from anywhere between 70 and 100.
Some people add a white background. To add background, go to Animation: Animation Properties, select Opaque and change color to white.
Hope you enjoyed this tutorial,
Hugs Simone
Please, always direct people to my blog to download my animations.
Do not load to any other download site and don't claim as your own.
Tutorial written by SophisticatSimone aka Lorraine Halle on Sunday October 20, 2013.
Friday, October 11, 2013

S E X Y W I T C H
♥♥♥
Please click on TAG to see in full size.
••• Supplies needed to complete this tutorial. •••
________________________________________________________________________
Programs: Paint Shop Pro, I'm using version 10. Animation Shop 3.
Plugin : None
Font used: Feathergraphy Decoration
Tube of choice: I'm using "Sexy Witch" by José Cano
Scrap Kit : I'm using "Demona" by Bibi's Collection from SATC
Animation: SimoneAni-SexyWitch
Mask: none
________________________________________________________________________
♥♥♥
Save your tag often. Nothing like working long and hard on a tag and PSP crashes.
♥♥♥
Open a new image 600 x 250.
Copy and paste paper of choice as background.
Crop merged opaque.
Copy and paste element 45 as a new layer and position in the center, change blend mode to soft light and your opacity to 59.
Copy and paste close up of your tube and position to the right side of tag.
Copy and paste element 21 as a new layer, move slightly to the left. Add drop shadow. Cover the skeletal man a bit, but make sure you see his head in the background.
Copy and paste element 23 as a new layer behind the tree line and in front of skeletal man. Using your mover tool, adjust so make sure it's not covering too much of the skeletal man.
Copy and paste element 57 as a new layer and re-size by 45% and position behind the close up layer and a little to the right of center line. Add drop shadow.
Copy and paste element 1 as a new layer and re-size by 45%. Move to the left side of tag.
Crop your tag.
Now select all and contract selection by 3. Add a new layer. Make sure it's your top layer.
Add a color from your tube. De-select and add drop shadow.
X-out this layer.
Highlight any of the other layers.
Go to Edit, copy merged.
In Animation Shop, right click and paste as a new animation.
Hold your Ctrl key and hit the L key 20 times. You should have a total of 21 frames.
Open SimoneAni-SexyWitch.
Go to Edit, select all.
Go to Edit, copy.
Activate your tag.
Go to Edit, select all.
Go to Edit and activate Propagate Paste.
Go to Edit and Paste, paste into selected frames.
I pasted it 3 different times, 1 in the center, 1 lower on tag near her hat and 1 time to the left of tag, on the phatom tombstone.
In PSP, select your layer with the banner. Copy.
In AS, right click anywhere on workspace and paste as new animation.
Go to Edit and Copy.
Activate your tag again and go to Edit, Paste into selected frames. It should line up perfectly. Click into place.
You can now add your copyright info and your license number.
Add your name.
Repeat for the avatar.
To save:
Go to File, Save as, enter the name of your file and select the folder to save to.
Now click on Customize:
Under COLORS TAB:
Number of colors: 255 Colors
Create palette by: OPTIMIZED OCTREE
Reduce colors by: Error Diffusion
Under OPTIMIZATIONS TAB:
set a check mark beside the second, third and forth choices. UN-check the 1st and last.
Under PARTIAL TRANSPARENCY:
check Convert pixels less than 92
Yes, blend with this color: change to white #FFFFFF
Click OK. Click Next, next, next, next.
Play your animation.
At times your animation may or will come out terrible. Optimization in Animation Shop is not the greatest.
You can play around will your settings, especially under the Tab: Optimization. I change this setting at times from anywhere between 70 and 100.
Some people add a white background. To add background, go to Animation: Animation Properties, select Opaque and change color to white.
Hope you enjoyed this tutorial,
Hugs Simone
Please, always direct people to my blog to download my animations.
Do not load to any other download site and don't claim as your own.
Tutorial written by SophisticatSimone aka Lorraine Halle on Friday October 11, 2013
♥♥♥
Please click on TAG to see in full size.
••• Supplies needed to complete this tutorial. •••
________________________________________________________________________
Programs: Paint Shop Pro, I'm using version 10. Animation Shop 3.
Plugin : None
Font used: Feathergraphy Decoration
Tube of choice: I'm using "Sexy Witch" by José Cano
Scrap Kit : I'm using "Demona" by Bibi's Collection from SATC
Animation: SimoneAni-SexyWitch
Mask: none
________________________________________________________________________
♥♥♥
Save your tag often. Nothing like working long and hard on a tag and PSP crashes.
♥♥♥
Open a new image 600 x 250.
Copy and paste paper of choice as background.
Crop merged opaque.
Copy and paste element 45 as a new layer and position in the center, change blend mode to soft light and your opacity to 59.
Copy and paste close up of your tube and position to the right side of tag.
Copy and paste element 21 as a new layer, move slightly to the left. Add drop shadow. Cover the skeletal man a bit, but make sure you see his head in the background.
Copy and paste element 23 as a new layer behind the tree line and in front of skeletal man. Using your mover tool, adjust so make sure it's not covering too much of the skeletal man.
Copy and paste element 57 as a new layer and re-size by 45% and position behind the close up layer and a little to the right of center line. Add drop shadow.
Copy and paste element 1 as a new layer and re-size by 45%. Move to the left side of tag.
Crop your tag.
Now select all and contract selection by 3. Add a new layer. Make sure it's your top layer.
Add a color from your tube. De-select and add drop shadow.
X-out this layer.
Highlight any of the other layers.
Go to Edit, copy merged.
In Animation Shop, right click and paste as a new animation.
Hold your Ctrl key and hit the L key 20 times. You should have a total of 21 frames.
Open SimoneAni-SexyWitch.
Go to Edit, select all.
Go to Edit, copy.
Activate your tag.
Go to Edit, select all.
Go to Edit and activate Propagate Paste.
Go to Edit and Paste, paste into selected frames.
I pasted it 3 different times, 1 in the center, 1 lower on tag near her hat and 1 time to the left of tag, on the phatom tombstone.
In PSP, select your layer with the banner. Copy.
In AS, right click anywhere on workspace and paste as new animation.
Go to Edit and Copy.
Activate your tag again and go to Edit, Paste into selected frames. It should line up perfectly. Click into place.
You can now add your copyright info and your license number.
Add your name.
Repeat for the avatar.
To save:
Go to File, Save as, enter the name of your file and select the folder to save to.
Now click on Customize:
Under COLORS TAB:
Number of colors: 255 Colors
Create palette by: OPTIMIZED OCTREE
Reduce colors by: Error Diffusion
Under OPTIMIZATIONS TAB:
set a check mark beside the second, third and forth choices. UN-check the 1st and last.
Under PARTIAL TRANSPARENCY:
check Convert pixels less than 92
Yes, blend with this color: change to white #FFFFFF
Click OK. Click Next, next, next, next.
Play your animation.
At times your animation may or will come out terrible. Optimization in Animation Shop is not the greatest.
You can play around will your settings, especially under the Tab: Optimization. I change this setting at times from anywhere between 70 and 100.
Some people add a white background. To add background, go to Animation: Animation Properties, select Opaque and change color to white.
Hope you enjoyed this tutorial,
Hugs Simone
Please, always direct people to my blog to download my animations.
Do not load to any other download site and don't claim as your own.
Tutorial written by SophisticatSimone aka Lorraine Halle on Friday October 11, 2013
Monday, September 2, 2013

♥♥♥
Please click on TAG to see in full size.
••• Supplies needed to complete this tutorial. •••
________________________________________________________________________
Programs: Paint Shop Pro, I'm using version 10. Animation Shop 3.
Plugin : none
Font used: Sweetly Broken
Tube of choice: I'm using "Lucky 13" by José Cano.
Scrap Kit : I'm using "Lucky 13" by Bibi's Collection from S&Co
Animation: SimoneAni-Lucky13
Mask: 0164 HERE
________________________________________________________________________
♥♥♥
Save your tag often. Nothing like working long and hard on a tag and PSP crashes.
♥♥♥
Open a new image 700 x 700, resolution 72 dpi, transparent background.
Copy and paste your tube as a new layer and re-size by 75%.
C/P element 82 as a new layer and re-size by 58%. Move this element behind the tube. Sharpen. Duplicate and merge together.
C/P element 81 (car) as a new layer and re-size by 40%. Mirror and position lower left hand side behind your tube layer.
C/P element 80 (leaf) as a new layer and position behind car layer in the left upper hand side of tag.
C/P element 15 (branch) as a new layer and re-size by 40%. Position behind red curtain layer in the left upper hand side of tag. Duplicate, free rotate to the right by 90 degrees. Flip and position mid center and on right side of tag.
C/P element 1 (cat) as a new layer and re-size by 75%. Position as top layer in the lower right hand side of tag.
Highlight Raster 1 layer in layers palette. It should be blank. If not, add a new raster layer and send to bottom.
Go to Selections, select all.
Copy element 30 (clocks). Paste INTO selection. Select none.
Re-size by 92%. Duplicate and merge together. Add drop shadow {V and H =5, Opacity=37, Blur=3, Color=black}and move this layer up to above the car layer.
C/P element 49 (cards) as a new layer and position on right side. Should be below the clocks.
C/P element 43 (checkered tile) as a new layer and position in lower right hand side of tag.
This should be your bottom layer.
Activate your top layer in layers palette.
C/P element 56 (skull) as a new layer and re-size by 45%. Mirror. Position bottom center of tag. Covering a portion of your tubes legs.
C/P element 89 (flowers) as a new layer and re-size by 30%. Position beside the skull (make sure skill is still above this layer). Duplicate flowers layer and move it to the other side of the skull. Move cat a bit if you need to. Line them up perfectly at the bottom.
C/P element 27 (card) as a new layer and mirror. Position to the right side of tag. Make sure this layer is behind the flower layer.
C/P element 31 (button) as a new layer and position behind the flowers on the lower right hand side of tag.
Add a new Raster layer and send to bottom.
Selection, select all.
Copy paper 9 and paste INTO selection. Select none.
Apply Mask of choice or mine Masks0164. Merge group. Duplicate. On top layer change blend mode to Multiply.
Add artist copyright.
Mask sure all your elements and your tube have a drop shadow.
Starting with your top layer, merge down one by one until you reach the tube. Include the tube in this merged layer.
X-out this layer now, highlight a bottom layer and merge visible all layers.
Ok now make sure your bottom layer is highlighted in layers palette.
Go to Selections, select all.
Go to Edit and copy. Paste as a new animation in Animation Shop.
Hold your Ctrl key down and repeatedly hit letter L on your keyboard for a total of 20 frames.
You can watch the count on the lower right hand side of your screen in AS.
Open SimoneAni-Lucky13
Go to Edit, select all.
Go to Edit, copy.
Activate your tag.
Go to Edit, select all.
Go to Edit, make sure Propagate Paste is selected.
Go to Edit, Paste, paste into selected frames.
Position on your tag and click into place. I placed mine in the center of the tag.
Go back to PSP now and highlight (activate) your tube layer and copy.
Paste as a NEW animation in AS.
Go to Edit, copy.
Activate your tag.
Go to Edit, Paste, paste into selected frames.
Try to position it as centered as possible. Click into place.
Play and save.
Don't forget to add your name.
To save:
Go to File, Save as, enter the name of your file and select the folder to save to.
Now click on Customize:
Under COLORS TAB:
Number of colors: 255 Colors
Create palette by: OPTIMIZED OCTREE
Reduce colors by: Error Diffusion
Under OPTIMIZATIONS TAB:
set a check mark beside the second, third and forth choices. UN-check the 1st and last.
Under PARTIAL TRANSPARENCY:
check Convert pixels less than 92
Yes, blend with this color: change to white #FFFFFF
Click OK. Click Next, next, next, next.
Play your animation.
At times your animation may or will come out terrible. Optimization in Animation Shop is not the greatest.
You can play around will your settings, especially under the Tab: Optimization. I change this setting at times from anywhere between 70 and 100.
Some people add a white background. To add background, go to Animation: Animation Properties, select Opaque and change color to white.
Hope you enjoyed this tutorial,
Hugs Simone
Please, always direct people to my blog to download my animations.
Do not load to any other download site and don't claim as your own.
Tutorial written by SophisticatSimone aka Lorraine Halle on Monday September 2, 2013
Tuesday, August 13, 2013

♥♥♥
Please click on TAG to see in full size.
••• Supplies needed to complete this tutorial. •••
________________________________________________________________________
Programs: Paint Shop Pro, I'm using version 10. Animation Shop 3.
Plugin : Gradient Glow (Eye Candy) for the name
Font used: Echinos Park Script
Tube of choice: I'm using "Naughty Girl" by SkyScraps found at SATC
Scrap Kit : I'm using "Naughty Girls" by Bibi's Collection from SATC
Animation: none
Mask: 0102 HERE
________________________________________________________________________
♥♥♥
Save your tag often. Nothing like working long and hard on a tag and PSP crashes.
♥♥♥
Open a new image 700 x 700.
C/P element 53 as a new layer and move to the left. Duplicate and free rotate to the right by 45 degrees.
Move this frame over to the right, making sure they overlap each other.
C/P element 44 as a new layer and place this layer in between the two window frames at center of tag.
C/P your tube as a new layer and re-size by 64%. Position in middle of tag but a bit more to the right of tag.
C/P element 59 as a new layer and move this layer to bottom. Duplicate and merge together.
C/P element 58 as a new layer and move to the top and just behind your tube layer. Duplicate and merge together.
C/P element 26 as a new layer and move to the right side of tag. Re-size by 50%.
C/P element 30 as a new layer and move to the left upper hand side of tag. Re-size by 50%. Make sure
this layer is behind the window frame layer.
Duplicate and mirror and flip. It should now be in the lower right hand side of tag. Adjust.
C/P element 9 as a new layer and send to top. Re-size by 25%. Position near your tube and violin.
Let's re-size a few more and free rotate them and arrange near and around the violin.
Duplicate and free rotate by 45 degrees.
Copy and paste again the original and re-size by 20%. Position at top of violin.
Copy and paste again the original and re-size by 11%. Position on upper left hand side of tag.
Duplicate that layer and mirror. Position in upper left hand side of tag again, along the same black branch.
Activate your top layer.
C/P element 18 as a new layer and position next to your tube on the left side of tag.
C/P element 31 as a new layer and position as second to last layer, so just above the mask like layer.
Position in upper right hand side of tag. Duplicate and merge together.
Duplicate and mirror and flip. Adjust in the lower left hand side of tag.
C/P element 43 as a new layer and leave in center of tag, behind your tube layer.
C/P element 74 as a new layer. This feather should be behind the window frame layer on the right hand side of tag.
Duplicate.
On bottom original feather layer, go to Adjust> Blur > Gaussian Blur> 5
Go to Adjust> Brightness and Contrast> Brightness/Contrast enter:
Brightness 152
Contrast 22
On the top feather layer, change the blend mode to Overlay.
Now do the same by adding one at the bottom of the tag.
This feather should be the very next layer above your tube.
Make sure you add a drop shadow to all your layers, except the feathers.
Activate your top layer and add artist copyright and license number.
Merge all visible.
I used Mask 0102 on Paper 4 and added as my bottom layer.
Crop your tag and save.
Add your name using font of choice. I used Echinos Park Script PERSONAL US.
Hope you enjoyed this tutorial,
Hugs Simone
Please, always direct people to my blog to download my animations.
Do not load to any other download site and don't claim as your own.
Tutorial written by SophisticatSimone aka Lorraine Halle on Tuesday August 13, 2013
Sunday, August 11, 2013
♥♥♥
Please click on TAG to see in full size.
••• Supplies needed to complete this tutorial. •••
________________________________________________________________________
Programs: Paint Shop Pro, I'm using version 10. Animation Shop 3.
Plugin : Eye Candy: Gradient Glow for name.
Font used: CarolEtched
Tube of choice: I'm using "Sorceress" by The Hunter from SATC.
Scrap Kit : I'm using "Sorceress" by Bibi's Collection from SATC
Animation: SimoneAni-Sorceress
Mask: none
________________________________________________________________________
♥♥♥
Save your tag often. Nothing like working long and hard on a tag and PSP crashes.
♥♥♥
Open a new image 704 x 704, transparent.
Copy and paste your tube as a new layer. Using your selection tool, feature set to 28, surround the legs and delete.
Duplicate your tube. On the bottom tube layer, add gaussian blur of 3.
Merge together.
Copy and paste element 82 as a new layer and re-size by 35%. Make sure you change the dpi to 72.
Position on the right side of tag and behind the tube.
Copy and paste element 81 as a new layer and re-size by 55%. Position behind your tube on the left upper side of tag.
Copy and paste element 89 as a new layer and re-size by 55%. Position in front of your tube on the lower left-center hand side of tag.
Copy and paste element 121 as a new layer and re-size by 70%. Drag down as last layer and position more to the left upper hand side of tag.
Copy and paste element 50 as a new layer and re-size by 50%. Make sure you change the dpi to 72.
Position on the right side of tag in front of tube.
Copy and paste element 57 as a new layer and re-size by 50%. Position on your tube on the left upper hand side of tag.
Copy and paste element 131 as a new layer and re-size by 50%. Position in front of your tube in the lower left hand side of tag.
Copy and paste element 72 as a new layer and re-size by 50%. Mirror and position behind kitty cat on the left side.
Duplicate layer and re-size by 50%. Position over current leaves to fill it in a bit.
Duplicate and mirror. Position upper right hand side of tag behind the bookcase.
Copy and paste element 18 as a new layer and re-size by 50%. Position in front in the lower right hand side of tag.
Copy and paste element 58 as a new layer and position in front of bookcase.
Copy and paste element 92 as a new layer and re-size by 50%. This fancy book should be between your tube and the cat.
It should also be one the layer above the tree layer in your layers palette.
Add element 86 as a new layer and re-size by 30%. Position in front of book at center.
Add element 67 as a new layer and re-size by 30%. Position in front in between book and wine glass.
Add drop shadow to all your layers.
Now for your castle, I added two more turrets. So you should have one at top left, one top right and one right beside the one on the right and make it a little higher then the others.
Activate your crop tool. Click on "Snap crop rectangle to: Merged Opaque" . You can either click on the little green arrow to apply or double click on
your tag.
Add artist copyright as your top layer.
To animate:
Go to Selections, select all.
Go to Edit and copy merged. Paste as a new animation in Animation Shop.
Hold your Ctrl key down and repeatedly hit letter L on your keyboard for a total of 15 frames.
You can watch the count on the lower right hand side of your screen in AS.
Open SimoneAni-Sorceress-06
Go to Edit, select all.
Go to Edit, copy.
Activate your tag.
Go to Edit, select all.
Go to Edit, make sure Propagate Paste is selected.
Go to Edit, Paste, paste into selected frames.
Position on your tag and click into place. I placed mine on the right side in her hand.
Delete the first 3 frames. You should now have 12 frames.
Play and save.
Don't forget to add your name.
To save:
Go to File, Save as, enter the name of your file and select the folder to save to.
Now click on Customize:
Under COLORS TAB:
Number of colors: 255 Colors
Create palette by: OPTIMIZED OCTREE
Reduce colors by: Error Diffusion
Under OPTIMIZATIONS TAB:
set a check mark beside the second, third and forth choices. UN-check the 1st and last.
Under PARTIAL TRANSPARENCY:
check Convert pixels less than 92
Yes, blend with this color: change to white #FFFFFF
Click OK. Click Next, next, next, next.
Play your animation.
At times your animation may or will come out terrible. Optimization in Animation Shop is not the greatest.
You can play around will your settings, especially under the Tab: Optimization. I change this setting at times from anywhere between 70 and 100.
Some people add a white background. To add background, go to Animation: Animation Properties, select Opaque and change color to white.
Hope you enjoyed this tutorial,
Hugs Simone
Please, always direct people to my blog to download my animations.
Do not load to any other download site and don't claim as your own.
Tutorial written by SophisticatSimone aka Lorraine Halle on Sunday August 11, 2013.
Tuesday, August 6, 2013
Sweet Fairy
Please click on TAG to see in full size.
••• Supplies needed to complete this tutorial. •••
________________________________________________________________________
Programs: Paint Shop Pro, I'm using version 10. Animation Shop 3.
Plugin : Eye Candy: Gradient Glow for name.
Font used: Easter Parade
Tube of choice: I'm using "Sweet Fairy" by The Hunter from SATC.
Scrap Kit : I'm using "Sweet Fairy" by Bibi's Collection from SATC
Animation: SimoneAni492-496, SimoneAni467-471 and SimoneAni513-517
Mask: 25
________________________________________________________________________
***
Save your tag often. Nothing like working long and hard on a tag and PSP crashes.
***
Let's Start!
Open a new image 700 x 655, transparent.
Copy and paste element 5 as a new layer and add drop shadow.
Copy and paste your tube as a new layer and re-size by 70%. Add drop shadow.
Copy and paste element 15 as a new layer and re-size by 70%. Position bottom left side of tag beside your tube. Add drop shadow.
Copy and paste element 2 as a new layer and re-size by 60%. Position bottom right side of tag beside your tube. Add drop shadow.
Copy and paste element 14 as a new layer and re-size by 75%. Position at top of tag and behind your tube. Add drop shadow.
Copy and paste element 33 as a new layer and re-size by 50%. Position right side of tag behind your tube. Add drop shadow.
Copy and paste element 38 as a new layer and re-size by 33%. Position bottom left side of tag behind the bird and your tube layer. Add drop shadow.
Copy and paste element 65 as a new layer and position in left upper hand side of tag. Layer should be behind your tube layer. Add drop shadow.
Copy and paste element 64 as a new layer and position on right side of tag. Re-size by 70%. Layer should be behind your tube layer and tree layer.
Add drop shadow.
Copy and paste element 75 as a new layer and re-size by 28%. Position in front of tube, down center, beside the fawn.
Duplicate, mirror, move to right side and position behind fawn layer at edge of tag.
Copy and paste element 61 as a new layer and re-size by 58%. Move to right side of tube behind fawn.
Duplicate, move to left side, make sure it's behind the boot-house and the grapes.
Add drop shadow to each.
Copy and paste paper 11 as a new layer and send to bottom.
Crop your tag.
Add mask and merge group. I used Mask25. I duplicated by layer and merged them together. I sharpened twice and duplicated again.
I added noise of 17%, gaussian checked. Merge all visible.
Add artist copyright and your license number.
Merge visible.
To animate:
Go to Selections, select all.
Go to Edit and copy merged. Paste as a new animation in Animation Shop.
Hold your Ctrl key down and repeatedly hit letter L on your keyboard for a total of 16 frames.
You can watch the count on the lower right hand side of your screen in AS.
Open SimoneAni496-MNG
Go to Edit, select all.
Go to Edit, copy.
Activate your tag.
Go to Edit, select all.
Go to Edit, make sure Propagate Paste is selected.
Go to Edit, Paste, paste into selected frames.
Position on your tag and click into place. I placed mine as the middle flower on my tag.
Ok now go back to SimoneAni496-MNG. Click to activate. Go to Animation> Mirror.
Go to Edit>Copy.
Now activate your tag again and then go to Edit, paste, paste into selected frames.
Now position (with your cursor/mouse) to the left of previous flower and closer to your tube.
Ok now go back to SimoneAni496-MNG. Click to activate. Go to Animation>Re-size and enter: 75%, smart size checked.
Go to Edit>Copy.
Now activate your tag again and then go to Edit, paste, paste into selected frames.
Now position (with your cursor/mouse) to far right of tag and slightly higher up on the branch.
See my tag for reference.
I also ended up using animation 471 which you'll find on my blog as well as animation 515
Play and save.
Don't forget to add your name.
To save:
Go to File, Save as, enter the name of your file and select the folder to save to.
Now click on Customize:
Under COLORS TAB:
Number of colors: 255 Colors
Create palette by: OPTIMIZED OCTREE
Reduce colors by: Error Diffusion
Under OPTIMIZATIONS TAB:
set a check mark beside the second, third and forth choices. UN-check the 1st and last.
Under PARTIAL TRANSPARENCY:
check Convert pixels less than 92
Yes, blend with this color: change to white #FFFFFF
Click OK. Click Next, next, next, next.
Play your animation.
At times your animation may or will come out terrible. Optimization in Animation Shop is not the greatest.
You can play around will your settings, especially under the Tab: Optimization. I change this setting at times from anywhere between 70 and 100.
Some people add a white background. To add background, go to Animation: Animation Properties, select Opaque and change color to white.
Hope you enjoyed this tutorial,
Hugs Simone
Please, always direct people to my blog to download my animations.
Do not load to any other download site and don't claim as your own.
Tutorial written by SophisticatSimone aka Lorraine Halle on Tuesday August 6, 2013
Friday, July 12, 2013

♥♥♥
Please click on TAG to see in full size.
••• Supplies needed to complete this tutorial. •••
________________________________________________________________________
Programs: Paint Shop Pro, I'm using version 10. Animation Shop 3.
Plugin : Eye Candy 4: Gradient Glow for name
Font used: Scotosaurus
Tube of choice: I'm using "CAZADORA" by The Hunter from SATC.
Scrap Kit : I'm using " Super Hero Girls " by Bibi's Collection from SATC.
Animation: SimoneAni-Hero Babe
Mask: 0125 HERE
________________________________________________________________________
♥♥♥
Save your tag often. Nothing like working long and hard on a tag and PSP crashes.
♥♥♥
Open element 141 and duplicate. Close original.
Re-size by 75%, 72 dpi, make sure all layers is checked.
Now go to Image, Canvas size and enter 685 x 685.
Copy and paste element 120 as a new layer. Position in upper middle area of tag.
Copy and paste element 112 as a new layer. Position lower left hand side and re-size by 75%. Sharpen.
Copy and paste element 121 as a new layer. Position on TV.
Copy and paste element 44 as a new layer. Position in front of your tube at bottom.
Copy and paste your tube as a new layer. I used the close-up and re-sized by 74%.
Move a bit to the right side of tag. Above TV layer.
Looks like it's coming out of TV and streaks in front of her to her opposite hand.
Copy and paste element 104 as a new layer and re-size by 85%. Sharpen. Move up and to the left.
Copy and paste element 139 as a new layer and move to the upper left hand side.
OK for the background of the tag.
Open paper 14 and duplicate. Close original.
On duplicate, using your crop tool, surround only the skyline, try to exclude as much of the white top portion as possible.
Double click to apply. Go to Edit and Copy.
On your tag, make sure you have a blank raster layer at the very bottom.
If not, add a new Raster layer.
Go to Selections, select all.
Go to Edit, paste into selection.
Go to Image, crop to selection.
Open your Mask, I'm using Mask 0125, apply and merge group.
Duplicate layer and merge down.
Let's add more elements.
Copy and paste element 130 as a new layer, re-size by 40% and move to the lower right hand side. Should be your top layer. Duplicate and move slightly to the left.
Copy and paste element 117 as a new layer and move to the front low and in front of your tube. Re-size by 35%.
Copy and paste element 119 as a new layer and move to the front lower left hand side. Re-size by 41%.
Add drop shadow to all layers, but not the mask layer or the spider web, unless you find a nice one.
Ok Merge all layers down one by one starting with top layer and all the way down to tube. Include the tube and make sure TV is also included.
X-out this merged layer.
Activate the mask layer and merge visible. OK un-hide layer.
Add artist copyright, and merge down to your top layer.
To animate, go to Selections, select ALL.
Activate the bottom layer and copy.
Paste as a new Animation in Animation Shop.
Hold your Ctrl key down and repeatedly hit letter L on your keyboard for a total of 15 frames.
You can watch the count on the lower right hand side of your screen in AS.
Open SimoneAni-HeroBabe-01
Go to Edit, select all.
Go to Edit, copy.
Activate your tag.
Go to Edit, select all.
Go to Edit, make sure Propagate Paste is selected.
Go to Edit, Paste, paste into selected frames.
Position on your tag and click into place. I positioned it in the center.
Go back in PSP and activate the top layer. Copy and paste in AS as a new animation.
Go Edit and Copy.
Activate your tag.
Go to Edit, Paste, paste into selected frames.
Position as best as you can, the way it looked on your tag in PSP. Click into place.
Play and save.
To save:
Go to File, Save as, enter the name of your file and select the folder to save to.
Now click on Customize:
Under COLORS TAB:
Number of colors: 255 Colors
Create palette by: OPTIMIZED OCTREE
Reduce colors by: Error Diffusion
Under OPTIMIZATIONS TAB:
set a check mark beside the second, third and forth choices. UN-check the 1st and last.
Under PARTIAL TRANSPARENCY:
check Convert pixels less than 92
Yes, blend with this color: change to white #FFFFFF
Click OK. Click Next, next, next, next.
Play your animation.
At times your animation may or will come out terrible. Optimization in Animation Shop is not the greatest.
You can play around will your settings, especially under the Tab: Optimization. I change this setting at times from anywhere between 70 and 100.
Some people add a white background. To add background, go to Animation: Animation Properties, select Opaque and change color to white.
Hope you enjoyed this tutorial,
Hugs Simone
Please, always direct people to my blog to download my animations.
Do not load to any other download site and don't claim as your own.
Tutorial written by SophisticatSimone aka Lorraine Halle on Saturday July 13, 2013
Friday, July 5, 2013

♥♥♥
Please click on TAG to see in full size.
••• Supplies needed to complete this tutorial. •••
________________________________________________________________________
Programs: Paint Shop Pro, I'm using version 10. Animation Shop 3.
Plugin : Eye Candy: Gradient Glow for name.
Font used: BadaBoom
Tube of choice: I'm using "Bikini3" by Jose A Cano.
Scrap Kit : I'm using "Super Hero Girls" by Bibi's Collection.
Animation: SimoneAni-Kaplow!
Mask: by me 0145
________________________________________________________________________
♥♥♥
Save your tag often. Nothing like working long and hard on a tag and PSP crashes.
♥♥♥
Open a new image 700 x 700, transparent background.
Go to Selections, select all.
Open Paper 12 and copy.
On your new image, right click on top border and select Paste INTO selection.
De-select.
Close original paper to save for later.
Open your mask of choice and apply or use the one I made Mask0145.
Merge group.
Save this file now in case of crash or loss of power. This happened to me earlier today and I've had to redo the whole tag. Sad story.
Copy and paste element 65 as a new layer and re-size by 40%. Duplicate layer and mirror. Merge them together.
Save your tag.
Copy and paste element 82 as a new layer and re-size by 48%. Add drop shadow.
Copy and paste element 11 as a new layer. Add drop shadow.
Save your tag.
C/P element 67 as a new layer. Drag this layer to the top. Add drop shadow.
C/P element 5 as a new layer and re-size by 80%. This should be your top layer now.
Save your tag.
C/P element 71 as a new layer and re-size by 25%. Move this "Boom" to the upper left hand side of tag. Add drop shadow.
At this time, copy and paste your tube of choice as a new layer. I re-sized mine by 75%. Add drop shadow.
C/P element 70 as a new layer and re-size by 40%. Place in the lower right hand side of tag. Add drop shadow.
Save your tag.
C/P element 77 as a new layer and re-size by 15%. Position over scuffle cloud on the lower right hand side of tag.
Add drop shadow.
C/P element 83 as a new layer and re-size by 23%. Position over the "Boom" word near bottom edge. Add drop shadow.
C/P element 38 as a new layer and move to right upper hand side of tag.
C/P element 133 as a new layer and re-size by 75%. Drag this layer down in the palette until it's just above the big WOW word/element. Position to the left of your character/tube. Add drop shadow.
C/P element 132 as a new layer, mirror and re-size by 70%. Position behind your tube. Add drop shadow.
C/P element 109 as a new layer and re-size by 60%. Move to lower right hand side and add drop shadow. Save tag.
C/P element 66 as a new layer and re-size by 31%. Mirror and move behind your tube on her right side. Duplicate and mirror. Make sure this layer in behind your car. Add drop shadow to each.
C/P element 78 as a new layer and re-size by 16%. Move to left hand side and add drop shadow.
Make sure all your layers have a drop shadow. Add your artist copyright and license number. Place where it will be
visible. Merge this layer down on your tube layer.
Hide your tube, X out the layer.
Activate your Mask layer and right click Merge all visible.
Un hide your tube.
Now to animate.
Making sure your merged layer is selected,
Go to Selections, select all.
Go to Edit and copy merged. Paste as a new animation in Animation Shop.
Hold your Ctrl key down and repeatedly hit letter L on your keyboard for a total of 14 frames.
You can watch the count on the lower right hand side of your screen in AS.
Open SimoneAni-Kaplow!-01
Go to Edit, select all.
Go to Edit, copy.
Activate your tag.
Go to Edit, select all.
Go to Edit, make sure Propagate Paste is selected.
Go to Edit, Paste, paste into selected frames.
Position on your tag and click into place. I placed mine about 3/4 of the way up the tag, so head level in reference to your tube position.
Go back to PSP now and highlight (activate) your tube layer and copy.
Paste as a NEW animation in AS.
Go to Edit, copy.
Activate your tag.
Go to Edit, Paste, paste into selected frames.
I also added SimoneAni-Kaplow!-04 to the center of my tube's chest area.
Play and save.
Don't forget to add your name.
To save:
Go to File, Save as, enter the name of your file and select the folder to save to.
Now click on Customize:
Under COLORS TAB:
Number of colors: 255 Colors
Create palette by: OPTIMIZED OCTREE
Reduce colors by: Error Diffusion
Under OPTIMIZATIONS TAB:
set a check mark beside the second, third and forth choices. UN-check the 1st and last.
Under PARTIAL TRANSPARENCY:
check Convert pixels less than 92
Yes, blend with this color: change to white #FFFFFF
Click OK. Click Next, next, next, next.
Play your animation.
At times your animation may or will come out terrible. Optimization in Animation Shop is not the greatest.
You can play around will your settings, especially under the Tab: Optimization. I change this setting at times from anywhere between 70 and 100.
Some people add a white background. To add background, go to Animation: Animation Properties, select Opaque and change color to white.
Hope you enjoyed this tutorial,
Hugs Simone
Please, always direct people to my blog to download my animations.
Do not load to any other download site and don't claim as your own.
Tutorial written by SophisticatSimone aka Lorraine Halle on Thursday July 4, 2013.
Tuesday, July 2, 2013

♥♥♥
Please click on TAG to see in full size.
••• Supplies needed to complete this tutorial. •••
________________________________________________________________________
Programs: Paint Shop Pro, I'm using version 10. Animation Shop 3.
Plugin : Eye Candy: Gradient Glow for name.
Please click on TAG to see in full size.
••• Supplies needed to complete this tutorial. •••
________________________________________________________________________
Programs: Paint Shop Pro, I'm using version 10. Animation Shop 3.
Plugin : Eye Candy: Gradient Glow for name.
Font used: LD Modern Mix
Tube of choice: I'm using "USA Cowgirl" by The Hunter from SATC.
Scrap Kit : I'm using "USA Cowgirl" by Bibi's Collection from SATC
Animation: SimoneAni-AmericanCowgirl
Mask: 0143 HERE
________________________________________________________________________
♥♥♥
Save your tag often. Nothing like working long and hard on a tag and PSP crashes.
♥♥♥
Open paper 10 and duplicate, close original. Re-size by 88%, smart size checked and 72 dpi. Sharpen.
Open Mask. Go to Layers, New mask layer, from image. Apply mask and merge group.
Copy and paste your tube as a new layer. Delete the tube from the knees down using your selection tool, set to rectangle, feather set to 16. Add drop shadow to tube.
C/P element 45 as a new layer and re-size by 55%. Move to right lower hand side in front of tube layer. Add d/s.
C/P element 71 as a new layer and re-size by 45%. Move to left hand side behind tube layer. Add d/s.
C/P element 11 as a new layer and re-size by 60%. Free rotate to the left by 45 degrees. Move to right lower hand side in front of tube layer. Add d/s.
C/P element 9 as a new layer and duplicate. Change blend mode to multiply. Merge down. Re-size by 80%. Position to the left side of tag.
C/P element 5 as a new layer. Re-size by 60% and duplicate. Position side by side in front of your tube and the barrel. Add d/s to each and merge together. Duplicate and re-size by 75% and move this layer behind the barrel on the left side of tag.
C/P element 10 as a new layer and re-size by 50%. Move to right lower hand side of tag. Add d/s.
C/P element 24 as a new layer and re-size by 50%. Move to upper center of tag. This element should be just above the mask layer. Add d/s.
C/P element 51 as a new layer and re-size by 50%. Move to bottom center of tag. This element should be below skull and above the grass. You can extra grass behind the fence. Add drop shadow.
C/P element 78 as a new layer and free rotate to right by 45 degrees. Add drop shadow. Position to left lower hand side.
Add artist copyright and your license number.
Starting from tube layer moving down to mask, merge down each layer.
X-out this layer now. Click on any other layer and merge visible.
You should have two layers now.
Crop merged opaque.
Now to animate.
Go to Selections, select all.
Go to Edit and copy merged. Paste as a new animation in Animation Shop.
Hold your Ctrl key down and repeatedly hit letter L on your keyboard for a total of 15 frames.
You can watch the count on the lower right hand side of your screen in AS.
Open SimoneAni-AmericanCowgirl-001
Go to Edit, select all.
Go to Edit, copy.
Activate your tag.
Go to Edit, select all.
Go to Edit, make sure Propagate Paste is selected.
Go to Edit, Paste, paste into selected frames.
Position on your tag OVER the frame area and click into place. I positioned mine more to the left side of the tag.
Go to PSP and select the tube layer and copy.
Paste in Animation Shop as a new layer.
Copy.
Click on your tag to activate.
Go to Edit and paste into selected frame.
Careful you don't cut off anything from that layer when you click it into place.
You can move it around on the frame until you are happy, click into place.
Repeat steps using SimoneAni-VIPGirl-03 and position this animation over the wagon on the right hand side of tag.
Play and save.
Don't forget to add your name.
To save:
Go to File, Save as, enter the name of your file and select the folder to save to.
Now click on Customize:
Under COLORS TAB:
Number of colors: 255 Colors
Create palette by: OPTIMIZED OCTREE
Reduce colors by: Error Diffusion
Under OPTIMIZATIONS TAB:
set a check mark beside the second, third and forth choices. UN-check the 1st and last.
Under PARTIAL TRANSPARENCY:
check Convert pixels less than 92
Yes, blend with this color: change to white #FFFFFF
Click OK. Click Next, next, next, next.
Play your animation.
At times your animation may or will come out terrible. Optimization in Animation Shop is not the greatest.
You can play around will your settings, especially under the Tab: Optimization. I change this setting at times from anywhere between 70 and 100.
Some people add a white background. To add background, go to Animation: Animation Properties, select Opaque and change color to white.
Hope you enjoyed this tutorial,
Hugs Simone
Please, always direct people to my blog to download my animations.
Do not load to any other download site and don't claim as your own.
Tutorial written by SophisticatSimone aka Lorraine Halle on Tuesday July 2, 2013.
Sunday, June 23, 2013

♥♥♥
Please click on TAG to see in full size.
••• Supplies needed to complete this tutorial. •••
________________________________________________________________________
Programs: Paint Shop Pro, I'm using version 10. Animation Shop 3.
Plugin : Eye Candy 4000 and Lokas Software/3D Shadow
Please click on TAG to see in full size.
••• Supplies needed to complete this tutorial. •••
________________________________________________________________________
Programs: Paint Shop Pro, I'm using version 10. Animation Shop 3.
Plugin : Eye Candy 4000 and Lokas Software/3D Shadow
Font used: Qwigley
Tube of choice: I'm using "Goth" by Jose A Cano from SATC.
Scrap Kit : I'm using "BoomBoom" by Bibi's Collection.
Animation: SimoneAni-BoomBoom-Tutorial
Mask: 0137 HERE
________________________________________________________________________
♥♥♥
Save your tag often. Nothing like working long and hard on a tag and PSP crashes.
♥♥♥
Scrap Kit : I'm using "BoomBoom" by Bibi's Collection.
Animation: SimoneAni-BoomBoom-Tutorial
Mask: 0137 HERE
________________________________________________________________________
♥♥♥
Save your tag often. Nothing like working long and hard on a tag and PSP crashes.
♥♥♥
Open element 31 and duplicate. Close original.
C/P your tube as a new layer. Re-size by 70%. Add drop shadow.
C/P element 55 as a new layer and send layer to bottom. Position in the right upper left hand side, behind the buildings.
Duplicate element and mirror. Add drop shadow to each layer.
C/P element 39 as a new layer and re-size by 45%. Move to left lower hand side, as your top layer. Add drop shadow.
C/P element 14 as a new layer and free rotate to the left by 90 degrees. Position in front of your tube. Add drop shadow.
C/P element 10 as a new layer and re-size by 45%. Move to right lower hand side, as your top layer. Add drop shadow.
C/P element 5 as a new layer and re-size by 50%. Position bottom center. Add drop shadow.
C/P element 23 as a new layer and re-size by 50%. Position behind the building on the lower left hand side.
Duplicate and mirror. Duplicate and move this left up and behind your purple leaves. Duplciate and mirror. Add drop shadow to each.
C/P element 43 as a new layer and re-size by 50%. Move to bottom right hand side behind the barrel. Add drop shadow.
C/P element 40 as a new layer and re-size by 50%. Move to left hand side of tag. Duplicate and mirror. Add drop shadow to each.
C/P element 37 as a new layer and re-size by 50%. Move to left hand side of tag. Duplicate and move to the right side. Add drop shadow to each.
C/P element 12 as a new layer and re-size by 90%. Move to left upper hand side of tag. Add drop shadow.
C/P element 25 and 4 as a new layer and re-size by 50% each. Move to left hand side of tag. Duplicate and mirror. Add drop shadow to each. Position as you like on your tag. This is the flower and purple leaf.
Open paper 4, duplicate, close original and change canvas size to : 700 x 650
Apply Mask of choice or mine(Masks0137). Merge group and copy.
Paste on your tag and send layer to bottom.
C/P element 57 as a new layer. Position this layer just above your mask layer. Position in upper left hand corner of tag.
Duplicate, mirror and flip. Move a bit more to the lower right hand side. Merge these two together.
Add noise, 100%, gaussian, twice.
Add drop shadow.
Make sure all your layers have a drop shadow.
Save your tag as pspimage file.
Add artist copyright.
Save again.
I always keep a copy of my finished original tag without a name on it, so duplicate this one and close it.
Merge visible the copied one.
Add your name, merge visible and save as PNG.
If animating, merge all layers one at a time down to and including your tube.
X-out this layer now. Click on Mask layer and merge all visible.
UN hide top layer.
Make sure your bottom layer is active. Go to Selections, select all and copy.
Paste as a new Animation in Animation Shop.
Hold your Ctrl key down and repeatedly hit letter L on your keyboard for a total of 10 frames.
You can watch the count on the lower right hand side of your screen in AS.
Open SimoneAni-BoomBoom
Go to Edit, select all.
Go to Edit, copy.
Activate your tag.
Go to Edit, select all.
Go to Edit, make sure Propagate Paste is selected.
Go to Edit, Paste, paste into selected frames.
Position on your tag and click into place. Center of tag and buildings.
Go back in PSP and activate the top layer. Copy and paste in AS as a new animation.
Go Edit and Copy.
Activate your tag.
Go to Edit, Paste, paste into selected frames.
Position as best as you can, the way it looked on your tag in PSP. Click into place.
Play and save.
To save:
Go to File, Save as, enter the name of your file and select the folder to save to.
Now click on Customize:
Under COLORS TAB:
Number of colors: 255 Colors
Create palette by: OPTIMIZED OCTREE
Reduce colors by: Error Diffusion
Under OPTIMIZATIONS TAB:
set a check mark beside the second, third and forth choices. UN-check the 1st and last.
Under PARTIAL TRANSPARENCY:
check Convert pixels less than 92
Yes, blend with this color: change to white #FFFFFF
Click OK. Click Next, next, next, next.
Play your animation.
At times your animation may or will come out terrible. Optimization in Animation Shop is not the greatest.
You can play around will your settings, especially under the Tab: Optimization. I change this setting at times from anywhere between 70 and 100.
Some people add a white background. To add background, go to Animation: Animation Properties, select Opaque and change color to white.
To create the same name as I did in this tag, please go to this tutorial HERE
Hope you enjoyed this tutorial,
Hugs Simone
Please, always direct people to my blog to download my animations.
Do not load to any other download site and don't claim as your own.
Tutorial written by SophisticatSimone aka Lorraine Halle on Sunday June 23, 2013
Saturday, June 22, 2013

♥♥♥
Please click on TAG to see in full size.
••• Supplies needed to complete this tutorial. •••
________________________________________________________________________
Programs: Paint Shop Pro, I'm using version 10. Animation Shop 3.
Plugin : Eye Candy: Gradient Glow for name.
Font used: Recorda Script Personal Use Only
Tube of choice: I'm using "Dark Fairytale" by The Hunter from SATC.
Scrap Kit : I'm using "Dark Fairytale" by Bibi's Collection from SATC
Animation: SimoneAni-DarkFairytale
Mask: none
________________________________________________________________________
♥♥♥
Save your tag often. Nothing like working long and hard on a tag and PSP crashes.
♥♥♥
Open element 20 and duplicate. Close original.
Copy and paste your fairy tube as a new layer.
Go to Image/ Re-size, all layers checked.
Resolution : 72, enter: 58% and re sample using: Smart Size
Go to Image, Canvas Size and enter:
700 x 650, center diamond depressed.
Copy and paste element 25 as a new layer and re-size by 60%. Place on upper right hand side of frame element and behind your tube. Add drop shadow.
C/P element 1 as a new layer and re-size by 60%. Move to the left side of tag. Add drop shadow.
Open paper 2, duplicate and close original. Go to Image, Canvas Size and enter the following:
650 x 500, center diamond depressed. Click OK.
Copy.
On your tag, using your magic wand, feather set to 0, click inside the frame (make sure your frame layer is active).
Go to Selections, modify, expand by 10.
Add a new Raster layer. Send to bottom.
Now go to Edit and paste into selection.
Go to Selections, select none.
Activate your frame layer again and add this drop shadow:
V=8
H=8
Opacity=65
Blur=11
Color=black
C/P element 35 as a new layer and position, upper left hand side of frame, add same drop shadow.
C/P element 37 as a new layer and position, upper right hand side of frame, add same drop shadow.
C/P element 56 as a new layer and position, lower left hand side of frame. Re-size by 60%.
C/P elment 94 as a new layer and leave in center of tag and behind your tube.
Re-size your canvas if it's not fitting in completely. We can re-size later.
C/P rock element 99 and position under her hands on right side of tag.
C/P element 18 and position behind your tube and behind the giant mushrooms.
Duplicate your big black flower and re-size by 60%. Move in front of your rock.
Duplicate again the big black flower and re-size by 40%. Move behind rock and your tube and position far back by her hip.
Add artist copyright and merge all visible.
Add your name and save as PNG.
Hope you enjoyed this tutorial,
Hugs Simone
Please, always direct people to my blog to download my animations.
Do not load to any other download site and don't claim as your own.
Tutorial written by SophisticatSimone aka Lorraine Halle on Saturday June 22, 2013.
Thursday, June 20, 2013

♥♥♥
Please click on TAG to see in full size.
••• Supplies needed to complete this tutorial. •••
________________________________________________________________________
Programs: Paint Shop Pro, I'm using version 10. Animation Shop 3.
Plugin : Gradient Glow for name.
Font used: 2Peas Cocoa
Tube of choice: I'm using "Sailor Girl" by Alexander McMillan from SATC.
Scrap Kit : I'm using "Sailor Beach" by Bibi's Collection from SATC
Animation: none
Mask: 0108 HERE
________________________________________________________________________
♥♥♥
Save your tag often. Nothing like working long and hard on a tag and PSP crashes.
♥♥♥
Open a new image, transparent, 650 x 650.
C/P element 37 as a new layer. Move to left upper hand side of tag. Add Drop shadow.
C/P your tube as a new layer and re-size by 75%. Move to right side of tag.
Open Paper 2. Duplicate and close original.
Re-size by 54%, 72 dpi and smart size checked. Apply mask of choice, or mine mask 0108.
Merge group and duplicate. Merge visible. Copy and paste as a new layer on your tag.
Move to bottom.
C/P element 11 as a new layer. Using your selection tool, remove the trunk portion of the tree.
This element should be just above your mask layer.
Add drop shadow.
C/P element 26 as a new layer and move to the lower left hand side of tag. This layer should be your top layer (above tube).
C/P element 99 as a new layer and move to the lower right hand side of tag. This layer is above grass layer.
C/P element 39 as a new layer and move to the lower right hand side of tag. Re-size by 54%. Add drop shadow.
C/P element 27 as a new layer and move to the lower left hand side of tag. Place over the grass element.
Merge all visible. Add artist copyright.
Add your name and save as PNG.
Hope you enjoyed this tutorial,
Hugs Simone
Please, always direct people to my blog to download my animations.
Do not load to any other download site and don't claim as your own.
Tutorial written by SophisticatSimone aka Lorraine Halle on Thursday, June 20 2013.
Monday, June 17, 2013

♥♥♥
Please click on TAG to see in full size.
••• Supplies needed to complete this tutorial. •••
________________________________________________________
Programs: Paint Shop Pro, I'm using version 10. Animation Shop 3.
Plugin : Eye Candy: Gradient Glow for name. Cybia: Screenworks for name.
Font used: Olivier
Tube of choice: I'm using "Dark Mermaid" by The Hunter from SATC.
Scrap Kit : I'm using "Dark Mermaid" by Bibi's Collection from SATC
Animation: none
Mask: 0139 HERE
________________________________________________________
Save your tag often. Nothing like working long and hard on a tag and PSP crashes.
♥♥♥
Open paper 4 and duplicate. Close original.
Re-size by 58%, 72 dpi, smart size.
Open Mask 0139 SS and apply to the paper.
Merge group.
Copy and paste your tube close up.
Activate your mask layer. Go to Selections, select all.
Activate your close up layer.
Go to Image, Crop to Selection.
Now using your selection tool, set to rectangle, feather of 25, select the lower portion of your tube and delete so a little bit of her elbows are deleted.
Add drop shadow.
Copy and paste element 3 as a new layer. Move to the top. Again, using your selection tool, remove the extra on either side.
Duplicate layer and flip. Merge together and add drop shadow. Move below close up layer.
Copy and paste element 9 as a new layer and move to the right side of tag. Add drop shadow. This should be behind your tube layer.
Repeat for element 10. Move to the right side.
Repeat for element 60. Move to the far left side. Duplicate and re-size by 50%.
Mirror.
Copy and paste element 15 as a new layer. Position bottom middle of tag. Add drop shadow.
Copy and paste element 96 as a new layer and re-size by 50%. Move to the left side of tag. Triplicate this element, you can re-size them each by 90% and 88%.
Tuck them in here and there on your tag. Mainly to fill empty spaces. Add drop shadow to each.
Add element 90, element 98, element 61 as new layers. Re-size to desired size
and add drop shadow to each. Place down along the bottom of tag.
Repeat for element 97 and duplicate. Placing one on the right side and one on the left side.
Copy and paste element 7 as a new layer and place bottom of tag and to the left a bit.
Copy and paste element 12 as a new layer and move to the right side of tag, add drop shadow.
Copy and paste element 23 as a new layer. If there are to many sparkles over her face, just grab your selection tool, set to point to point (freehand) and feather 23. Delete whatever you don't want over her face.
Merge all layers/visible. Add copyright. Merge down.
Save as PNG.
Add your name. I used font Olivier.
On the font I added noise set to random and 25%.
Added plugin : Cybia, Screen works, Boxed Dot, 0
I added gradient glow, eye candy 4, set to FAT(under color tab) and 3 for glow width.
I added drop shadow.
Merge all visible.
SAVE as PNG.
Hope you enjoyed this tutorial,
Hugs Simone
Please, always direct people to my blog to download my animations.
Do not load to any other download site and don't claim as your own.
Tutorial written by SophisticatSimone aka Lorraine Halle on Monday June 17, 2013.
Tuesday, June 11, 2013

???
Please click on TAG to see in full size.
••• Supplies needed to complete this tutorial. •••
________________________________________________________________________
Programs: Paint Shop Pro, I'm using version 10. Animation Shop 3.
Plugin : Eye Candy: Gradient Glow for name.
Font used: LD Marooned
Tube of choice: I'm using "Pirate" by Danny Lee from SATC.
Scrap Kit : I'm using "Pirate" by Bibi's Collection from SATC
Animation: none
Mask: 0138 HERE
________________________________________________________________________
???
Save your tag often. Nothing like working long and hard on a tag and PSP crashes.
???
Open Paper 12 and duplicate. Close original.
Select your crop tool and at the top on your preset bar, enter 700 x 700.
Move your crop box so your are selecting the lower left hand side of this paper.
The paper is 1000 x 1000 so you can pick anywhere really, but for my tag I chose the lower left hand side. Double click on tag or click apply (green check mark).
Apply mask 0138. Go to Layers, new mask layer, from Image and select in drop down box. Merge group. Duplicate layer and merge down.
Copy and paste element 212 as a new layer. Re-size by 30% and move a little off center to the left. Add drop shadow.
Copy and paste your tube as a new layer and re-size by 70% if you are using the Danny Lee pirate tube. Add drop shadow.
C/P element 223 as a new layer and re-size by 45%. Position to the left of your tube. Add drop shadow.
C/P element 221 as a new layer and re-size by 92%. Position below your tube in layers palette and near bottom on the tag. Duplicate. On bottom skeleton layer, add a gaussian blur of 2. On the top layer change blend mode to Soft Light.
C/P element 208 as a new layer and re-size by 30%. Sharpen image. Place monkey on the barrel. Add drop shadow.
C/P element 177 as a new layer and move down in layers to just above the mask layer. Move to the edge of mask (upper left hand side). Change blend mode to Multiply.
C/P element 170 as a new layer and re-size by 50%. Position behind your tube layer and to the right side of tag. Add drop shadow.
Repeat for element 156. Position to the left side of tag, near the barrel.
Copy and paste element 134 as a new layer and position behind the boxes and in front of your ship.
C/P element 112 as a new layer and re-size by 25%. Place on a box.
C/P element 102 as a new layer and re-size by 50%. Place on the right side of tag behind your tube. Add Drop shadow.
C/P element 40 as a new layer and re-size by 50%. Place bottom of tag, near tube's foot. Add drop shadow.
C/P element 20 as a new layer. Re-size by 30%. Duplicate. Place one bomb near monkey's hand on the boxes. Place the other at bottom of tag in front of boxes (crates).
Mirror this one.
C/P element 14 and re-size by 30%. Place at bottom near barrel.
C/P element 6 and re-size by 30%. Place at bottom on right hand side.
C/P element 27 as a new layer and re-size by 60%. Place behind crates on the left hand side of tag. If you need to adjust some elements do so. Add drop shadow.
C/P skulls (element 4) and re-size by 60%. Duplicate and mirror one layer.
Place some behind your tube at her feet and place some in front of crates and barrel.
C/P cross (63) and re-size by 43%. Position on front of one of the crates (left side of tag).
C/P 108 and re-size by 31%, place on crate.
C/P 226 and re-size by 22%, place on barrel and change blend mode to overlay.
Ok now make it your own and add any other elements you like.
Make sure all your layers have drop shadow, except of layers that have a blend mode applied to it.
Add artist copyright. I used font LD Marooned. Save your tag as a PNG file.
Hope you enjoyed this tutorial,
Hugs Simone
Please, always direct people to my blog to download my animations.
Do not load to any other download site and don't claim as your own.
Tutorial written by SophisticatSimone aka Lorraine Halle on Tuesday June 11, 2013.
Monday, June 10, 2013

???
Please click on TAG to see in full size.
••• Supplies needed to complete this tutorial. •••
________________________________________________________________________
Programs: Paint Shop Pro, I'm using version 10. Animation Shop 3.
Plugin : none
Please click on TAG to see in full size.
••• Supplies needed to complete this tutorial. •••
________________________________________________________________________
Programs: Paint Shop Pro, I'm using version 10. Animation Shop 3.
Plugin : none
Font used: Ornatique
Tube of choice: I'm using "Celina" by Alexander McMillan from SATC.
Scrap Kit : I'm using "SteamPunk" by Bibi's Collection from SATC
Animation: SimoneAni-Steamy HERE
Mask: 0136 HERE
________________________________________________________________________
???
Save your tag often. Nothing like working long and hard on a tag and PSP crashes.
???
Open paper 8 and duplicate. Apply Mask and merge group. I used mask 0136 by me.
Copy and paste your tube as a new layer. I remove some of the bottom off my tube with my selection tool set to rectangle and feather of 30.
Move tube to the right side of tag.
If you have a large close up image of your tube, copy and paste it as a new layer. Mirror and position over your mask.
Click on your bottom mask layer.
Go to Selections, select all. Go to Selections, float. Go to Selections, invert. Hit delete on your keyboard. Go to Selections, select none.
Grab your preset shapes tool, set to Ellipse. Background color black, foreground color null.
Make a circle that is smaller then your mask. Convert to raster layer and send to bottom, below your mask layer. You should have something like this:
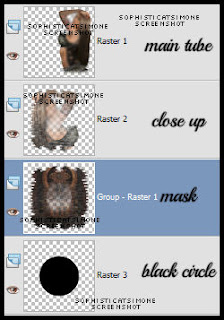
Copy and paste element 14 as a new layer. In layers palette this should be below your tube close up.
Click on your your tube close up now to activate that layer.
Copy and paste element 44 as a new layer. Re-size by 75%. Free rotate the element to the right by 50 degrees.
Add following drop shadow:
V=10
H=7
Opacity=73
Blur=13
Color=black
OK now we are going to add a layer to prepare for our coming animation placement.
Using your preset shapes set to rectangle, choose a color for your background and foreground is null.
My square is 244 x 266. You can always open a new image with those dimensions and flood fill with a bright color.
Copy and paste it on your tag and place at bottom, in between element 44 and your tube. Our animation will be going there, so the color will remind us to not place any elements over this area. Double click on this layer in your palette. Properties box will pop up. Place a check mark beside "Highlight in layers palette" and choose a color of choice.

Click OK to close. You should have something like this:

When the time comes to animate we will be referencing to this layer.
Copy and paste element 109 as a new layer and re-size by 40%. Position this over the box you just created and convert to raster layer.
Add drop shadow and drag below the box layer.
Copy and paste element 126 as a new layer. Re-size by 40% and position to the left side behind the box layer you just made.
Duplicate and free rotate by 45 degrees. Position at top of tag and to the right, behind your tube.
Add drop shadow to each.
Duplicate original branch at move this layer above your tube layer near right lower hand side.
Copy and paste elment 130 as a new layer and re-size by 64%. Move to the lower right hand side and add drop shadow.
Copy and paste element 118 as a new layer and re-size by 70%. Position over the leafy branch down on lower right hand side and beside the bomb.
Add drop shadow.
Copy and paste element 83 as a new layer and re-size by 35%, add drop shadow and move to the left side. This layer should be just above the box layer you created earlier.
Repeat for element 101. Position at bottom of tag in center.
Copy and paste element 113 as a new layer and re-size by 25%, add drop shadow and move to the bottom left hand side of tag, under the wing like element.
Copy and paste again and re-size by 15%. Triplicate. Position one at top of tag, one near wing like element (below it in the layers, but above it on the
tag) and place the other one middle top of your box. Drop shadow each.
C/P element 106 and re-size by 15% and duplicate. Place one at bottom of tag by the googles and one mid tag on the left side. Add D/S to both layers.
C/P element 114 as a new layer and re-size by 20%. Place along your box on the left side. Duplicate and free rotate by 90 degrees to the right.
Position along the top of your box, and below the other pipe layer. Add drop shadow to both layers.
Add anything else you want on your tag at this time.
I added element 42, 10, 5 and 15.
Activate your top layer and using your text tool, add your artist copyright.
Go to Selections, select all.
Go to Image, crop to selection.
Activate the layer below your box layer/colored layer and merge them down till you get to the bottom.
Go to Selections, select all. Go to Image and copy.
In animation shop, right click and paste as a new animation.
Hold your Ctrl key down and repeatedly hit letter L on your keyboard for a total of 11 frames.
You can watch the count on the lower right hand side of your screen in AS.
Open SimoneAni-Steamy-002
Go to Edit, select all.
Go to Edit, copy.
Activate your tag.
Go to Edit, select all.
Go to Edit, make sure Propagate Paste is selected.
Go to Edit, Paste, paste into selected frames.
Position on your tag and click into place over the grill square.
Go back to PSP and X-out your bottom layer and the square layer.
Click on any of the other layers, make sure you still have your tag selected (Selection All).
Go to Edit, Copy Merged.
In AS right click and paste as a new animation.
Go to Edit, copy.
Activate your tag. Go to Edit, Paste, paste into selected frames. You may have to move it slightly with your cursor. Once happy just click on your tag.
Now I added another animation called SimoneAni-Steamy-006withShadow-PSD.
Open this animation, go to Edit and select all. Go to Edit and copy.
Activate the very last frame on this animation so your frame becomes blue.
Right click in that frame and select, Paste after current frame.
Now scroll the animation out so you see all 16 frames.
Delete frames 2, 7 and 12 using your Ctrl button on keyboard.

Go to Edit, select all.
Go to Edit, copy.
Activate your tag.
Go to Edit, select all.
Go to Edit, Paste, paste into selected frames.
I placed that one at the top.
Next on Steamy-006withShadow animation, I mirrored it.
Go to animation/mirror.
Go to Edit, select all.
Go to Edit, copy.
Activate your tag.
Go to Edit, select all.
Go to Edit, Paste, paste into selected frames.
I placed that one on top of winged element in bottom left hand side of tag.
Re-size your tag by 85%, Smart Size checked.
Add your name and save!
I used the font Ornatique by designstation.
For glitter look I put 100% noise. To animate it, I changed the noise to 100, 99 and 98.
Hope you enjoyed this tutorial,
Hugs Simone
Please, always direct people to my blog to download my animations.
Do not load to any other download site and don't claim as your own.
Tutorial written by SophisticatSimone aka Lorraine Halle on Monday June 10, 2013.
Subscribe to:
Posts
(Atom)