My Blinkie

Showing posts with label Glitter. Show all posts
Showing posts with label Glitter. Show all posts
Sunday, May 26, 2013
♥♥♥
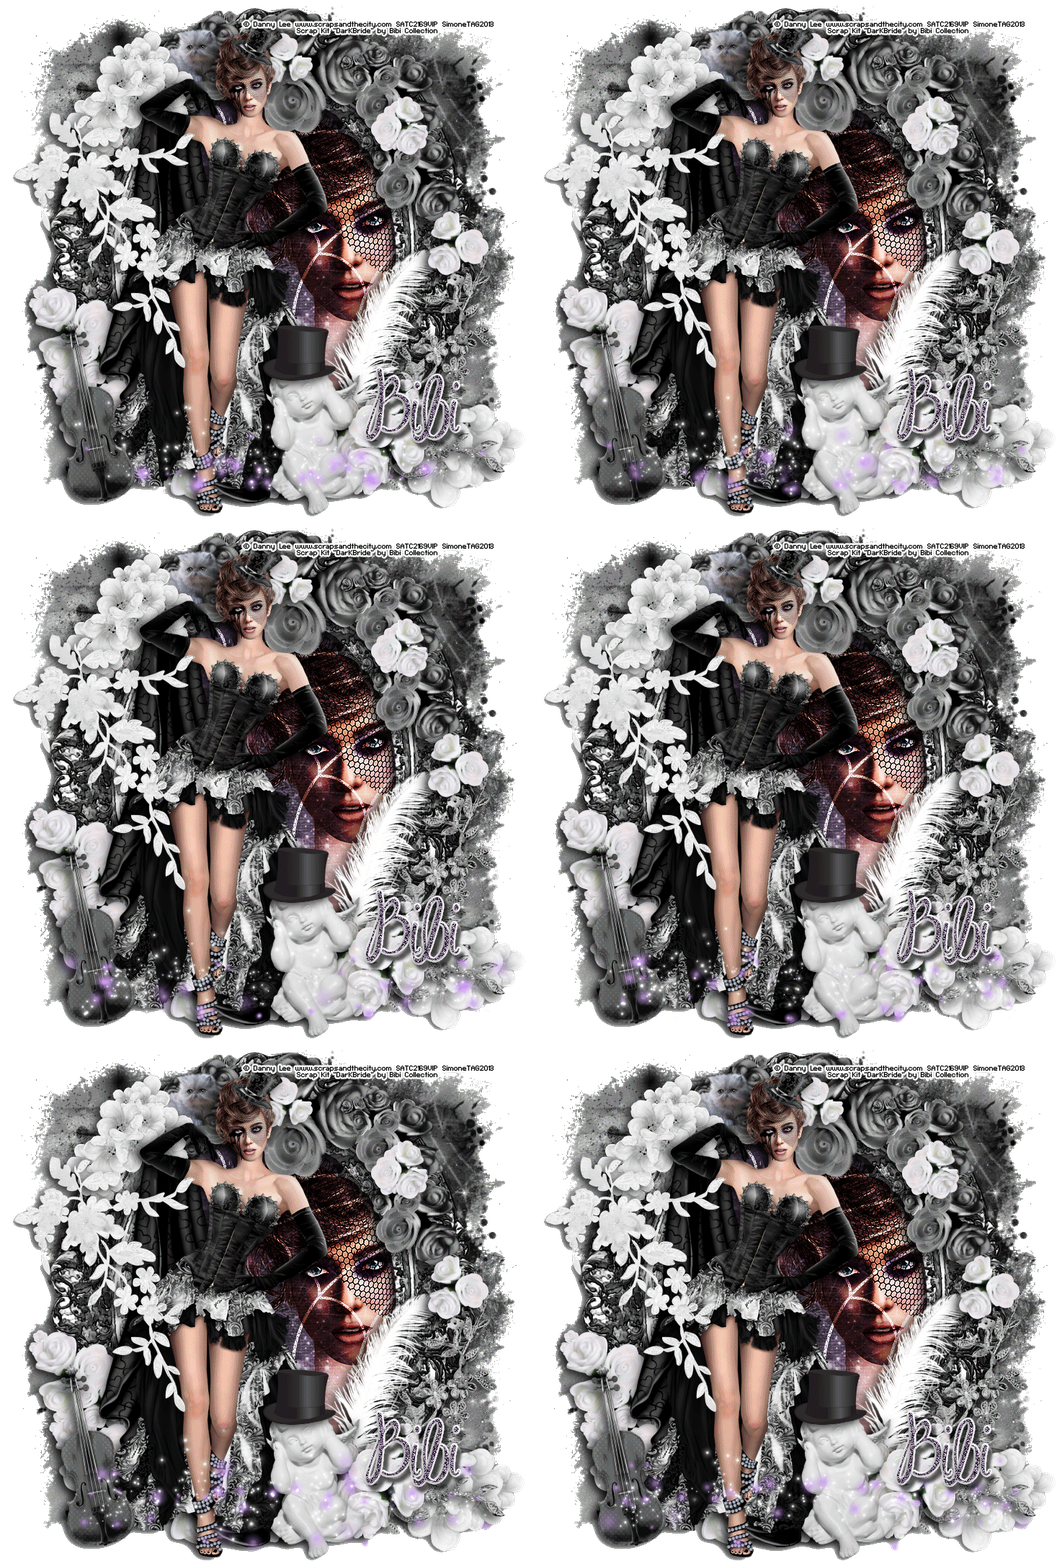
Please click on TAG to see in full size.
••• Supplies needed to complete this tutorial. •••
________________________________________________________________________
Programs: Paint Shop Pro, I'm using version 10. Animation Shop 3.
Plugin : Gradient Glow by Eye Candy 4000 (for name)
Font used:
Tube of choice: I'm using "Dark Bride" by Danny Lee from SATC.
Scrap Kit : I'm using "Dark Bride"by Bibi's Collection from SATC
Animation: SimoneAni-453
Mask: Masks0114
________________________________________________________________________
♥♥♥
Save your tag often. Nothing like working long and hard on a tag and PSP crashes.
♥♥♥
Open your mask of choice in PSP and minimize. I used Mask 0114.
Open Paper 2 and duplicate. Re-size by 90%, 72 dpi, smart size.
Apply mask to the paper. Merge group.
Copy and paste your tube as a new layer. I had to re-size mine by 70%.
Move tube a little to the left. Add drop shadow.
Copy and paste element 1 as a new layer. Move up just a little bit. Move this frame below your tube layer.
Select your magic wand feather set to 0. Click inside the frame. Go to selections, modify and expand by 10.
Copy and paste a close up of your tube. Move it to the right a bit.
Go to Selections and invert. Hit delete on your keyboard.
Open Paper 5 and duplicate. Re-size by 70%.
Copy and paste as a new layer and drag down below your tube close up.
Hit delete on your keyboard.
On this paper layer, change the blend mode to Overlay.
On your close up layer, change blend mode to Hard Light.
Copy and paste element 88 as a now layer, position so larger portion of web is over close up. This web element should be above the close up layer. Hit delete on your keyboard.
Copy and paste element 26 as a new layer and move down to right lower hand side of tag. Drag down below all layers except the mask/background layer. Add drop shadow.
OK you can now de-select. Go to Selections, select none.
Duplicate spider web element. On the bottom layer add a drop shadow. On the top layer add noise.
Go to Adjust, Add/Remove Noise, Add Noise. Check : Gaussian and set to 73%, monochrome checked.
Merge all visible.
Copy and paste element 84 as a new layer. Re-size by 34% and move to the right side of frame, down near bottom. Add drop shadow.
Copy and paste element 61as a new layer and flip it. Move to the right side of frame, down near bottom. Add drop shadow.
Copy and paste element 68 as a new layer. Flip it and mirror it. Move to the left bottom side of frame. Duplicate and move it in towards the center of frame. Add drop shadow to each.
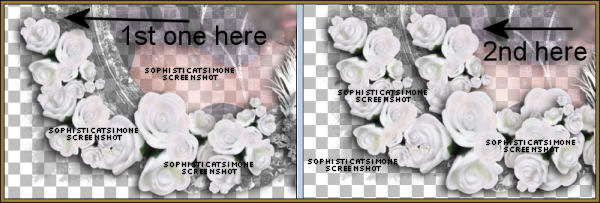
Copy and paste element 19 as a new layer and re-size by 50%. Add drop shadow and position behind your tube.
Copy and paste element 69 as move to the upper right hand side of the frame. Add drop shadow.
Copy and paste element 26 as a new layer and move to upper left hand side and re-size by 60%. Free rotate by 90 degrees to the right. Add drop shadow.
Copy and paste element 80 as a new layer. Move to the left side of frame/tag and position near your tube's shoulder. See my tag for reference. Add drop shadow. This element should be above your tube layer.
Copy and paste element 57 as a new layer. Re-size by 35% and triplicate. Position a few along the black flower cluster on the upper right hand side. Rotate a few of them and drop shadow each.
Do the same for the following elements: 5, 41 and 99. That's the top hat, cherub and violin. I positioned them all along the front bottom of tag.
Add anything else you would like or merge all visible.
Save your tag.
To animate.
Go to Selections, select all.
Go to Edit and copy merged. Paste as a new animation in Animation Shop.
Hold your Ctrl key down and repeatedly hit letter L on your keyboard for a total of 16 frames.
You can watch the count on the lower right hand side of your screen in AS.
Open SimoneAni-453
Go to Edit, select all.
Go to Edit, copy.
Activate your tag.
Go to Edit, select all.
Go to Edit, make sure Propagate Paste is selected.
Go to Edit, Paste, paste into selected frames.
Position on your tag and click into place.
Play and save.
Don't forget to add your name.
You can see my name tutorial HERE.
To save:
Go to File, Save as, enter the name of your file and select the folder to save to.
Now click on Customize:
Under COLORS TAB:
Number of colors: 255 Colors
Create palette by: OPTIMIZED OCTREE
Reduce colors by: Error Diffusion
Under OPTIMIZATIONS TAB:
set a check mark beside the second, third and forth choices. UN-check the 1st and last.
Under PARTIAL TRANSPARENCY:
check Convert pixels less than 92
Yes, blend with this color: change to white #FFFFFF
Click OK. Click Next, next, next, next.
Play your animation.
At times your animation may or will come out terrible. Optimization in Animation Shop is not the greatest.
You can play around will your settings, especially under the Tab: Optimization. I change this setting at times from anywhere between 70 and 100.
Some people add a white background. To add background, go to Animation: Animation Properties, select Opaque and change color to white.
Hope you enjoyed this tutorial,
Hugs Simone
Please, always direct people to my blog to download my animations.
Do not load to any other download site and don't claim as your own.
Tutorial written by SophisticatSimone aka Lorraine Halle on Sunday, May 26, 2013.
Please click on TAG to see in full size.
••• Supplies needed to complete this tutorial. •••
________________________________________________________________________
Programs: Paint Shop Pro, I'm using version 10. Animation Shop 3.
Plugin : Gradient Glow by Eye Candy 4000 (for name)
Font used:
Tube of choice: I'm using "Dark Bride" by Danny Lee from SATC.
Scrap Kit : I'm using "Dark Bride"by Bibi's Collection from SATC
Animation: SimoneAni-453
Mask: Masks0114
________________________________________________________________________
♥♥♥
Save your tag often. Nothing like working long and hard on a tag and PSP crashes.
♥♥♥
Open your mask of choice in PSP and minimize. I used Mask 0114.
Open Paper 2 and duplicate. Re-size by 90%, 72 dpi, smart size.
Apply mask to the paper. Merge group.
Copy and paste your tube as a new layer. I had to re-size mine by 70%.
Move tube a little to the left. Add drop shadow.
Copy and paste element 1 as a new layer. Move up just a little bit. Move this frame below your tube layer.
Select your magic wand feather set to 0. Click inside the frame. Go to selections, modify and expand by 10.
Copy and paste a close up of your tube. Move it to the right a bit.
Go to Selections and invert. Hit delete on your keyboard.
Open Paper 5 and duplicate. Re-size by 70%.
Copy and paste as a new layer and drag down below your tube close up.
Hit delete on your keyboard.
On this paper layer, change the blend mode to Overlay.
On your close up layer, change blend mode to Hard Light.
Copy and paste element 88 as a now layer, position so larger portion of web is over close up. This web element should be above the close up layer. Hit delete on your keyboard.
Copy and paste element 26 as a new layer and move down to right lower hand side of tag. Drag down below all layers except the mask/background layer. Add drop shadow.
OK you can now de-select. Go to Selections, select none.
Duplicate spider web element. On the bottom layer add a drop shadow. On the top layer add noise.
Go to Adjust, Add/Remove Noise, Add Noise. Check : Gaussian and set to 73%, monochrome checked.
Merge all visible.
Copy and paste element 84 as a new layer. Re-size by 34% and move to the right side of frame, down near bottom. Add drop shadow.
Copy and paste element 61as a new layer and flip it. Move to the right side of frame, down near bottom. Add drop shadow.
Copy and paste element 68 as a new layer. Flip it and mirror it. Move to the left bottom side of frame. Duplicate and move it in towards the center of frame. Add drop shadow to each.
Copy and paste element 19 as a new layer and re-size by 50%. Add drop shadow and position behind your tube.
Copy and paste element 69 as move to the upper right hand side of the frame. Add drop shadow.
Copy and paste element 26 as a new layer and move to upper left hand side and re-size by 60%. Free rotate by 90 degrees to the right. Add drop shadow.
Copy and paste element 80 as a new layer. Move to the left side of frame/tag and position near your tube's shoulder. See my tag for reference. Add drop shadow. This element should be above your tube layer.
Copy and paste element 57 as a new layer. Re-size by 35% and triplicate. Position a few along the black flower cluster on the upper right hand side. Rotate a few of them and drop shadow each.
Do the same for the following elements: 5, 41 and 99. That's the top hat, cherub and violin. I positioned them all along the front bottom of tag.
Add anything else you would like or merge all visible.
Save your tag.
To animate.
Go to Selections, select all.
Go to Edit and copy merged. Paste as a new animation in Animation Shop.
Hold your Ctrl key down and repeatedly hit letter L on your keyboard for a total of 16 frames.
You can watch the count on the lower right hand side of your screen in AS.
Open SimoneAni-453
Go to Edit, select all.
Go to Edit, copy.
Activate your tag.
Go to Edit, select all.
Go to Edit, make sure Propagate Paste is selected.
Go to Edit, Paste, paste into selected frames.
Position on your tag and click into place.
Play and save.
Don't forget to add your name.
You can see my name tutorial HERE.
To save:
Go to File, Save as, enter the name of your file and select the folder to save to.
Now click on Customize:
Under COLORS TAB:
Number of colors: 255 Colors
Create palette by: OPTIMIZED OCTREE
Reduce colors by: Error Diffusion
Under OPTIMIZATIONS TAB:
set a check mark beside the second, third and forth choices. UN-check the 1st and last.
Under PARTIAL TRANSPARENCY:
check Convert pixels less than 92
Yes, blend with this color: change to white #FFFFFF
Click OK. Click Next, next, next, next.
Play your animation.
At times your animation may or will come out terrible. Optimization in Animation Shop is not the greatest.
You can play around will your settings, especially under the Tab: Optimization. I change this setting at times from anywhere between 70 and 100.
Some people add a white background. To add background, go to Animation: Animation Properties, select Opaque and change color to white.
Hope you enjoyed this tutorial,
Hugs Simone
Please, always direct people to my blog to download my animations.
Do not load to any other download site and don't claim as your own.
Tutorial written by SophisticatSimone aka Lorraine Halle on Sunday, May 26, 2013.

Thursday, May 23, 2013

♥♥♥
Please click on TAG to see in full size.
••• Supplies needed to complete this tutorial. •••
________________________________________________________________________
Programs: Paint Shop Pro, I'm using version 10. Animation Shop 3.
Plugin : Gradient Glow by Eye Candy 4000 (for name)
Font used: MsMadi
Tube of choice: I'm using "REGGIE REY" by Pinup Bombshells from SATC.
Scrap Kit : I'm using "Toyland" by Bibi's Collection from SATC
Animation: SimoneAni-MyBedroom
Mask: Masks0121
________________________________________________________________________
♥♥♥
Save your tag often. Nothing like working long and hard on a tag and PSP crashes.
♥♥♥
Open paper 5 and duplicate. Close original.
Re-size your paper by 80%. Make sure resolution is set to 72 dpi.
When re-sizing any of the elements or papers make sure the resolution is always set to 72.
Apply Mask 0121 to paper and merge group. Add noise:
Random, 7, monochrome checked.
C/P element 90 as a new layer and re-size by 80%. Move to the lower right hand side of tag.
Add drop shadow.
C/P element 44 as a new layer and position a little higher on the canvas. Add light drop shadow.
Make sure it's behind the bed layer.
C/P element 72 as a new layer. Remove a portion of the plant down at the bottom. Activate your Selection Tool, set to Rectangle, Mode: add shift, feather 0 and anti-alias checked.
Just drag out a box over the bottom portion of plant and then hit delete on keyboard. Right click on tag to de-select or go to Selections, select none.
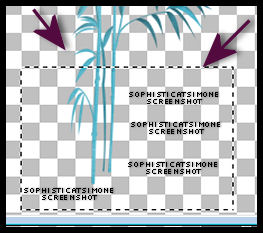
Duplicate this layer and mirror. Add drop shadow to each. They should frame the screen.
C/P element 88 as a new layer. Re-size by 60%. Position high in middle of tag. Should appear a little above the screen. Duplicate and re-size by 50%. Move it to far right side of tag. Add drop shadow to each balloon.
C/P element 83 as a new layer. Re-size by 60% and move in front of bed and to the right of tag at bottom. Add drop shadow.
C/P element 80 as a new layer and move to the side of bed on left side of tag. Add drop shadow.
C/P element 71 as a new layer and Re-size by 50%. Move behind the bed, over the screen. Duplicate, re-size by 50% and move to the far left of tag, in front of toy box.
Back to original purple plant layer. Duplicate and re-size by 80% and move down in front of bed, to the right hand side of mid-line. Should be near the toy chest. Add drop shadows to all these flowers.
C/P element 18 as a new layer and re-size by 55%. Move to top of tag, on right side of blue balloon. Add drop shadow.
C/P element 84 as a new layer and position middle of tag and a little higher than center.
C/P your tube as a new layer. Re-size if need be. I didn't re-size mine, but I deleted some of her legs. I used selection tool, set to rectangle and feather of 10. I also mirrored her position and placed her on left side of tag at foot of bed. Add drop shadow. Make sure she is behind/below the bed layer in layers palette.
OK click on your screen element in layers palette to activate.
C/P element 87 as a new layer. Free rotate by 20 degrees to the right and re-size by 60%. Make sure it's tucked behind the toy box and the blue plant. Add drop shadow.
Click on tube layer to activate.
C/P element 91 as a new layer and mirror. Re-size by 60%. Move this little mouse in front of your tube down by her legs. Add drop shadow.
C/P element 21 as a new layer and re-size by 65%. Move to left hand side of tag at bottom of tag. Add drop shadow.
C/P element 31 as a new layer and re-size by 80%. Move to left hand side of tag at bottom of tag and place him on top of purple ball. Add drop shadow.
C/P element 73 as a new layer and re-size by 40%. Move to right lower hand side of tag in front of toy chest. Add drop shadow.
C/P element 23 as a new layer and re-size by 60%. Move to bottom of tag. Add drop shadow.
C/P element 77 as a new layer, re-size by 80% and have him sit on top of bed canape. Add drop shadow.
C/P element 78 as a new layer, re-size by 70% and have him sit on top of bed. Add drop shadow.
C/P element 1as a new layer, re-size by 40% and have her sit on the toy chest on the right side of tag. Add drop shadow.
Go to Selections, select all.
Go to Edit, Crop to Selection.
Now to animate.
Go to Selections, select all.
Go to Edit and copy merged. Paste as a new animation in Animation Shop.
Hold your Ctrl key down and repeatedly hit letter L on your keyboard for a total of 20 frames.
You can watch the count on the lower right hand side of your screen in AS.
Open SimoneAni-MyBedroom
Go to Edit, select all.
Go to Edit, copy.
Activate your tag.
Go to Edit, select all.
Go to Edit, make sure Propagate Paste is selected.
Go to Edit, Paste, paste into selected frames.
Position on your tag and click into place.
Play and save.
Don't forget to add your name.
You can see my name tutorial HERE.
To save:
Go to File, Save as, enter the name of your file and select the folder to save to.
Now click on Customize:
Under COLORS TAB:
Number of colors: 255 Colors
Create palette by: OPTIMIZED OCTREE
Reduce colors by: Error Diffusion
Under OPTIMIZATIONS TAB:
set a check mark beside the second, third and forth choices. UN-check the 1st and last.
Under PARTIAL TRANSPARENCY:
check Convert pixels less than 92
Yes, blend with this color: change to white #FFFFFF
Click OK. Click Next, next, next, next.
Play your animation.
At times your animation may or will come out terrible. Optimization in Animation Shop is not the greatest.
You can play around will your settings, especially under the Tab: Optimization. I change this setting at times from anywhere between 70 and 100.
Some people add a white background. To add background, go to Animation: Animation Properties, select Opaque and change color to white.
Hope you enjoyed this tutorial,
Hugs Simone
Please, always direct people to my blog to download my animations.
Do not load to any other download site and don't claim as your own.
Tutorial written by SophisticatSimone aka Lorraine Halle on Thursday, May 23, 2013.
Please click on TAG to see in full size.
••• Supplies needed to complete this tutorial. •••
________________________________________________________________________
Programs: Paint Shop Pro, I'm using version 10. Animation Shop 3.
Plugin : Gradient Glow by Eye Candy 4000 (for name)
Font used: MsMadi
Tube of choice: I'm using "REGGIE REY" by Pinup Bombshells from SATC.
Scrap Kit : I'm using "Toyland" by Bibi's Collection from SATC
Animation: SimoneAni-MyBedroom
Mask: Masks0121
________________________________________________________________________
♥♥♥
Save your tag often. Nothing like working long and hard on a tag and PSP crashes.
♥♥♥
Open paper 5 and duplicate. Close original.
Re-size your paper by 80%. Make sure resolution is set to 72 dpi.
When re-sizing any of the elements or papers make sure the resolution is always set to 72.
Apply Mask 0121 to paper and merge group. Add noise:
Random, 7, monochrome checked.
C/P element 90 as a new layer and re-size by 80%. Move to the lower right hand side of tag.
Add drop shadow.
C/P element 44 as a new layer and position a little higher on the canvas. Add light drop shadow.
Make sure it's behind the bed layer.
C/P element 72 as a new layer. Remove a portion of the plant down at the bottom. Activate your Selection Tool, set to Rectangle, Mode: add shift, feather 0 and anti-alias checked.
Just drag out a box over the bottom portion of plant and then hit delete on keyboard. Right click on tag to de-select or go to Selections, select none.
Duplicate this layer and mirror. Add drop shadow to each. They should frame the screen.
C/P element 88 as a new layer. Re-size by 60%. Position high in middle of tag. Should appear a little above the screen. Duplicate and re-size by 50%. Move it to far right side of tag. Add drop shadow to each balloon.
C/P element 83 as a new layer. Re-size by 60% and move in front of bed and to the right of tag at bottom. Add drop shadow.
C/P element 80 as a new layer and move to the side of bed on left side of tag. Add drop shadow.
C/P element 71 as a new layer and Re-size by 50%. Move behind the bed, over the screen. Duplicate, re-size by 50% and move to the far left of tag, in front of toy box.
Back to original purple plant layer. Duplicate and re-size by 80% and move down in front of bed, to the right hand side of mid-line. Should be near the toy chest. Add drop shadows to all these flowers.
C/P element 18 as a new layer and re-size by 55%. Move to top of tag, on right side of blue balloon. Add drop shadow.
C/P element 84 as a new layer and position middle of tag and a little higher than center.
C/P your tube as a new layer. Re-size if need be. I didn't re-size mine, but I deleted some of her legs. I used selection tool, set to rectangle and feather of 10. I also mirrored her position and placed her on left side of tag at foot of bed. Add drop shadow. Make sure she is behind/below the bed layer in layers palette.
OK click on your screen element in layers palette to activate.
C/P element 87 as a new layer. Free rotate by 20 degrees to the right and re-size by 60%. Make sure it's tucked behind the toy box and the blue plant. Add drop shadow.
Click on tube layer to activate.
C/P element 91 as a new layer and mirror. Re-size by 60%. Move this little mouse in front of your tube down by her legs. Add drop shadow.
C/P element 21 as a new layer and re-size by 65%. Move to left hand side of tag at bottom of tag. Add drop shadow.
C/P element 31 as a new layer and re-size by 80%. Move to left hand side of tag at bottom of tag and place him on top of purple ball. Add drop shadow.
C/P element 73 as a new layer and re-size by 40%. Move to right lower hand side of tag in front of toy chest. Add drop shadow.
C/P element 23 as a new layer and re-size by 60%. Move to bottom of tag. Add drop shadow.
C/P element 77 as a new layer, re-size by 80% and have him sit on top of bed canape. Add drop shadow.
C/P element 78 as a new layer, re-size by 70% and have him sit on top of bed. Add drop shadow.
C/P element 1as a new layer, re-size by 40% and have her sit on the toy chest on the right side of tag. Add drop shadow.
Go to Selections, select all.
Go to Edit, Crop to Selection.
Now to animate.
Go to Selections, select all.
Go to Edit and copy merged. Paste as a new animation in Animation Shop.
Hold your Ctrl key down and repeatedly hit letter L on your keyboard for a total of 20 frames.
You can watch the count on the lower right hand side of your screen in AS.
Open SimoneAni-MyBedroom
Go to Edit, select all.
Go to Edit, copy.
Activate your tag.
Go to Edit, select all.
Go to Edit, make sure Propagate Paste is selected.
Go to Edit, Paste, paste into selected frames.
Position on your tag and click into place.
Play and save.
Don't forget to add your name.
You can see my name tutorial HERE.
To save:
Go to File, Save as, enter the name of your file and select the folder to save to.
Now click on Customize:
Under COLORS TAB:
Number of colors: 255 Colors
Create palette by: OPTIMIZED OCTREE
Reduce colors by: Error Diffusion
Under OPTIMIZATIONS TAB:
set a check mark beside the second, third and forth choices. UN-check the 1st and last.
Under PARTIAL TRANSPARENCY:
check Convert pixels less than 92
Yes, blend with this color: change to white #FFFFFF
Click OK. Click Next, next, next, next.
Play your animation.
At times your animation may or will come out terrible. Optimization in Animation Shop is not the greatest.
You can play around will your settings, especially under the Tab: Optimization. I change this setting at times from anywhere between 70 and 100.
Some people add a white background. To add background, go to Animation: Animation Properties, select Opaque and change color to white.
Hope you enjoyed this tutorial,
Hugs Simone
Please, always direct people to my blog to download my animations.
Do not load to any other download site and don't claim as your own.
Tutorial written by SophisticatSimone aka Lorraine Halle on Thursday, May 23, 2013.
Saturday, May 18, 2013

♥♥♥
Please click on TAG to see in full size.
••• Supplies needed to complete this tutorial. •••
________________________________________________________________________
Programs: Paint Shop Pro, I'm using version 10. Animation Shop 3.
Plugin : MuRa Copies
Font used: Alice In Wonderland
Tube of choice: I'm using "Beautiful Darkness" by Danny Lee from SATC.
Scrap Kit : I'm using "Darkness" by Bibi's Collection from SATC
Animation: I'm using my own, SimoneAni-My Darkness
________________________________________________________________________
♥♥♥
Save your tag often. Nothing like working long and hard on a tag and PSP crashes.
♥♥♥
Open element 40 and duplicate. Please remember to always close your originals so you don't lose them.
Re-size all layers by 50%. Now re-size your canvas by 800 x 750. You re-size at the end.
Go to Effects, Plugins, MuRa Copies, Encircle. Enter the following numbers:
8
40
40
0
100
-25
100
0
100
0
0
30
0
OK
Duplicate and merge down. Now move to the far left side. Duplicate and mirror. Merge together.
Copy and paste element 46 as a new layer and move high on the tag, leave in center. Add drop shadow.
Copy and paste element 67 as a new layer, re-size by 70% and move to the left side of tag. Add drop shadow.
Copy and paste element 56 as a new layer and move to the right side of tag and add drop shadow.
Copy and paste element 68 as a new layer and move to the left side of tag. Using your selection tool, remove the extra at the bottom and add drop shadow.
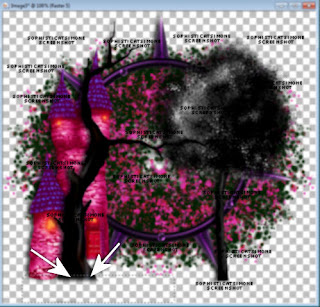
Copy and paste element 41 as a new layer and move to the right side of castle and add drop shadow. Duplicate and re-size by 76%. Move to the far right side of tag.
Copy and paste your tube as a new layer and re-size if needed. Add drop shadow.
Copy and paste element 57 as a new layer, move to lower portion of tag. Add drop shadow.
Copy and paste element 70 as a new layer, move a little lower so your tube isn't overly covered. Duplicate and merge down.
Copy and paste elements 24 and 73 as new elements and move them both to the right hand side of tag. Add drop shadow to each.
C/P element 1 as new layer and re-size by 50%. Move to left side and over tree trunk. Add Drop shadow.
Add any other element you feel would add to the tag.
Add artist copyright and scrap kit maker name.
Merge visible.
To Animate:
Go to Selections, select all.
Go to Edit and copy. Paste as a new animation in Animation Shop.
Hold your Ctrl key down and repeatedly hit letter L on your keyboard for a total of 19 frames.
You can watch the count on the lower right hand side of your screen in AS.
Open SimoneAni-My Darkness
Go to Edit, select all.
Go to Edit, copy.
Activate your tag.
Go to Edit, select all.
Go to Edit, make sure Propagate Paste is selected.
Go to Edit, Paste, paste into selected frames.
Position on your tag and click into place.
Play and save.
Don't forget to add your name.
You can see my name tutorial HERE.
To save:
Go to File, Save as, enter the name of your file and select the folder to save to.
Now click on Customize:
Under COLORS TAB:
Number of colors: 255 Colors
Create palette by: OPTIMIZED OCTREE
Reduce colors by: Error Diffusion
Under OPTIMIZATIONS TAB:
set a check mark beside the second, third and forth choices. UN-check the 1st and last.
Under PARTIAL TRANSPARENCY:
check Convert pixels less than 92
Yes, blend with this color: change to white #FFFFFF
Click OK. Click Next, next, next, next.
Play your animation.
At times your animation may or will come out terrible. Optimization in Animation Shop is not the greatest.
You can play around will your settings, especially under the Tab: Optimization. I change this setting at times from anywhere between 70 and 100.
Some people add a white background. To add background, go to Animation: Animation Properties, select Opaque and change color to white.
Hope you enjoyed this tutorial,
Hugs Simone
Please, always direct people to my blog to download my animations.
Do not load to any other download site and don't claim as your own.
Tutorial written by SophisticatSimone aka Lorraine Halle on Saturday, May 18, 2013.
Please click on TAG to see in full size.
••• Supplies needed to complete this tutorial. •••
________________________________________________________________________
Programs: Paint Shop Pro, I'm using version 10. Animation Shop 3.
Plugin : MuRa Copies
Font used: Alice In Wonderland
Tube of choice: I'm using "Beautiful Darkness" by Danny Lee from SATC.
Scrap Kit : I'm using "Darkness" by Bibi's Collection from SATC
Animation: I'm using my own, SimoneAni-My Darkness
________________________________________________________________________
♥♥♥
Save your tag often. Nothing like working long and hard on a tag and PSP crashes.
♥♥♥
Open element 40 and duplicate. Please remember to always close your originals so you don't lose them.
Re-size all layers by 50%. Now re-size your canvas by 800 x 750. You re-size at the end.
Go to Effects, Plugins, MuRa Copies, Encircle. Enter the following numbers:
8
40
40
0
100
-25
100
0
100
0
0
30
0
OK
Duplicate and merge down. Now move to the far left side. Duplicate and mirror. Merge together.
Copy and paste element 46 as a new layer and move high on the tag, leave in center. Add drop shadow.
Copy and paste element 67 as a new layer, re-size by 70% and move to the left side of tag. Add drop shadow.
Copy and paste element 56 as a new layer and move to the right side of tag and add drop shadow.
Copy and paste element 68 as a new layer and move to the left side of tag. Using your selection tool, remove the extra at the bottom and add drop shadow.

Copy and paste element 41 as a new layer and move to the right side of castle and add drop shadow. Duplicate and re-size by 76%. Move to the far right side of tag.
Copy and paste your tube as a new layer and re-size if needed. Add drop shadow.
Copy and paste element 57 as a new layer, move to lower portion of tag. Add drop shadow.
Copy and paste element 70 as a new layer, move a little lower so your tube isn't overly covered. Duplicate and merge down.
Copy and paste elements 24 and 73 as new elements and move them both to the right hand side of tag. Add drop shadow to each.
C/P element 1 as new layer and re-size by 50%. Move to left side and over tree trunk. Add Drop shadow.
Add any other element you feel would add to the tag.
Add artist copyright and scrap kit maker name.
Merge visible.
To Animate:
Go to Selections, select all.
Go to Edit and copy. Paste as a new animation in Animation Shop.
Hold your Ctrl key down and repeatedly hit letter L on your keyboard for a total of 19 frames.
You can watch the count on the lower right hand side of your screen in AS.
Open SimoneAni-My Darkness
Go to Edit, select all.
Go to Edit, copy.
Activate your tag.
Go to Edit, select all.
Go to Edit, make sure Propagate Paste is selected.
Go to Edit, Paste, paste into selected frames.
Position on your tag and click into place.
Play and save.
Don't forget to add your name.
You can see my name tutorial HERE.
To save:
Go to File, Save as, enter the name of your file and select the folder to save to.
Now click on Customize:
Under COLORS TAB:
Number of colors: 255 Colors
Create palette by: OPTIMIZED OCTREE
Reduce colors by: Error Diffusion
Under OPTIMIZATIONS TAB:
set a check mark beside the second, third and forth choices. UN-check the 1st and last.
Under PARTIAL TRANSPARENCY:
check Convert pixels less than 92
Yes, blend with this color: change to white #FFFFFF
Click OK. Click Next, next, next, next.
Play your animation.
At times your animation may or will come out terrible. Optimization in Animation Shop is not the greatest.
You can play around will your settings, especially under the Tab: Optimization. I change this setting at times from anywhere between 70 and 100.
Some people add a white background. To add background, go to Animation: Animation Properties, select Opaque and change color to white.
Hope you enjoyed this tutorial,
Hugs Simone
Please, always direct people to my blog to download my animations.
Do not load to any other download site and don't claim as your own.
Tutorial written by SophisticatSimone aka Lorraine Halle on Saturday, May 18, 2013.
Sunday, May 12, 2013

♥♥♥
Please click on TAG to see in full size.
••• Supplies needed to complete this tutorial. •••
________________________________________________________________________
Programs: Paint Shop Pro, I'm using version 10. Animation Shop 3.
Plugin : none
Font used: LD Edward
Tube of choice: I'm using "Amber" by Zlata from SATC.
Scrap Kit : I'm using "Purple Dreams" by Amy Marie Kits from SATC
Mask: SophisticatSimone-Mask61
Animation: SimoneAni-DreamNightGlitter
________________________________________________________________________
♥♥♥
Save your tag often. Nothing like working long and hard on a tag and PSP crashes.
♥♥♥
Open Mask61 in PSP and minimize.
Open a new image 700 x 650. Copy and paste paper 12 as a new layer on your canvas.
Close original.
Click on Raster 1. Go to Selections, select all.
Click on Raster 2. Go to Image, crop to Selection.
Copy and paste your tube as a new layer.
Copy and paste close up of tube as a new layer.
Move down to your paper and change Blend Mode to Luminance (L) and Opacity to 42.
Click on Raster 1. Go to Selections, select all.
Click on Raster 2. Go to Image, crop to Selection.
X-out your tube and Raster 1.
Click on Raster 2 and merge visible.
UN-hide your tube and Raster 1.
Copy and paste element 99 as a new layer and re-size by 65%. Position behind your tube low on your canvas. Leave in center of tag.
Copy and paste element 98 as a new layer. Position to the left on your canvas.
Copy and paste element 85 as a new layer and position in front of Eiffel Tower at bottom of tag.
Copy and paste element 1 as a new layer and position behind the Eiffel Tower on the left side of tag. Duplicate leaves, free rotate by 90 degrees and flip. Move the leaves to the right side of tag behind your tube. Using your lasso tool, remove the branch portion of this element.
Copy and paste element 56 as a new layer. Position behind your tube low on your canvas and in front of flower.
Copy and paste element 10 as a new layer. Position behind your tube high on canvas at top and at center.
Copy and paste element 2 as a new layer, free rotate right by 90 degrees and position to the left side of tag, behind Tower.
Copy and paste element 40 as a new layer and re-size by 50%. Position in front of your tube on the lower right hand side of tag.
Copy and paste element 43 as a new layer and re-size by 50%. Position in front of your tube on the lower right hand side of tag.
Copy and paste element 104 as a new layer and re-size by 50%. Position in front of Eiffel Tower lower left hand side of tag.
Copy and paste element 61 as a new layer. Position in background, near your tube.
Keep adding elements. Flowers, telephone, mask, ribbons and vase.
Add the glitter swirl, element 90 and 89 as new layer.
Add copyright and scrap kit maker credit.
Add your name and save.
Now to animate.
Go to Selections, select all.
Go to Edit and copy merged. Paste as a new animation in Animation Shop.
Hold your Ctrl key down and repeatedly hit letter L on your keyboard for a total of 18 frames.
You can watch the count on the lower right hand side of your screen in AS.
Open SimoneAni-DreamNightGlitter-MNG
Go to Edit, select all.
Go to Edit, copy.
Activate your tag.
Go to Edit, select all.
Go to Edit, make sure Propagate Paste is selected.
Go to Edit, Paste, paste into selected frames.
Position on your tag and click into place.
Play and save.
Don't forget to add your name.
You can see my name tutorial HERE.
To save:
Go to File, Save as, enter the name of your file and select the folder to save to.
Now click on Customize:
Under COLORS TAB:
Number of colors: 255 Colors
Create palette by: OPTIMIZED OCTREE
Reduce colors by: Error Diffusion
Under OPTIMIZATIONS TAB:
set a check mark beside the second, third and forth choices. UN-check the 1st and last.
Under PARTIAL TRANSPARENCY:
check Convert pixels less than 92
Yes, blend with this color: change to white #FFFFFF
Click OK. Click Next, next, next, next.
Play your animation.
At times your animation may or will come out terrible. Optimization in Animation Shop is not the greatest.
You can play around will your settings, especially under the Tab: Optimization. I change this setting at times from anywhere between 70 and 100.
Some people add a white background. To add background, go to Animation: Animation Properties, select Opaque and change color to white.
Hope you enjoyed this tutorial,
Hugs Simone
Please, always direct people to my blog to download my animations.
Do not load to any other download site and don't claim as your own.
Tutorial written by SophisticatSimone aka Lorraine Halle on Sunday, May 12, 2013.
Please click on TAG to see in full size.
••• Supplies needed to complete this tutorial. •••
________________________________________________________________________
Programs: Paint Shop Pro, I'm using version 10. Animation Shop 3.
Plugin : none
Font used: LD Edward
Tube of choice: I'm using "Amber" by Zlata from SATC.
Scrap Kit : I'm using "Purple Dreams" by Amy Marie Kits from SATC
Mask: SophisticatSimone-Mask61
Animation: SimoneAni-DreamNightGlitter
________________________________________________________________________
♥♥♥
Save your tag often. Nothing like working long and hard on a tag and PSP crashes.
♥♥♥
Open Mask61 in PSP and minimize.
Open a new image 700 x 650. Copy and paste paper 12 as a new layer on your canvas.
Close original.
Click on Raster 1. Go to Selections, select all.
Click on Raster 2. Go to Image, crop to Selection.
Copy and paste your tube as a new layer.
Copy and paste close up of tube as a new layer.
Move down to your paper and change Blend Mode to Luminance (L) and Opacity to 42.
Click on Raster 1. Go to Selections, select all.
Click on Raster 2. Go to Image, crop to Selection.
X-out your tube and Raster 1.
Click on Raster 2 and merge visible.
UN-hide your tube and Raster 1.
Copy and paste element 99 as a new layer and re-size by 65%. Position behind your tube low on your canvas. Leave in center of tag.
Copy and paste element 98 as a new layer. Position to the left on your canvas.
Copy and paste element 85 as a new layer and position in front of Eiffel Tower at bottom of tag.
Copy and paste element 1 as a new layer and position behind the Eiffel Tower on the left side of tag. Duplicate leaves, free rotate by 90 degrees and flip. Move the leaves to the right side of tag behind your tube. Using your lasso tool, remove the branch portion of this element.
Copy and paste element 56 as a new layer. Position behind your tube low on your canvas and in front of flower.
Copy and paste element 10 as a new layer. Position behind your tube high on canvas at top and at center.
Copy and paste element 2 as a new layer, free rotate right by 90 degrees and position to the left side of tag, behind Tower.
Copy and paste element 40 as a new layer and re-size by 50%. Position in front of your tube on the lower right hand side of tag.
Copy and paste element 43 as a new layer and re-size by 50%. Position in front of your tube on the lower right hand side of tag.
Copy and paste element 104 as a new layer and re-size by 50%. Position in front of Eiffel Tower lower left hand side of tag.
Copy and paste element 61 as a new layer. Position in background, near your tube.
Keep adding elements. Flowers, telephone, mask, ribbons and vase.
Add the glitter swirl, element 90 and 89 as new layer.
Add copyright and scrap kit maker credit.
Add your name and save.
Now to animate.
Go to Selections, select all.
Go to Edit and copy merged. Paste as a new animation in Animation Shop.
Hold your Ctrl key down and repeatedly hit letter L on your keyboard for a total of 18 frames.
You can watch the count on the lower right hand side of your screen in AS.
Open SimoneAni-DreamNightGlitter-MNG
Go to Edit, select all.
Go to Edit, copy.
Activate your tag.
Go to Edit, select all.
Go to Edit, make sure Propagate Paste is selected.
Go to Edit, Paste, paste into selected frames.
Position on your tag and click into place.
Play and save.
Don't forget to add your name.
You can see my name tutorial HERE.
To save:
Go to File, Save as, enter the name of your file and select the folder to save to.
Now click on Customize:
Under COLORS TAB:
Number of colors: 255 Colors
Create palette by: OPTIMIZED OCTREE
Reduce colors by: Error Diffusion
Under OPTIMIZATIONS TAB:
set a check mark beside the second, third and forth choices. UN-check the 1st and last.
Under PARTIAL TRANSPARENCY:
check Convert pixels less than 92
Yes, blend with this color: change to white #FFFFFF
Click OK. Click Next, next, next, next.
Play your animation.
At times your animation may or will come out terrible. Optimization in Animation Shop is not the greatest.
You can play around will your settings, especially under the Tab: Optimization. I change this setting at times from anywhere between 70 and 100.
Some people add a white background. To add background, go to Animation: Animation Properties, select Opaque and change color to white.
Hope you enjoyed this tutorial,
Hugs Simone
Please, always direct people to my blog to download my animations.
Do not load to any other download site and don't claim as your own.
Tutorial written by SophisticatSimone aka Lorraine Halle on Sunday, May 12, 2013.
Saturday, May 11, 2013

♥♥♥
Please click on TAG to see in full size.
••• Supplies needed to complete this tutorial. •••
________________________________________________________________________
Programs: Paint Shop Pro, I'm using version 10. Animation Shop 3.
Plugin : Eye Candy: Gradient Glow for name
Font used: Feathergraphy Decoration
Tube of choice: I'm using "Red Mermaid" by Jay Trembly from SATC.
Scrap Kit : I'm using "An Ocean Between Us" by Disturbed Scraps from SATC
Animation: I'm using my own, SimoneAni-OceanApartTutorial
________________________________________________________________________
♥♥♥
Save your tag often. Nothing like working long and hard on a tag and PSP crashes.
♥♥♥
Open Masks0116-SophisticatSimone in PSP and minimize.
Open paper 013 and duplicate. Close original.
Promote background to layer.
Go to Image, Canvas Size and enter 700 x 700.
Apply mask. Merge group.
Copy and paste element 37 as a new layer and mirror.
Copy and paste tube as a new layer. Move down low on tag.
Add drop shadow.
Copy and paste element 38 as a new layer. Move behind your tube and off center to the right.
Using magic wand, click inside life saver. Expand selection by 9.
Add new raster layer and move below life saver. Flood fill layer with color of choice.
I used pink from my tube #fe8097.
Copy and paste tube close-up as a new layer and move within the selection.
Invert selection and delete.
Duplicate layer. On original close up layer, add blur of 3.
On top close up layer, change blend mode to screen.
Copy and paste element 014 as a new layer. Add a few trees around the life saver.
Add drop shadow. I also re-size a few layers and added a bit more around the life saver and down in front of the tube.
Copy and paste element 015 as a new layer. Add a few leaves around the life saver.
Add drop shadow.
Copy and paste element 016 as a new layer. Add a few of these grass like elements. They should be behind your tube. Make them different sizes. Add drop shadow.
Copy and paste element 001 as a new layer. Re-size by 50% and move to the right side of life saver. Add drop shadow.
Copy and paste element 017 as a new layer. Add drop shadow.
Copy and paste element 086 as a new layer. Add drop shadow. Move this layer behind the palm trees.
Copy and paste element 035 as a new layer. Add two of these grass like elements. They should be behind your tube. Add drop shadow.
Copy and paste element 022 as a new layer and move to right side and behind your tube. Add drop shadow. Mine appears behind her shoulder and arm.
Copy and paste element 30 and 31 as new layers and re-size. Add drop shadow to each and place in front of tube on right side of tag.
Copy and paste element 39 as a new layer and add drop shadow. Position in front of tube to the left side of tag.
Copy and paste element 46, re-size and move to the top portion of tag, over the life saver.
Copy and paste element 41 as a new layer and re-size. Position at bottom of tag in center of tag.
Copy and paste flower elements 4 and 5 as new layers and randomly add them to the bottom of tag. Duplicate a couple of times and re-size them. Add drop shadows.
Copy and paste element 53 as a new layer and re-size. Add to the top of tag and mirror. I free rotated to the left by 10 degrees. Add drop shadow.
Add element 43, re-size and add drop shadow. I placed mine to the right side.
Add element 32, re-size and add drop shadow. I placed mine to the right side below the flowers and poking out at bottom.
Add element
Add element 17, drop shadow.
If NOT animating:
Merge all visible and add copyright.
Add name. SAVE as PNG.
If animating:
Add artist copyright and scrap kit credit.
Go to Selections, select all.
Go to Edit and copy merged. Paste as a new animation in Animation Shop.
Hold your Ctrl key down and repeatedly hit letter L on your keyboard for a total of 17 frames.
You can watch the count on the lower right hand side of your screen in AS.
Open SimoneAni-Ocean Apart-002 (I also added 001).
Go to Edit, select all.
Go to Edit, copy.
Activate your tag.
Go to Edit, select all.
Go to Edit, make sure Propagate Paste is selected.
Go to Edit, Paste, paste into selected frames.
Position on your tag and click into place.
I deleted frame 17 and frame 1
Play and save.
Don't forget to add your name.
You can see my name tutorial HERE.
To save:
Go to File, Save as, enter the name of your file and select the folder to save to.
Now click on Customize:
Under COLORS TAB:
Number of colors: 255 Colors
Create palette by: OPTIMIZED OCTREE
Reduce colors by: Error Diffusion
Under OPTIMIZATIONS TAB:
set a check mark beside the second, third and forth choices. UN-check the 1st and last.
Under PARTIAL TRANSPARENCY:
check Convert pixels less than 92
Yes, blend with this color: change to white #FFFFFF
Click OK. Click Next, next, next, next.
Play your animation.
At times your animation may or will come out terrible. Optimization in Animation Shop is not the greatest.
You can play around will your settings, especially under the Tab: Optimization. I change this setting at times from anywhere between 70 and 100.
Some people add a white background. To add background, go to Animation: Animation Properties, select Opaque and change color to white.
Hope you enjoyed this tutorial,
Hugs Simone
Please, always direct people to my blog to download my animations.
Do not load to any other download site and don't claim as your own.
Tutorial written by SophisticatSimone aka Lorraine Halle on Saturday, May 11, 2013.
Please click on TAG to see in full size.
••• Supplies needed to complete this tutorial. •••
________________________________________________________________________
Programs: Paint Shop Pro, I'm using version 10. Animation Shop 3.
Plugin : Eye Candy: Gradient Glow for name
Font used: Feathergraphy Decoration
Tube of choice: I'm using "Red Mermaid" by Jay Trembly from SATC.
Scrap Kit : I'm using "An Ocean Between Us" by Disturbed Scraps from SATC
Animation: I'm using my own, SimoneAni-OceanApartTutorial
________________________________________________________________________
♥♥♥
Save your tag often. Nothing like working long and hard on a tag and PSP crashes.
♥♥♥
Open Masks0116-SophisticatSimone in PSP and minimize.
Open paper 013 and duplicate. Close original.
Promote background to layer.
Go to Image, Canvas Size and enter 700 x 700.
Apply mask. Merge group.
Copy and paste element 37 as a new layer and mirror.
Copy and paste tube as a new layer. Move down low on tag.
Add drop shadow.
Copy and paste element 38 as a new layer. Move behind your tube and off center to the right.
Using magic wand, click inside life saver. Expand selection by 9.
Add new raster layer and move below life saver. Flood fill layer with color of choice.
I used pink from my tube #fe8097.
Copy and paste tube close-up as a new layer and move within the selection.
Invert selection and delete.
Duplicate layer. On original close up layer, add blur of 3.
On top close up layer, change blend mode to screen.
Copy and paste element 014 as a new layer. Add a few trees around the life saver.
Add drop shadow. I also re-size a few layers and added a bit more around the life saver and down in front of the tube.
Copy and paste element 015 as a new layer. Add a few leaves around the life saver.
Add drop shadow.
Copy and paste element 016 as a new layer. Add a few of these grass like elements. They should be behind your tube. Make them different sizes. Add drop shadow.
Copy and paste element 001 as a new layer. Re-size by 50% and move to the right side of life saver. Add drop shadow.
Copy and paste element 017 as a new layer. Add drop shadow.
Copy and paste element 086 as a new layer. Add drop shadow. Move this layer behind the palm trees.
Copy and paste element 035 as a new layer. Add two of these grass like elements. They should be behind your tube. Add drop shadow.
Copy and paste element 022 as a new layer and move to right side and behind your tube. Add drop shadow. Mine appears behind her shoulder and arm.
Copy and paste element 30 and 31 as new layers and re-size. Add drop shadow to each and place in front of tube on right side of tag.
Copy and paste element 39 as a new layer and add drop shadow. Position in front of tube to the left side of tag.
Copy and paste element 46, re-size and move to the top portion of tag, over the life saver.
Copy and paste element 41 as a new layer and re-size. Position at bottom of tag in center of tag.
Copy and paste flower elements 4 and 5 as new layers and randomly add them to the bottom of tag. Duplicate a couple of times and re-size them. Add drop shadows.
Copy and paste element 53 as a new layer and re-size. Add to the top of tag and mirror. I free rotated to the left by 10 degrees. Add drop shadow.
Add element 43, re-size and add drop shadow. I placed mine to the right side.
Add element 32, re-size and add drop shadow. I placed mine to the right side below the flowers and poking out at bottom.
Add element
Add element 17, drop shadow.
If NOT animating:
Merge all visible and add copyright.
Add name. SAVE as PNG.
If animating:
Add artist copyright and scrap kit credit.
Go to Selections, select all.
Go to Edit and copy merged. Paste as a new animation in Animation Shop.
Hold your Ctrl key down and repeatedly hit letter L on your keyboard for a total of 17 frames.
You can watch the count on the lower right hand side of your screen in AS.
Open SimoneAni-Ocean Apart-002 (I also added 001).
Go to Edit, select all.
Go to Edit, copy.
Activate your tag.
Go to Edit, select all.
Go to Edit, make sure Propagate Paste is selected.
Go to Edit, Paste, paste into selected frames.
Position on your tag and click into place.
I deleted frame 17 and frame 1
Play and save.
Don't forget to add your name.
You can see my name tutorial HERE.
To save:
Go to File, Save as, enter the name of your file and select the folder to save to.
Now click on Customize:
Under COLORS TAB:
Number of colors: 255 Colors
Create palette by: OPTIMIZED OCTREE
Reduce colors by: Error Diffusion
Under OPTIMIZATIONS TAB:
set a check mark beside the second, third and forth choices. UN-check the 1st and last.
Under PARTIAL TRANSPARENCY:
check Convert pixels less than 92
Yes, blend with this color: change to white #FFFFFF
Click OK. Click Next, next, next, next.
Play your animation.
At times your animation may or will come out terrible. Optimization in Animation Shop is not the greatest.
You can play around will your settings, especially under the Tab: Optimization. I change this setting at times from anywhere between 70 and 100.
Some people add a white background. To add background, go to Animation: Animation Properties, select Opaque and change color to white.
Hope you enjoyed this tutorial,
Hugs Simone
Please, always direct people to my blog to download my animations.
Do not load to any other download site and don't claim as your own.
Tutorial written by SophisticatSimone aka Lorraine Halle on Saturday, May 11, 2013.

♥♥♥
Please click on TAG to see in full size.
••• Supplies needed to complete this tutorial. •••
________________________________________________________________________
Programs: Paint Shop Pro, I'm using version 10. Animation Shop 3.
Plugin : AAA Filters/ Blot and Smudge and Xero_Fritillary
Font used: Croissant
Tube of choice: I'm using "Beth" by Jose A Cano from SATC.
Scrap Kit : I'm using "Rock a Babe" by Bibi's Collection from SATC
Animation: I'm using my own, SimoneAni441-443
________________________________________________________________________
♥♥♥
Save your tag often. Nothing like working long and hard on a tag and PSP crashes.
♥♥♥
Open element 7 and duplicate. Close original.
Go to image and canvas size. Enter the new size of 700 x 650.
Re-size screen element to 90%, 72dpi, smart size.
Copy and paste element 2 as a new layer.
Copy and paste your tube as a new layer and re-size by 75%.
Using your magic wand, feather set to 0, Mode set to Add shift, Match mode set to RGB Value, Tolerance set to 12 and anti-alias
checked, select all the white portions of the screen.
Go to selections invert and promote selection to layer.
Leave selected.
In layers palette, highlight the original screen again and now copy and paste a close up of your tube. Position it where you can see
the majority of her/his face. Now hit delete on your screen.
Deselect. On promoted layer, (frame outline), add drop shadow.
On tube close up layer, change opacity to 40 and blend mode to Multiply.
Go to Effects/Plugins/ AAA Filters/ Blot and Smudge and enter:
Blot=10
Smudge=100
Go to Effects/Plugins/Xero/Fritillary and enter the following numbers:
10
100
0
0
X-out the red flower spill and merge visible.
Un-hide the flower spill element.
Copy and paste as a new layer element 68.
Move behind your screen layer. Place in the upper right hand corner of tag. See my tag for reference. Add drop shadow.
Copy and paste as a new layer element 64.
Move behind your screen layer. Place in the upper right hand corner of tag in front of palm trees. See my tag for reference.
Add drop shadow.
Copy and paste as a new layer element 63.
Move behind your screen layer. Place on the right side of the screen in front of palm trees and the red leaf. Duplicate and move that layer just a little lower. Add drop shadow to both.
Please click on TAG to see in full size.
••• Supplies needed to complete this tutorial. •••
________________________________________________________________________
Programs: Paint Shop Pro, I'm using version 10. Animation Shop 3.
Plugin : AAA Filters/ Blot and Smudge and Xero_Fritillary
Font used: Croissant
Tube of choice: I'm using "Beth" by Jose A Cano from SATC.
Scrap Kit : I'm using "Rock a Babe" by Bibi's Collection from SATC
Animation: I'm using my own, SimoneAni441-443
________________________________________________________________________
♥♥♥
Save your tag often. Nothing like working long and hard on a tag and PSP crashes.
♥♥♥
Open element 7 and duplicate. Close original.
Go to image and canvas size. Enter the new size of 700 x 650.
Re-size screen element to 90%, 72dpi, smart size.
Copy and paste element 2 as a new layer.
Copy and paste your tube as a new layer and re-size by 75%.
Using your magic wand, feather set to 0, Mode set to Add shift, Match mode set to RGB Value, Tolerance set to 12 and anti-alias
checked, select all the white portions of the screen.
Go to selections invert and promote selection to layer.
Leave selected.
In layers palette, highlight the original screen again and now copy and paste a close up of your tube. Position it where you can see
the majority of her/his face. Now hit delete on your screen.
Deselect. On promoted layer, (frame outline), add drop shadow.
On tube close up layer, change opacity to 40 and blend mode to Multiply.
Go to Effects/Plugins/ AAA Filters/ Blot and Smudge and enter:
Blot=10
Smudge=100
Go to Effects/Plugins/Xero/Fritillary and enter the following numbers:
10
100
0
0
X-out the red flower spill and merge visible.
Un-hide the flower spill element.
Copy and paste as a new layer element 68.
Move behind your screen layer. Place in the upper right hand corner of tag. See my tag for reference. Add drop shadow.
Copy and paste as a new layer element 64.
Move behind your screen layer. Place in the upper right hand corner of tag in front of palm trees. See my tag for reference.
Add drop shadow.
Copy and paste as a new layer element 63.
Move behind your screen layer. Place on the right side of the screen in front of palm trees and the red leaf. Duplicate and move that layer just a little lower. Add drop shadow to both.
Copy and paste as a new layer element 49.
Move behind your screen layer. Place on the left side of the screen. Add drop shadow to both.
I add a few more of these leaves just around the screen. You can duplicate, re-size and mirror. Add drop shadow to all layers.
Copy and paste element 60 as a new layer, re-size by 58 % and move to the right hand side of tag/screen and add drop shadow.
Merge all visible layers.
We will be working on top of the screen layer now. Nothing else for background unless you choose to add a mask layer, which I didn't.
Copy and paste your tube as a new layer. Move her to the bottom of screen and add drop shadow.
All elements will be below tube layer now.
Copy and paste element 66 as a new layer and move to the left. I didn't re-size but I did remove extra at the bottom. You can do
this by using your selection tool. Just select area to remove and delete. Add drop shadow. *On this layer in the layers palette,
double click it to open Layer properties box. Place check mark next to: Highlight in layers palette. Choose color of choice.*
Copy and paste element 46 as a new layer and move to the left. I re-sized by 40%. Duplicate and free rotate by 90 degrees to the
right. Position these flowers, by her hands and her head. Add drop shadow to each layer.
Paste the large flower again as a new layer and move this one to the right of tag and behind her legs. Re-size by 80% and Add drop shadow.
Copy and paste element 6 as a new layer and move to the left side of center. Add drop shadow.
Copy and paste element 40 as a new layer and move to the left side of center. Add drop shadow.
Remove extra that shows under your tube at the bottom of tag.
Copy and paste element 60 as a new layer and leave in center. Add drop shadow. Triplicate this layer and re-size them. Move them along the bottom of screen (in front) and create grassy area.
Add kitten element (79) as new layer, re-size and add drop shadow. This should be your top layer.
Element 15, which is bubbles, you can add here and there if you like.
Now merge all layers down to the highlighted layer in your layers palette. You added a check mark and color to it earlier.
This is your top layer.
Anything below that is merge down together.
You should have two layers.

Now to animate.
Make sure your bottom layer is active in layers palette.
Go to Selections, select all.
Go to Edit and copy merged. Paste as a new animation in Animation Shop.
Hold your Ctrl key down and repeatedly hit letter L on your keyboard for a total of 15 frames.
You can watch the count on the lower right hand side of your screen in AS.
Open SimoneAni443
Go to Edit, select all. Go to Animation / Flip
Go to Edit, copy.
Activate your tag.
Go to Edit, select all.
Go to Edit, make sure Propagate Paste is selected.
Go to Edit, Paste, paste into selected frames.
Position on your tag and click into place.
Play and save.
Don't forget to add your name.
You can see my name tutorial HERE.
To save:
Go to File, Save as, enter the name of your file and select the folder to save to.
Now click on Customize:
Under COLORS TAB:
Number of colors: 255 Colors
Create palette by: OPTIMIZED OCTREE
Reduce colors by: Error Diffusion
Under OPTIMIZATIONS TAB:
set a check mark beside the second, third and forth choices. UN-check the 1st and last.
Under PARTIAL TRANSPARENCY:
check Convert pixels less than 92
Yes, blend with this color: change to white #FFFFFF
Click OK. Click Next, next, next, next.
Play your animation.
At times your animation may or will come out terrible. Optimization in Animation Shop is not the greatest.
You can play around will your settings, especially under the Tab: Optimization. I change this setting at times from anywhere between 70 and 100.
Some people add a white background. To add background, go to Animation: Animation Properties, select Opaque and change color to white.
Hope you enjoyed this tutorial,
Hugs Simone
Please, always direct people to my blog to download my animations.
Do not load to any other download site and don't claim as your own.
Tutorial written by SophisticatSimone aka Lorraine Halle on Saturday, May 11, 2013.
Sunday, April 28, 2013

♥♥♥
Please click on TAG to see in full size.
••• Supplies needed to complete this tutorial. •••
________________________________________________________________________
Programs: Paint Shop Pro, I'm using version 10. Animation Shop 3.
Plugin : NONE
Font used: Bangle
Tube of choice: I'm using "Spring" by Alex Prihodko from Pics For Design
Scrap Kit : I'm using "Katy Love" by Bibi's Collection from SATC
Animations : Made by me, Mask0112, HERE.
Mask: Made by me, HERE.
________________________________________________________________________
♥♥♥
Save your tag often. Nothing like working long and hard on a tag and PSP crashes.
♥♥♥
Open Paper 9 from kit "Bibi Katy Love". Duplicate and close original. Re-size by 60% at 72 dpi and check Smart Size.
Right click in layers palette and promote background to layer.
Open your mask of choice in PSP. I'm using Mask0112-SophisticatSimone.
Activate your paper. Go to Layers, New Mask Layer, From Image.
In drop down list find your mask and select.
Check : Source luminance
and make sure Invert mask data is UN-checked.
Click OK.
Copy and paste element 83 as a new layer and re-size by 75%.
Move a little to the left and add drop shadow.
Copy and paste element 28 as a new layer and re-size by 45%.
Move to the left in front of tree and add drop shadow.
Copy and paste element 60 as a new layer and re-size by 25%.
Place anywhere on your tree and add drop shadow.
Copy and paste element 9 as a new layer and re-size by 30%.
Mirror image and place anywhere on your tree and add drop shadow.
Copy and paste element 61 as a new layer and re-size by 94%.
Move to the bottom of tag in front of tree layer.
Copy and paste your tube as a new layer. Place her/him on top of grass layer.
Add drop shadow.
Copy and paste element 26 as a new layer and re-size by 90%.
This layer should be between your mask layer and your tree layer.
You will notice a hard edge on the right hand side. Using your selection tool set to 20 feather, just select a small portion of that edge and delete. It should soften it up.
Copy and paste element 41 as a new layer and re-size by 45%.
Move this bird above your tube layer and place it on her knee and add drop shadow.
Copy and paste element 30 as a new layer and re-size by 45%.
Move the chest by the cat and add drop shadow.
Copy and paste element 46 as a new layer and re-size by 22%.
Move in front of tube at bottom of tag and add drop shadow.
Copy and paste element 68 as a new layer and re-size by 40%.
Move so the grass appears behind the tube and add drop shadow.
Do the same for element 51.
Add the sun, element 50 and re-size by 40. Move to the upper right hand side of tag.
Copy and paste element 45 and re-size by 35%. Place at the bottom of tag in front of tube.
Copy and paste element 82 and re-size by 35%. Place behind your cat element and in front of tree. Add drop shadow.
Copy and paste element 66 and re-size by 50%. Place at your tubes knees and behind your tube. Add drop shadow.
Copy and paste element 49 and re-size by 20%. Place at your tubes feet in front of tube and add drop shadow.Duplicate and move to the left side in front of chest.
Paste again as a new layer and re-size by 25%. Mirror and add drop shadow. Place in front of chest as well, but behind the 1st flower.
Add any other element that you think would fill any blank spots and add to the overall look of your tag.
Add artist copyright and scrap kit maker credit.
Save your tag in layers.
Make sure you've added drop shadows to all your layers.
Grab your crop tool and on tool bar where it says Snap crop rectangle to: choose "merged opaque".
Either click Apply or double click your tag.
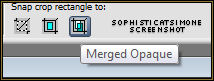
Add your name, merge all visible and save as a PNG.
♥♥♥
If you choose to animate, don't add your name yet.
Go to Selections, select all.
Go to Edit and copy merged. Paste as a new animation in Animation Shop.
Hold your Ctrl key down and repeatedly hit letter L on your keyboard for a total of 20 frames.
You can watch the count on the lower right hand side of your screen in AS.
Open SimoneAni-LazyDays-Tutorial
Go to Edit, select all.
Go to Edit, copy.
Activate your tag.
Go to Edit, select all.
Go to Edit, make sure Propagate Paste is selected.
Go to Edit, Paste, paste into selected frames.
Position on your tag and click into place.
Play and save.
Don't forget to add your name.
You can see my name tutorial HERE.
To save:
Go to File, Save as, enter the name of your file and select the folder to save to.
Now click on Customize:
Under COLORS TAB:
Number of colors: 255 Colors
Create palette by: OPTIMIZED OCTREE
Reduce colors by: Error Diffusion
Under OPTIMIZATIONS TAB:
set a check mark beside the second, third and forth choices. UN-check the 1st and last.
Under PARTIAL TRANSPARENCY:
check Convert pixels less than 92
Yes, blend with this color: change to white #FFFFFF
Click OK. Click Next, next, next, next.
Play your animation.
At times your animation may or will come out terrible. Optimization in Animation Shop is not the greatest.
You can play around will your settings, especially under the Tab: Optimization. I change this setting at times from anywhere between 70 and 100.
Some people add a white background. To add background, go to Animation: Animation Properties, select Opaque and change color to white.
Please click on TAG to see in full size.
••• Supplies needed to complete this tutorial. •••
________________________________________________________________________
Programs: Paint Shop Pro, I'm using version 10. Animation Shop 3.
Plugin : NONE
Font used: Bangle
Tube of choice: I'm using "Spring" by Alex Prihodko from Pics For Design
Scrap Kit : I'm using "Katy Love" by Bibi's Collection from SATC
Animations : Made by me, Mask0112, HERE.
Mask: Made by me, HERE.
________________________________________________________________________
♥♥♥
Save your tag often. Nothing like working long and hard on a tag and PSP crashes.
♥♥♥
Open Paper 9 from kit "Bibi Katy Love". Duplicate and close original. Re-size by 60% at 72 dpi and check Smart Size.
Right click in layers palette and promote background to layer.
Open your mask of choice in PSP. I'm using Mask0112-SophisticatSimone.
Activate your paper. Go to Layers, New Mask Layer, From Image.
In drop down list find your mask and select.
Check : Source luminance
and make sure Invert mask data is UN-checked.
Click OK.
Copy and paste element 83 as a new layer and re-size by 75%.
Move a little to the left and add drop shadow.
Copy and paste element 28 as a new layer and re-size by 45%.
Move to the left in front of tree and add drop shadow.
Copy and paste element 60 as a new layer and re-size by 25%.
Place anywhere on your tree and add drop shadow.
Copy and paste element 9 as a new layer and re-size by 30%.
Mirror image and place anywhere on your tree and add drop shadow.
Copy and paste element 61 as a new layer and re-size by 94%.
Move to the bottom of tag in front of tree layer.
Copy and paste your tube as a new layer. Place her/him on top of grass layer.
Add drop shadow.
Copy and paste element 26 as a new layer and re-size by 90%.
This layer should be between your mask layer and your tree layer.
You will notice a hard edge on the right hand side. Using your selection tool set to 20 feather, just select a small portion of that edge and delete. It should soften it up.
Copy and paste element 41 as a new layer and re-size by 45%.
Move this bird above your tube layer and place it on her knee and add drop shadow.
Copy and paste element 30 as a new layer and re-size by 45%.
Move the chest by the cat and add drop shadow.
Copy and paste element 46 as a new layer and re-size by 22%.
Move in front of tube at bottom of tag and add drop shadow.
Copy and paste element 68 as a new layer and re-size by 40%.
Move so the grass appears behind the tube and add drop shadow.
Do the same for element 51.
Add the sun, element 50 and re-size by 40. Move to the upper right hand side of tag.
Copy and paste element 45 and re-size by 35%. Place at the bottom of tag in front of tube.
Copy and paste element 82 and re-size by 35%. Place behind your cat element and in front of tree. Add drop shadow.
Copy and paste element 66 and re-size by 50%. Place at your tubes knees and behind your tube. Add drop shadow.
Copy and paste element 49 and re-size by 20%. Place at your tubes feet in front of tube and add drop shadow.Duplicate and move to the left side in front of chest.
Paste again as a new layer and re-size by 25%. Mirror and add drop shadow. Place in front of chest as well, but behind the 1st flower.
Add any other element that you think would fill any blank spots and add to the overall look of your tag.
Add artist copyright and scrap kit maker credit.
Save your tag in layers.
Make sure you've added drop shadows to all your layers.
Grab your crop tool and on tool bar where it says Snap crop rectangle to: choose "merged opaque".
Either click Apply or double click your tag.
Add your name, merge all visible and save as a PNG.
♥♥♥
If you choose to animate, don't add your name yet.
Go to Selections, select all.
Go to Edit and copy merged. Paste as a new animation in Animation Shop.
Hold your Ctrl key down and repeatedly hit letter L on your keyboard for a total of 20 frames.
You can watch the count on the lower right hand side of your screen in AS.
Open SimoneAni-LazyDays-Tutorial
Go to Edit, select all.
Go to Edit, copy.
Activate your tag.
Go to Edit, select all.
Go to Edit, make sure Propagate Paste is selected.
Go to Edit, Paste, paste into selected frames.
Position on your tag and click into place.
Play and save.
Don't forget to add your name.
You can see my name tutorial HERE.
To save:
Go to File, Save as, enter the name of your file and select the folder to save to.
Now click on Customize:
Under COLORS TAB:
Number of colors: 255 Colors
Create palette by: OPTIMIZED OCTREE
Reduce colors by: Error Diffusion
Under OPTIMIZATIONS TAB:
set a check mark beside the second, third and forth choices. UN-check the 1st and last.
Under PARTIAL TRANSPARENCY:
check Convert pixels less than 92
Yes, blend with this color: change to white #FFFFFF
Click OK. Click Next, next, next, next.
Play your animation.
At times your animation may or will come out terrible. Optimization in Animation Shop is not the greatest.
You can play around will your settings, especially under the Tab: Optimization. I change this setting at times from anywhere between 70 and 100.
Some people add a white background. To add background, go to Animation: Animation Properties, select Opaque and change color to white.
Hope you enjoyed this tutorial,
Hugs Simone
Please, always direct people to my blog to download my animations.
Do not load to any other download site and don't claim as your own.
Tutorial written by SophisticatSimone aka Lorraine Halle on Sunday, April 28, 2013.
Hugs Simone
Please, always direct people to my blog to download my animations.
Do not load to any other download site and don't claim as your own.
Tutorial written by SophisticatSimone aka Lorraine Halle on Sunday, April 28, 2013.
Monday, April 22, 2013

♥♥♥
Please click on TAG to see in full size.
••• Supplies needed to complete this tutorial. •••
________________________________________________________________________
Programs: Paint Shop Pro, I'm using version 10. Animation Shop 3.
Plugin :
Font used:
Tube of choice: I'm using Roxy by Diana Gali from SATC.
Scrap Kit : Roxy Rocks by Bibi's Collection found HERE
Mask: By me, Mask102SophisticatSimone HERE
Animations: By me, SimoneAni405 HERE
________________________________________________________________________
♥♥♥
Save your tag often. Nothing like working long and hard on a tag and PSP crashes.
Please click on TAG to see in full size.
••• Supplies needed to complete this tutorial. •••
________________________________________________________________________
Programs: Paint Shop Pro, I'm using version 10. Animation Shop 3.
Plugin :
Font used:
Tube of choice: I'm using Roxy by Diana Gali from SATC.
Scrap Kit : Roxy Rocks by Bibi's Collection found HERE
Mask: By me, Mask102SophisticatSimone HERE
Animations: By me, SimoneAni405 HERE
________________________________________________________________________
♥♥♥
Save your tag often. Nothing like working long and hard on a tag and PSP crashes.
♥♥♥
Let's begin!
Open Bibi Roxy Rocks Element (4). Copy and paste it as a new Image.
Close original. Re-size new image by 90% at 72dpi.
Copy and paste element (9) as a new layer and re-size by 70%. Re-position on your canvas as you like.
Select your crop tool and snap crop rectangle to Merged Opaque.
Go to Selections, Select all. Go to selections, Modify, contract by 10.
Go to Selections, Feather, 15.
Go to Selections, Invert and delete a couple of times by tapping delete key on your keyboard.
De-select.
Copy and paste element (75) as a new layer and re-size by 45% at 72dpi. Re-position on your canvas to the top.
Copy and paste element (79) as a new layer and re-size by 100% at 72dpi. Move to the left side of your canvas.
Duplicate layer and mirror.
Copy and paste element (82) as a new layer and re-size by 100% at 72dpi. Move to the left side of your canvas.
This layer should be below the speaker. So behind it.
Copy and paste element (5) as a new layer and re-size by 40% at 72dpi. Re-position on your canvas to the left side of tag, in front of speaker.
Copy and paste element (106) as a new layer and re-size by 100% at 72dpi. Move to the left side of your canvas at the top of tag and over the speaker.
Copy and paste element (48) as a new layer and re-size by 36% at 72dpi. Move to the right side of your canvas at the top of tag and over the speaker.
Copy and paste element (76) as a new layer and re-size by 57% at 72dpi. Move to the right side of your canvas at the bottom of tag and behind the speaker.
Copy and paste element (58) as a new layer and re-size by 55% at 72dpi. Move to the center of your canvas and behind the barrels.
Copy and paste element (6) as a new layer and re-size by 45% at 72dpi. Re-position on your canvas to the right side of tag, in front of speaker.
Copy and paste element (54) as a new layer and re-size by 45% at 72dpi. Re-position on your canvas to the left side of tag, in behind the speaker and glow.
Duplicate and mirror.
Continue this way with the following elements, 26, 33, 51, 56, 91. Don't forget to re-size them to your liking and position them around. Element 91, which is the
bow tie I placed on the dog.
Copy and paste your tube and re-size if needed.
Add drop shadow of choice to all elements.
Add background paper. I used paper 7.
Select your crop tool and snap crop rectangle to Merged Opaque.
Open Mask of choice and apply to background paper.
Merge group.
Add artist copyright and license number.
Add scrap kit maker credit.
Add your name and merge all visible and save as a PNG.
If animating please do the following.
Go to edit and UN-merge.
Go to Selections, select all.
Go to Edit and copy merged. Paste as a new animation in Animation Shop.
Hold your Ctrl key down and repeatedly hit letter L on your keyboard for a total of 18 frames.
You can watch the count on the lower right hand side of your screen in AS.
Open SimoneAni405
Go to Edit, select all.
Go to Edit, copy.
Activate your tag.
Go to Edit, select all.
Go to Edit, make sure Propagate Paste is selected.
Go to Edit, Paste, paste into selected frames.
Position on your tag and click into place.
Let's begin!
Open Bibi Roxy Rocks Element (4). Copy and paste it as a new Image.
Close original. Re-size new image by 90% at 72dpi.
Copy and paste element (9) as a new layer and re-size by 70%. Re-position on your canvas as you like.
Select your crop tool and snap crop rectangle to Merged Opaque.
Go to Selections, Select all. Go to selections, Modify, contract by 10.
Go to Selections, Feather, 15.
Go to Selections, Invert and delete a couple of times by tapping delete key on your keyboard.
De-select.
Copy and paste element (75) as a new layer and re-size by 45% at 72dpi. Re-position on your canvas to the top.
Copy and paste element (79) as a new layer and re-size by 100% at 72dpi. Move to the left side of your canvas.
Duplicate layer and mirror.
Copy and paste element (82) as a new layer and re-size by 100% at 72dpi. Move to the left side of your canvas.
This layer should be below the speaker. So behind it.
Copy and paste element (5) as a new layer and re-size by 40% at 72dpi. Re-position on your canvas to the left side of tag, in front of speaker.
Copy and paste element (106) as a new layer and re-size by 100% at 72dpi. Move to the left side of your canvas at the top of tag and over the speaker.
Copy and paste element (48) as a new layer and re-size by 36% at 72dpi. Move to the right side of your canvas at the top of tag and over the speaker.
Copy and paste element (76) as a new layer and re-size by 57% at 72dpi. Move to the right side of your canvas at the bottom of tag and behind the speaker.
Copy and paste element (58) as a new layer and re-size by 55% at 72dpi. Move to the center of your canvas and behind the barrels.
Copy and paste element (6) as a new layer and re-size by 45% at 72dpi. Re-position on your canvas to the right side of tag, in front of speaker.
Copy and paste element (54) as a new layer and re-size by 45% at 72dpi. Re-position on your canvas to the left side of tag, in behind the speaker and glow.
Duplicate and mirror.
Continue this way with the following elements, 26, 33, 51, 56, 91. Don't forget to re-size them to your liking and position them around. Element 91, which is the
bow tie I placed on the dog.
Copy and paste your tube and re-size if needed.
Add drop shadow of choice to all elements.
Add background paper. I used paper 7.
Select your crop tool and snap crop rectangle to Merged Opaque.
Open Mask of choice and apply to background paper.
Merge group.
Add artist copyright and license number.
Add scrap kit maker credit.
Add your name and merge all visible and save as a PNG.
If animating please do the following.
Go to edit and UN-merge.
Go to Selections, select all.
Go to Edit and copy merged. Paste as a new animation in Animation Shop.
Hold your Ctrl key down and repeatedly hit letter L on your keyboard for a total of 18 frames.
You can watch the count on the lower right hand side of your screen in AS.
Open SimoneAni405
Go to Edit, select all.
Go to Edit, copy.
Activate your tag.
Go to Edit, select all.
Go to Edit, make sure Propagate Paste is selected.
Go to Edit, Paste, paste into selected frames.
Position on your tag and click into place.

Play and save.
Don't forget to add your name.
You can see my name tutorial HERE.
To save:
Go to File, Save as, enter the name of your file and select the folder to save to.
Now click on Customize:
Under COLORS TAB:
Number of colors: 255 Colors
Create palette by: OPTIMIZED OCTREE
Reduce colors by: Error Diffusion
Under OPTIMIZATIONS TAB:
set a check mark beside the second, third and forth choices. UN-check the 1st and last.
Under PARTIAL TRANSPARENCY:
check Convert pixels less than 92
Yes, blend with this color: change to white #FFFFFF
Click OK. Click Next, next, next, next.
Play your animation.
At times your animation may or will come out terrible. Optimization in Animation Shop is not the greatest.
You can play around will your settings, especially under the Tab: Optimization. I change this setting at times from anywhere between 70 and 100.
Some people add a white background. To add background, go to Animation: Animation Properties, select Opaque and change color to white.
Hope you enjoyed this tutorial,
Hugs Simone
Please, always direct people to my blog to download my animations.
Do not load to any other download site and don't claim as your own.
Tutorial written by SophisticatSimone aka Lorraine Halle on Monday, April 22, 2013.
Hugs Simone
Please, always direct people to my blog to download my animations.
Do not load to any other download site and don't claim as your own.
Tutorial written by SophisticatSimone aka Lorraine Halle on Monday, April 22, 2013.
Saturday, April 20, 2013

♥♥♥
Please click on TAG to see in full size.
••• Supplies needed to complete this tutorial. •••
________________________________________________________________________
Programs: Paint Shop Pro, I'm using version 10. Animation Shop 3.
Plugin :Eye Candy 4000(gradient glow).
Font used: Strumpf Std Contour
Tube of choice: I'm using Roxy by Diana Gali from SATC.
Scrap Kit : Roxy Rocker by Disturbed Scraps from SATC.
Mask: By me, Mask99SophisticatSimone HERE
Animations: By me, SimoneAni-RoxyRocker HERE
Please click on TAG to see in full size.
••• Supplies needed to complete this tutorial. •••
________________________________________________________________________
Programs: Paint Shop Pro, I'm using version 10. Animation Shop 3.
Plugin :Eye Candy 4000(gradient glow).
Font used: Strumpf Std Contour
Tube of choice: I'm using Roxy by Diana Gali from SATC.
Scrap Kit : Roxy Rocker by Disturbed Scraps from SATC.
Mask: By me, Mask99SophisticatSimone HERE
Animations: By me, SimoneAni-RoxyRocker HERE
________________________________________________________________________
♥♥♥
Save your tag often. Nothing like working long and hard on a tag and PSP crashes.
♥♥♥
Open a new image 700 x 700.
Copy and paste your tube close up as a new layer.
Using your mover tool, move close up until you see the face. Position to the right of tag.
Duplicate and mirror.
Grab your lasso tool, feather set to 12, on each layer remove any obstructing feather.
With her, it's her hair. Look at my screen shot. On each layer I removed a portion of hair.
Once you've completed that, flood fill Raster 1 layer (bottom layer) with black.
Merge all visible.
Open Mask99SophisticatSimone.
Make sure your tag is active and go to Layers, New Mask Layer, From Image.
Find mask in drop down list and apply.
Merge group.
Copy and paste element 089 as a new layer on your tag and re-size by 80 %.
Make sure it's your top layer and you can move it down low on your tag.
Add drop shadow.
Copy and paste your tube as a new layer. Re-size if needed. I re-sized mine by 30%.
Copy and paste element 090 as a new layer and re-size by 62 %. Move below skyline layer.
Position at top of tag. Add drop shadow.
Copy and paste element 064 as a new layer and re-size by 74 %. Move onto the skyline layer at bottom.
Add drop shadow.
Copy and paste element 025 as a new layer and re-size by 84 %. Move onto the skyline layer at bottom.
Add drop shadow.
Copy and paste element 026 as a new layer and mirror. Move behind the skyline layer at top.
Add drop shadow.
Copy and paste element 082 as a new layer and re-size by 35%. Move to the top left hand side of tag. Add drop shadow.
Copy and paste element 065 as a new layer and re-size by 76%. Move behind your tube and in front of skyline. Add
drop shadow.
Copy and paste element 022 as a new layer and re-size by 90%. Move behind your fence and warning sign and in front
of skyline. Add drop shadow.
Copy and paste element 061 as a new layer and re-size by 51%. Move as the top layer and center at the bottom of tag.
Add drop shadow.
Copy and paste element 001 as a new layer and re-size by 80%. Move as the top layer and to the left of the tag. Add
drop shadow.
Copy and paste element 099 as a new layer and re-size. Move on top of your barrel and add drop shadow.
Copy and paste element 094 as a new layer and re-size by 28%. Move on top of your charm. Add drop shadow.
Copy and paste element 114 as a new layer. Move to the left of tag. Move it below the charm in the layers palette.
Add artist copyright and scrap kit maker credit.
Go to Selections, select all.
Go to Animation Shop and right click paste as a new animation.
Hold your Ctrl key down and repeatedly hit letter L on your keyboard for a total of 20 frames.
You can watch the count on the lower right hand side of your screen in AS.
Open SimoneAni-RoxyRockerTutorial
Go to Edit, select all.
Go to Edit, copy.
Activate your tag.
Go to Edit, select all.
Go to Edit, make sure Propagate Paste is selected.
Go to Edit, Paste, paste into selected frames.
Position on your tag and click into place. I placed it low on tag near speaker.
Cull animation, go to Animation, cull animation:
Remove 1 frame every 2 frames.
You should be left with 10 frames.
Play and save.
Don't forget to add your name.
You can see my name tutorial HERE.
You can either do it animated like in the tutorial or still.
To save:
Go to File, Save as, enter the name of your file and select the folder to save to.
Now click on Customize:
Under COLORS TAB:
Number of colors: 255 Colors
Create palette by: OPTIMIZED OCTREE
Reduce colors by: Error Diffusion
Under OPTIMIZATIONS TAB:
set a check mark beside the second, third and forth choices.
UN-check the 1st and last.
Under PARTIAL TRANSPARENCY:
check Convert pixels less than 92
Yes, blend with this color: change to white #FFFFFF
Click OK. Click Next, next, next, next.
Play your animation.
At times your animation may or will come out terrible.
Optimization in Animation Shop is not the greatest.
You can play around will your settings, especially under the Tab: Optimization.
I change this setting at times from anywhere between 70 and 100.
Some people add a white background. To add background, go to Animation:
Animation Properties, select Opaque and change color to white.
Hope you enjoyed this tutorial,
Hugs Simone
Please, always direct people to my blog to download my animations.
Do not load to any other download site and don't claim as your own.
Tutorial written by SophisticatSimone aka Lorraine Halle on Saturday, April 20, 2013.
Posted by Simone aka Lorraine 0 comments
♥♥♥
Save your tag often. Nothing like working long and hard on a tag and PSP crashes.
♥♥♥
Open a new image 700 x 700.
Copy and paste your tube close up as a new layer.
Using your mover tool, move close up until you see the face. Position to the right of tag.
Duplicate and mirror.
Grab your lasso tool, feather set to 12, on each layer remove any obstructing feather.
With her, it's her hair. Look at my screen shot. On each layer I removed a portion of hair.
Once you've completed that, flood fill Raster 1 layer (bottom layer) with black.
Merge all visible.
Open Mask99SophisticatSimone.
Make sure your tag is active and go to Layers, New Mask Layer, From Image.
Find mask in drop down list and apply.
Merge group.
Copy and paste element 089 as a new layer on your tag and re-size by 80 %.
Make sure it's your top layer and you can move it down low on your tag.
Add drop shadow.
Copy and paste your tube as a new layer. Re-size if needed. I re-sized mine by 30%.
Copy and paste element 090 as a new layer and re-size by 62 %. Move below skyline layer.
Position at top of tag. Add drop shadow.
Copy and paste element 064 as a new layer and re-size by 74 %. Move onto the skyline layer at bottom.
Add drop shadow.
Copy and paste element 025 as a new layer and re-size by 84 %. Move onto the skyline layer at bottom.
Add drop shadow.
Copy and paste element 026 as a new layer and mirror. Move behind the skyline layer at top.
Add drop shadow.
Copy and paste element 082 as a new layer and re-size by 35%. Move to the top left hand side of tag. Add drop shadow.
Copy and paste element 065 as a new layer and re-size by 76%. Move behind your tube and in front of skyline. Add
drop shadow.
Copy and paste element 022 as a new layer and re-size by 90%. Move behind your fence and warning sign and in front
of skyline. Add drop shadow.
Copy and paste element 061 as a new layer and re-size by 51%. Move as the top layer and center at the bottom of tag.
Add drop shadow.
Copy and paste element 001 as a new layer and re-size by 80%. Move as the top layer and to the left of the tag. Add
drop shadow.
Copy and paste element 099 as a new layer and re-size. Move on top of your barrel and add drop shadow.
Copy and paste element 094 as a new layer and re-size by 28%. Move on top of your charm. Add drop shadow.
Copy and paste element 114 as a new layer. Move to the left of tag. Move it below the charm in the layers palette.
Add artist copyright and scrap kit maker credit.
Go to Selections, select all.
Go to Animation Shop and right click paste as a new animation.
Hold your Ctrl key down and repeatedly hit letter L on your keyboard for a total of 20 frames.
You can watch the count on the lower right hand side of your screen in AS.
Open SimoneAni-RoxyRockerTutorial
Go to Edit, select all.
Go to Edit, copy.
Activate your tag.
Go to Edit, select all.
Go to Edit, make sure Propagate Paste is selected.
Go to Edit, Paste, paste into selected frames.
Position on your tag and click into place. I placed it low on tag near speaker.
Cull animation, go to Animation, cull animation:
Remove 1 frame every 2 frames.
You should be left with 10 frames.
Play and save.
Don't forget to add your name.
You can see my name tutorial HERE.
You can either do it animated like in the tutorial or still.
To save:
Go to File, Save as, enter the name of your file and select the folder to save to.
Now click on Customize:
Under COLORS TAB:
Number of colors: 255 Colors
Create palette by: OPTIMIZED OCTREE
Reduce colors by: Error Diffusion
Under OPTIMIZATIONS TAB:
set a check mark beside the second, third and forth choices.
UN-check the 1st and last.
Under PARTIAL TRANSPARENCY:
check Convert pixels less than 92
Yes, blend with this color: change to white #FFFFFF
Click OK. Click Next, next, next, next.
Play your animation.
At times your animation may or will come out terrible.
Optimization in Animation Shop is not the greatest.
You can play around will your settings, especially under the Tab: Optimization.
I change this setting at times from anywhere between 70 and 100.
Some people add a white background. To add background, go to Animation:
Animation Properties, select Opaque and change color to white.
Hope you enjoyed this tutorial,
Hugs Simone
Please, always direct people to my blog to download my animations.
Do not load to any other download site and don't claim as your own.
Tutorial written by SophisticatSimone aka Lorraine Halle on Saturday, April 20, 2013.
Posted by Simone aka Lorraine 0 comments

♥♥♥
Please click on TAG to see in full size.
••• Supplies needed to complete this tutorial. •••
__________________________________________________________________
Programs: Paint Shop Pro, I'm using version 10. Animation Shop 3.
Plugin :Eye Candy 4000(gradient glow).
Font used: Will & Grace
Tube of choice: I'm using the Blanche by SkyScraps from SATC.
Scrap Kit : Dark Riding Hood by Bibi's Collection found HERE
Mask: by me, mask 101 HERE
Animations: by me, Pixie Dust download HERE I used SimoneAni398
__________________________________________________________________
♥♥♥
Save your tag often. Nothing like working long and hard on a tag and PSP crashes.
♥♥♥
Open element 94. Copy and paste as a new layer and re-sizy by 50%.
Free rotate 90 degrees to the right.
Re-size canvas to 700 x 700. Move the frame to the right side of tag.
Using your magic wand, feather 0, click inside the frame.
Go to selections, modify, expand by 10.
Open paper of choice, I'm using paper 1.
Copy and paste as a new layer and position area of choice within the frame.
Go to selections, invert and delete.
Move your paper below your frame.
Keep selection.
Copy and paste your tube close up as a new layer.
Delete extra.
De-select.
Duplicate the close up layer.
Both layers should have blend mode set to Overlay.
On the bottom close up layer blur the image by 3.
On the paper layer below the frame and closeups, let's select it and Colorize.
Colorize paper, Go to Adjust, Hue and Saturation, Colorize:
Hue: 146, Saturation: 147.
Merge visible.
Copy and paste element 27 as a new layer. Re-size by 50%.
Move this element on the left side of the frame and add drop shadow.
Copy and paste your tube as a new layer. Re-size if you need to. I re-sized mine by
50%. Mirror and add drop shadow.
Copy and paste element 45 as a new layer and re-size by 50%. Place on right side of
frame and add drop shadow.
Copy and paste element 90 as a new layer and re-size by 50%. Place on left side of
frame, behind the castle and add drop shadow.
Copy and paste element 82 as a new layer and re-size by 50%. Place on left side of
frame, behind the castle, in front of mushrooms and add drop shadow.
Copy and paste element 96 as a new layer and re-size by 50%. Place on the upper
right side of frame/tag, duplicate and merge down.
Duplicate and go to Image, Rotate, free rotate to the right by 90 degrees.
Move this to the bottom of the frame and in the layers palette drag it down to just
above the frame layer. Add drop shadow to both.
Copy and paste element 48 as a new layer and duplicate, merge down.
Position as your top layer and in front of your tube and the bottom of tag.
Copy and paste element 47 as a new layer and tuck it behind your tube layer and the
castle layer, but leave it on the left hand side of the tag. Duplicate and mirror.
This log should be dragged down to the very bottom in the layers palette, so behind
your frame layer. Add drop shadow to both logs.
Copy and paste paper of choice as a new layer. I used the same paper (1).
Move this paper to the very bottom.
Select your crop tool, where it says "snap crop rectangle to:" select Merged Opaque.
Double click on your tag.
Let's add our mask to this layer.
Open Mask0101SophisticatSimone.
Make sure your tag is active and go to Layers, New Mask Layer, From Image.
Find mask in drop down list and apply.
Merge group. Only the mask layers group.
Copy and paste element 26 as a new layer and move behind your tube layer and the
log layer. Add Drop shadow.
Copy and paste element 24 as a new layer, and re-size by 37% and move to the front
of frame to the left. See my tag for reference.
Copy and paste element 18 as a new layer, and move behind castle layer and behind
your tube. To the left of the frame. See my tag for reference. Add drop shadow.
Add any other elements to make it your own. I added more mushrooms, the rabbit,
the second log, feathers, butterflies and rock. Those are all in the kit.
Add artist copyright and scrap kit maker credit.
Save as PNG if you are NOT animating.
_____________________________________________________
Please click on TAG to see in full size.
••• Supplies needed to complete this tutorial. •••
__________________________________________________________________
Programs: Paint Shop Pro, I'm using version 10. Animation Shop 3.
Plugin :Eye Candy 4000(gradient glow).
Font used: Will & Grace
Tube of choice: I'm using the Blanche by SkyScraps from SATC.
Scrap Kit : Dark Riding Hood by Bibi's Collection found HERE
Mask: by me, mask 101 HERE
Animations: by me, Pixie Dust download HERE I used SimoneAni398
__________________________________________________________________
♥♥♥
Save your tag often. Nothing like working long and hard on a tag and PSP crashes.
♥♥♥
Open element 94. Copy and paste as a new layer and re-sizy by 50%.
Free rotate 90 degrees to the right.
Re-size canvas to 700 x 700. Move the frame to the right side of tag.
Using your magic wand, feather 0, click inside the frame.
Go to selections, modify, expand by 10.
Open paper of choice, I'm using paper 1.
Copy and paste as a new layer and position area of choice within the frame.
Go to selections, invert and delete.
Move your paper below your frame.
Keep selection.
Copy and paste your tube close up as a new layer.
Delete extra.
De-select.
Duplicate the close up layer.
Both layers should have blend mode set to Overlay.
On the bottom close up layer blur the image by 3.
On the paper layer below the frame and closeups, let's select it and Colorize.
Colorize paper, Go to Adjust, Hue and Saturation, Colorize:
Hue: 146, Saturation: 147.
Merge visible.
Copy and paste element 27 as a new layer. Re-size by 50%.
Move this element on the left side of the frame and add drop shadow.
Copy and paste your tube as a new layer. Re-size if you need to. I re-sized mine by
50%. Mirror and add drop shadow.
Copy and paste element 45 as a new layer and re-size by 50%. Place on right side of
frame and add drop shadow.
Copy and paste element 90 as a new layer and re-size by 50%. Place on left side of
frame, behind the castle and add drop shadow.
Copy and paste element 82 as a new layer and re-size by 50%. Place on left side of
frame, behind the castle, in front of mushrooms and add drop shadow.
Copy and paste element 96 as a new layer and re-size by 50%. Place on the upper
right side of frame/tag, duplicate and merge down.
Duplicate and go to Image, Rotate, free rotate to the right by 90 degrees.
Move this to the bottom of the frame and in the layers palette drag it down to just
above the frame layer. Add drop shadow to both.
Copy and paste element 48 as a new layer and duplicate, merge down.
Position as your top layer and in front of your tube and the bottom of tag.
Copy and paste element 47 as a new layer and tuck it behind your tube layer and the
castle layer, but leave it on the left hand side of the tag. Duplicate and mirror.
This log should be dragged down to the very bottom in the layers palette, so behind
your frame layer. Add drop shadow to both logs.
Copy and paste paper of choice as a new layer. I used the same paper (1).
Move this paper to the very bottom.
Select your crop tool, where it says "snap crop rectangle to:" select Merged Opaque.
Double click on your tag.
Let's add our mask to this layer.
Open Mask0101SophisticatSimone.
Make sure your tag is active and go to Layers, New Mask Layer, From Image.
Find mask in drop down list and apply.
Merge group. Only the mask layers group.
Copy and paste element 26 as a new layer and move behind your tube layer and the
log layer. Add Drop shadow.
Copy and paste element 24 as a new layer, and re-size by 37% and move to the front
of frame to the left. See my tag for reference.
Copy and paste element 18 as a new layer, and move behind castle layer and behind
your tube. To the left of the frame. See my tag for reference. Add drop shadow.
Add any other elements to make it your own. I added more mushrooms, the rabbit,
the second log, feathers, butterflies and rock. Those are all in the kit.
Add artist copyright and scrap kit maker credit.
Save as PNG if you are NOT animating.
_____________________________________________________
Now to animate.
Go to Selections, select all.
Go to Edit and copy merged. Paste as a new animation in Animation Shop.
Hold your Ctrl key down and repeatedly hit letter L on your keyboard for a total of 16 frames.
You can watch the count on the lower right hand side of your screen in AS.
Open SimoneAni398
Go to Edit, select all.
Go to Edit, copy.
Activate your tag.
Go to Edit, select all.
Go to Edit, make sure Propagate Paste is selected.
Go to Edit, Paste, paste into selected frames.
Position on your tag and click into place.
Play and save.
Don't forget to add your name.
You can see my name tutorial HERE.
You can either do it animated like in the tutorial or still.
To save:
Go to File, Save as, enter the name of your file and select the folder to save to.
Now click on Customize:
Under COLORS TAB:
Number of colors: 255 Colors
Create palette by: OPTIMIZED OCTREE
Reduce colors by: Error Diffusion
Under OPTIMIZATIONS TAB:
set a check mark beside the second, third and forth choices. UN-check the 1st and
last.
Under PARTIAL TRANSPARENCY:
check Convert pixels less than 92
Yes, blend with this color: change to white #FFFFFF
Click OK. Click Next, next, next, next.
Play your animation.
At times your animation may or will come out terrible.
Optimization in Animation Shop is not the greatest.
You can play around will your settings, especially under the Tab: Optimization.
I change this setting at times from anywhere between 70 and 100.
Some people add a white background. To add background, go to Animation:
Animation Properties, select Opaque and change color to white.
Hope you enjoyed this tutorial,
Hugs Simone
Please, always direct people to my blog to download my animations.
Do not load to any other download site and don't claim as your own.
Tutorial written by SophisticatSimone aka Lorraine Halle on Saturday, April 20, 2013.
Go to Selections, select all.
Go to Edit and copy merged. Paste as a new animation in Animation Shop.
Hold your Ctrl key down and repeatedly hit letter L on your keyboard for a total of 16 frames.
You can watch the count on the lower right hand side of your screen in AS.
Open SimoneAni398
Go to Edit, select all.
Go to Edit, copy.
Activate your tag.
Go to Edit, select all.
Go to Edit, make sure Propagate Paste is selected.
Go to Edit, Paste, paste into selected frames.
Position on your tag and click into place.
Play and save.
Don't forget to add your name.
You can see my name tutorial HERE.
You can either do it animated like in the tutorial or still.
To save:
Go to File, Save as, enter the name of your file and select the folder to save to.
Now click on Customize:
Under COLORS TAB:
Number of colors: 255 Colors
Create palette by: OPTIMIZED OCTREE
Reduce colors by: Error Diffusion
Under OPTIMIZATIONS TAB:
set a check mark beside the second, third and forth choices. UN-check the 1st and
last.
Under PARTIAL TRANSPARENCY:
check Convert pixels less than 92
Yes, blend with this color: change to white #FFFFFF
Click OK. Click Next, next, next, next.
Play your animation.
At times your animation may or will come out terrible.
Optimization in Animation Shop is not the greatest.
You can play around will your settings, especially under the Tab: Optimization.
I change this setting at times from anywhere between 70 and 100.
Some people add a white background. To add background, go to Animation:
Animation Properties, select Opaque and change color to white.
Hope you enjoyed this tutorial,
Hugs Simone
Please, always direct people to my blog to download my animations.
Do not load to any other download site and don't claim as your own.
Tutorial written by SophisticatSimone aka Lorraine Halle on Saturday, April 20, 2013.

♥♥♥
Please click on TAG to see in full size.
••• Supplies needed to complete this tutorial. •••
________________________________________________________________________
Programs : Paint Shop Pro, I'm using version 10. Animation Shop 3.
Plugin : MuRa Copies, Redfield(seamless workshop), Eye Candy 4000(gradient glow).
Font used: Do I like Stripes?
Tube of choice : I'm using the sweet angelic tube Maria by Alexander McMillan from SATC.
Scrap Kit : Matching scrap kit Marie by Bibi's Collection found HERE
Animations : by me, Pixie Dust set 395-400 download HERE in the tag I'm using 396
________________________________________________________________________
♥♥♥
Save your tag often. Nothing like working long and hard on a tag and PSP crashes.
♥♥♥
Let's make a tile first.
Open a new image 500x500.
Copy and paste your tube as a new image on this canvas.
Go to Effects, Plugins, MuRa Copies.
Select : Wallpaper/rotate. Default settings.
Merge down.
Select your crop tool and select Merged Opaque.
Go to Adjust, blur, gaussian blur, 25.
Go to Adjust, add/remove noise, add noise:
Check: Gaussian
Noise: 23%
Monochrome: checked
Go to Effects, Reflection effects, Kaleidoscope.
Enter the following:
Horizontal offset : -74
Vertical offset : -30
Rotation angle : 245
Scale factor : -37
Number of petals : 7
Number of orbits : 1
Radial suction : 70
Edge Mode: Wrap.
If you don't like this look, you can play around with your settings till you find something you like. This worked for me =)
Go to Effects/Plugins/Redfield/ Seamless Workshop
Click Preset 1 in the drop down box.
Click on the green check make.
You will empty space on your canvas, so copy this tile and paste as a new layer.
Minimize and close the other one, we are done with it.
Open a new image 700 x 700.
Double click on your background material palette,
Select pattern, and find the tile you just created.
Scale : 100 Angle : 0
Activate your food fill tool and fill your image canvas with your pattern.
Open BIBIMARIE ELEMS (8) from the kit.
Go to Layers, New Mask Layer, from image.
In drop down box, find BIBIMARIE ELEMS (8)
Apply mask.
In layers palette, right click and merge group.
Now copy and paste BIBIMARIE ELEMS (8) as a new layer on your mask layer.
You should have this:
Copy and paste BIBIMARIE ELEMS (56) as a new layer on your tag.
Re-size by 70%.
Add drop shadow:
V : 12
H : 7
Opacity : 50
Blur : 20.29
Color : black
Copy and paste your tube as a new layer and re-size if you need to.
I re-sized mine by 68%.
Add drop shadow of choice.
Copy and paste element 54 as a new layer and re-size by 45%.
Move to the left side of tube. Add drop shadow of choice.
Copy and paste element 55 as a new layer and re-size by 45%.
Have this bear sit on the chair. Add drop shadow of choice.
Copy and paste element 34 as a new layer and re-size by 70%.
Move this layer below all other layers but above the mask layer. Have it peek out on the right hand side.
Duplicate and mirror.
Add drop shadow of choice.
Copy and paste element 36 as a new layer and re-size by 70%.
This layer should be above the brown leaves. Free rotate to the right by 90 degrees.
Have it peek out on the right hand side.
Duplicate and mirror.
Add drop shadow of choice.
Copy and paste element 16 as a new layer.
Move to the right side of tube and as top layer. Add drop shadow of choice.
Copy and paste element 59 as a new layer and re-size by 25%.
Have this bird sit on bear's head. Add drop shadow of choice.
Copy and paste element 3 as a new layer and re-size by 25%.
Move as top layer and position to the left side of tag.
Duplicate, free rotate by 90 degrees and move over a little bit.
Duplicate, free rotate by 90 degrees and move over a little bit.
Duplicate, free rotate by 90 degrees and move over a little bit.
Line them up and add drop shadow to each one.
Copy and paste element 22 and re-size. Move to the upper right hand side.
Place above Mask layer and below the white element that was used as mask.
Add drop shadow.
Copy and paste element 25. Move to the upper right hand side.
Place above the double frame layer. Add drop shadow.
Copy and paste element 58 and re-size. Move to the left hand side of tag and place between the brown leaves and the white element.
Select your text tool.
Using font : Do I like Stripes?
Font size : 120 and your background material palette still set to your pattern.
Type your name out.
Add a very small drop shadow: V=0, H=-1, Opacity=60, Bur=1, Color=black
Add gradient glow using Eye Candy 4000.
See my name tutorial HERE.
Add large drop shadow: V=2, H=8, Opacity=50, Bur=10, Color=black.
Add artist copyright and scrap kit maker credit.
Save as PNG.
Please click on TAG to see in full size.
••• Supplies needed to complete this tutorial. •••
________________________________________________________________________
Programs : Paint Shop Pro, I'm using version 10. Animation Shop 3.
Plugin : MuRa Copies, Redfield(seamless workshop), Eye Candy 4000(gradient glow).
Font used: Do I like Stripes?
Tube of choice : I'm using the sweet angelic tube Maria by Alexander McMillan from SATC.
Scrap Kit : Matching scrap kit Marie by Bibi's Collection found HERE
Animations : by me, Pixie Dust set 395-400 download HERE in the tag I'm using 396
________________________________________________________________________
♥♥♥
Save your tag often. Nothing like working long and hard on a tag and PSP crashes.
♥♥♥
Let's make a tile first.
Open a new image 500x500.
Copy and paste your tube as a new image on this canvas.
Go to Effects, Plugins, MuRa Copies.
Select : Wallpaper/rotate. Default settings.
Merge down.
Select your crop tool and select Merged Opaque.
Go to Adjust, blur, gaussian blur, 25.
Go to Adjust, add/remove noise, add noise:
Check: Gaussian
Noise: 23%
Monochrome: checked
Go to Effects, Reflection effects, Kaleidoscope.
Enter the following:
Horizontal offset : -74
Vertical offset : -30
Rotation angle : 245
Scale factor : -37
Number of petals : 7
Number of orbits : 1
Radial suction : 70
Edge Mode: Wrap.
If you don't like this look, you can play around with your settings till you find something you like. This worked for me =)
Go to Effects/Plugins/Redfield/ Seamless Workshop
Click Preset 1 in the drop down box.
Click on the green check make.
You will empty space on your canvas, so copy this tile and paste as a new layer.
Minimize and close the other one, we are done with it.
Open a new image 700 x 700.
Double click on your background material palette,
Select pattern, and find the tile you just created.
Scale : 100 Angle : 0
Activate your food fill tool and fill your image canvas with your pattern.
Open BIBIMARIE ELEMS (8) from the kit.
Go to Layers, New Mask Layer, from image.
In drop down box, find BIBIMARIE ELEMS (8)
Apply mask.
In layers palette, right click and merge group.
Now copy and paste BIBIMARIE ELEMS (8) as a new layer on your mask layer.
You should have this:

Copy and paste BIBIMARIE ELEMS (56) as a new layer on your tag.
Re-size by 70%.
Add drop shadow:
V : 12
H : 7
Opacity : 50
Blur : 20.29
Color : black
Copy and paste your tube as a new layer and re-size if you need to.
I re-sized mine by 68%.
Add drop shadow of choice.
Copy and paste element 54 as a new layer and re-size by 45%.
Move to the left side of tube. Add drop shadow of choice.
Copy and paste element 55 as a new layer and re-size by 45%.
Have this bear sit on the chair. Add drop shadow of choice.
Copy and paste element 34 as a new layer and re-size by 70%.
Move this layer below all other layers but above the mask layer. Have it peek out on the right hand side.
Duplicate and mirror.
Add drop shadow of choice.
Copy and paste element 36 as a new layer and re-size by 70%.
This layer should be above the brown leaves. Free rotate to the right by 90 degrees.
Have it peek out on the right hand side.
Duplicate and mirror.
Add drop shadow of choice.
Copy and paste element 16 as a new layer.
Move to the right side of tube and as top layer. Add drop shadow of choice.
Copy and paste element 59 as a new layer and re-size by 25%.
Have this bird sit on bear's head. Add drop shadow of choice.
Copy and paste element 3 as a new layer and re-size by 25%.
Move as top layer and position to the left side of tag.
Duplicate, free rotate by 90 degrees and move over a little bit.
Duplicate, free rotate by 90 degrees and move over a little bit.
Duplicate, free rotate by 90 degrees and move over a little bit.
Line them up and add drop shadow to each one.
Copy and paste element 22 and re-size. Move to the upper right hand side.
Place above Mask layer and below the white element that was used as mask.
Add drop shadow.
Copy and paste element 25. Move to the upper right hand side.
Place above the double frame layer. Add drop shadow.
Copy and paste element 58 and re-size. Move to the left hand side of tag and place between the brown leaves and the white element.
Select your text tool.
Using font : Do I like Stripes?
Font size : 120 and your background material palette still set to your pattern.
Type your name out.
Add a very small drop shadow: V=0, H=-1, Opacity=60, Bur=1, Color=black
Add gradient glow using Eye Candy 4000.
See my name tutorial HERE.
Add large drop shadow: V=2, H=8, Opacity=50, Bur=10, Color=black.
Add artist copyright and scrap kit maker credit.
Save as PNG.
If you are animating please see any of my other animation tutorials and follow insturctions.
I used SimoneAni396 for this tag.
SAVE.
Hope you enjoyed this tutorial,
Hugs Simone
Please, always direct people to my blog to download my animations.
Do not load to any other download site and don't claim as your own.
Tutorial written by SophisticatSimone aka Lorraine Halle on Saturday, April 20, 2013.
Hugs Simone
Please, always direct people to my blog to download my animations.
Do not load to any other download site and don't claim as your own.
Tutorial written by SophisticatSimone aka Lorraine Halle on Saturday, April 20, 2013.
Thursday, April 18, 2013

♥♥♥
Please click on TAG to see in full size.
••• Supplies needed to complete this tutorial. •••
________________________________________________________________________
Programs: Paint Shop Pro, I'm using version 10. Animation Shop 3.
Plugin : none
Font used: A&S Motherload
Tube of choice: I'm using the kitty tube found in her scrap kit "Fiesta Tropicana"
Scrap Kit : Fiesta Tropicana by Angelica S
Mask: by me, Mask100SophisticatSimone HERE
Animations: by me, Tropical Bugs download HERE
________________________________________________________________________
♥♥♥
Save your tag often. Nothing like working long and hard on a tag and PSP crashes.
♥♥♥
Please click on TAG to see in full size.
••• Supplies needed to complete this tutorial. •••
________________________________________________________________________
Programs: Paint Shop Pro, I'm using version 10. Animation Shop 3.
Plugin : none
Font used: A&S Motherload
Tube of choice: I'm using the kitty tube found in her scrap kit "Fiesta Tropicana"
Scrap Kit : Fiesta Tropicana by Angelica S
Mask: by me, Mask100SophisticatSimone HERE
Animations: by me, Tropical Bugs download HERE
________________________________________________________________________
♥♥♥
Save your tag often. Nothing like working long and hard on a tag and PSP crashes.
♥♥♥
Open paper 02, duplicate and re-size by 87%, resolution 72 dpi. Close original.
In Layers palette, right click and promote background to layer.
Open your mask in PSP. I'm using Mask0100Sophisticatsimone.
Make sure you activate your tag.
Go to Layers, New Mask Layer, From Image.
Find the mask in Source window, check : Source luminance and UN-check : Invert mask data.
Click OK.
In layers palette, right click on mask layer and merge group.
Duplicate layer and merge down.
Close Mask.
Open element 116 and C/P as a new layer on your tag. Close original.
Re-size by 60% and move the kitty down low on the tag.
Add this drop shadow: V=-4, H=8, Opacity=83, Blur=15.94, Color=Black. Check : Shadow on new layer.
Select your PICK tool. Your shadow layer will have nodes on it.
Holding your shift key down, click on the lower left hand node and drag out about 1cm.
Holding your shift key down, click on the upper left hand node and drag up and out to the left a little bit.
Lower the opacity on this layer to 69 (If you find it too dark that is).
Open element 41 and C/P as a new layer on your tag. Close original.
Re-size by 75% and move this palm tree to the right side of tag and below the cat in layers palette.
Add this drop shadow: V=0, H=-12, Opacity=54, Blur=17.39, Color=Black. Uncheck : Shadow on new layer.
Open element 117 and C/P as a new layer on your tag. Close original.
Re-size by 60% and move the parrot in the upper left hand corner of your tag.
Add this drop shadow: V=7, H=11, Opacity=51, Blur=14.49, Color=Black.
Open element 45 and C/P as a new layer on your tag. Close original.
Re-size by 30% and move the hut to the left of tag about midway on your tag.
Add this drop shadow: V=1, H=4, Opacity=66, Blur=12, Color=Black.
Open element 06 and C/P as a new layer on your tag. Close original.
Re-size by 30% and move the leaf behind your kitty on the left side on your tag.
Add this drop shadow: V=0, H=-3, Opacity=66, Blur=8, Color=Black.
Open element 39 and C/P as a new layer on your tag. Close original.
Re-size by 30% and move the drum to the right side of tag and kitty.
In layers palette it should be the layer above the palm tree.
Add this drop shadow: V=0, H=-3, Opacity=66, Blur=8, Color=Black.
Open element 38 and C/P as a new layer on your tag. Close original.
Re-size by 35% and move the drink to the left side of tag.
Add this drop shadow: V=0, H=6, Opacity=66, Blur=8, Color=Black.
Open element 33 and C/P as a new layer on your tag. Close original.
Re-size by 35% and move the flower behind the drum in layers palette and in front of palm tree.
Wedge it between those two elements on the tag.
Add this drop shadow: V=-4, H=-6, Opacity=47, Blur=12, Color=Black.
Open element 36 and C/P as a new layer on your tag. Close original.
Re-size by 30% and move the flower behind the yellow flower in layers palette and in front of palm tree.
Duplicate layer and mirror. Move it near the kitty on the left hand side.
On 1st big flower add this drop shadow: V=-4, H=-6, Opacity=47, Blur=12, Color=Black.
On 2nd small flower add this drop shadow: V=3, H=-4, Opacity=57, Blur=8, Color=Black.
Open element 32 and C/P as a new layer on your tag. Close original.
Re-size by 38% and move the pineapple behind the drink and beside the flower.
Add this drop shadow: V=3, H=-4, Opacity=57, Blur=8, Color=Black.
Open element 48 and C/P as a new layer on your tag. Close original.
Position behind the palm trees and to the right side of tag.
Add this drop shadow: V=-4, H=-6, Opacity=47, Blur=12, Color=Black.
Open element 61 and C/P as a new layer on your tag. Close original.
Re-size by 23% and position this charm on your drum, dangling.
Add this drop shadow: V=7, H=11, Opacity=50, Blur=14.49, Color=Black.
Open element 76 and C/P as a new layer on your tag. Close original.
Re-size by 19%. Duplicate. On top layer, change Blend Mode to Multiple. Merge down.
Flip image and move down in front of kitty.
Add this drop shadow: V=0, H=-3, Opacity=66, Blur=8, Color=Black.
Open element 114 and C/P as a new layer on your tag. Close original.
Re-size by 46% and move behind the kitty. Duplicate and free rotate to the left by 25 degrees.
Re-size by 50%, sharpen.
On origianl add this drop shadow: V=0, H=-2, Opacity=66, Blur=8, Color=Black.
On re-sized add this drop shadow: V=0, H=-3, Opacity=66, Blur=8, Color=Black.
Open element 41 and C/P as a new layer on your tag. Close original.
Re-size by 50% and mirror. Move this palm tree behind the kitty and all the little elements at the front.
Add this drop shadow: V=-4, H=8, Opacity=63, Blur=15.94, Color=Black.
Once you've positioned all elements the way you want on your tag, add artist copyright and scrap kit maker credit.
You may also add your name at this time or wait until after the animation is added if you are making numerous tags for others.
You can also at this time save as png and be finished.
To animate:
Go to Selections, select all.
Go to edit and copy.
In animation shop, right click and paste as a new animation.
Hold Ctrl key down and tap letter L repeatedly for a total of 13 frames.
Open SimoneAni-TropicalFeverBUG-Noshadow.
Go to Edit, select all.
Go to Edit, click Propagate Paste.
Go to Edit, copy.
Activate your tag.
Go to Edit, select all.
Go to Edit, Paste, Paste into selected frames.
Position the bug wings near the kitty.
See screenshot.
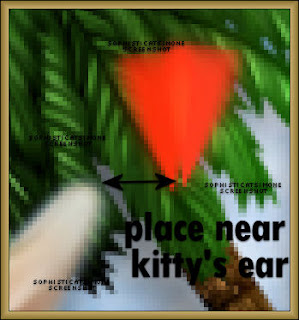
Open SimoneAni-TropicalFeverBUG2-NOshadow.
Go to Edit, select all.
Go to Edit, copy.
Activate your tag.
Go to Edit, select all.
Go to Edit, Paste, Paste into selected frames.
Position the bug wings near the first animation.
See screenshot.
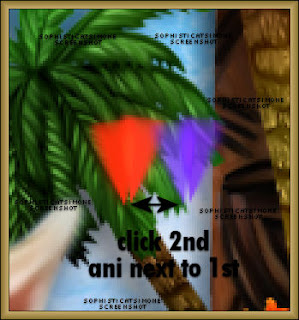
Delete frames 2, 12, and 13.
Or none at all, it's up to you.
You can hold your ctrl key bottom as you click on those frames only.
Once they are highlighted, hit your delete key on keyboard.
Play your animation.
If you are happy, save as gif.
In Layers palette, right click and promote background to layer.
Open your mask in PSP. I'm using Mask0100Sophisticatsimone.
Make sure you activate your tag.
Go to Layers, New Mask Layer, From Image.
Find the mask in Source window, check : Source luminance and UN-check : Invert mask data.
Click OK.
In layers palette, right click on mask layer and merge group.
Duplicate layer and merge down.
Close Mask.
Open element 116 and C/P as a new layer on your tag. Close original.
Re-size by 60% and move the kitty down low on the tag.
Add this drop shadow: V=-4, H=8, Opacity=83, Blur=15.94, Color=Black. Check : Shadow on new layer.
Select your PICK tool. Your shadow layer will have nodes on it.
Holding your shift key down, click on the lower left hand node and drag out about 1cm.
Holding your shift key down, click on the upper left hand node and drag up and out to the left a little bit.
Lower the opacity on this layer to 69 (If you find it too dark that is).
Open element 41 and C/P as a new layer on your tag. Close original.
Re-size by 75% and move this palm tree to the right side of tag and below the cat in layers palette.
Add this drop shadow: V=0, H=-12, Opacity=54, Blur=17.39, Color=Black. Uncheck : Shadow on new layer.
Open element 117 and C/P as a new layer on your tag. Close original.
Re-size by 60% and move the parrot in the upper left hand corner of your tag.
Add this drop shadow: V=7, H=11, Opacity=51, Blur=14.49, Color=Black.
Open element 45 and C/P as a new layer on your tag. Close original.
Re-size by 30% and move the hut to the left of tag about midway on your tag.
Add this drop shadow: V=1, H=4, Opacity=66, Blur=12, Color=Black.
Open element 06 and C/P as a new layer on your tag. Close original.
Re-size by 30% and move the leaf behind your kitty on the left side on your tag.
Add this drop shadow: V=0, H=-3, Opacity=66, Blur=8, Color=Black.
Open element 39 and C/P as a new layer on your tag. Close original.
Re-size by 30% and move the drum to the right side of tag and kitty.
In layers palette it should be the layer above the palm tree.
Add this drop shadow: V=0, H=-3, Opacity=66, Blur=8, Color=Black.
Open element 38 and C/P as a new layer on your tag. Close original.
Re-size by 35% and move the drink to the left side of tag.
Add this drop shadow: V=0, H=6, Opacity=66, Blur=8, Color=Black.
Open element 33 and C/P as a new layer on your tag. Close original.
Re-size by 35% and move the flower behind the drum in layers palette and in front of palm tree.
Wedge it between those two elements on the tag.
Add this drop shadow: V=-4, H=-6, Opacity=47, Blur=12, Color=Black.
Open element 36 and C/P as a new layer on your tag. Close original.
Re-size by 30% and move the flower behind the yellow flower in layers palette and in front of palm tree.
Duplicate layer and mirror. Move it near the kitty on the left hand side.
On 1st big flower add this drop shadow: V=-4, H=-6, Opacity=47, Blur=12, Color=Black.
On 2nd small flower add this drop shadow: V=3, H=-4, Opacity=57, Blur=8, Color=Black.
Open element 32 and C/P as a new layer on your tag. Close original.
Re-size by 38% and move the pineapple behind the drink and beside the flower.
Add this drop shadow: V=3, H=-4, Opacity=57, Blur=8, Color=Black.
Open element 48 and C/P as a new layer on your tag. Close original.
Position behind the palm trees and to the right side of tag.
Add this drop shadow: V=-4, H=-6, Opacity=47, Blur=12, Color=Black.
Open element 61 and C/P as a new layer on your tag. Close original.
Re-size by 23% and position this charm on your drum, dangling.
Add this drop shadow: V=7, H=11, Opacity=50, Blur=14.49, Color=Black.
Open element 76 and C/P as a new layer on your tag. Close original.
Re-size by 19%. Duplicate. On top layer, change Blend Mode to Multiple. Merge down.
Flip image and move down in front of kitty.
Add this drop shadow: V=0, H=-3, Opacity=66, Blur=8, Color=Black.
Open element 114 and C/P as a new layer on your tag. Close original.
Re-size by 46% and move behind the kitty. Duplicate and free rotate to the left by 25 degrees.
Re-size by 50%, sharpen.
On origianl add this drop shadow: V=0, H=-2, Opacity=66, Blur=8, Color=Black.
On re-sized add this drop shadow: V=0, H=-3, Opacity=66, Blur=8, Color=Black.
Open element 41 and C/P as a new layer on your tag. Close original.
Re-size by 50% and mirror. Move this palm tree behind the kitty and all the little elements at the front.
Add this drop shadow: V=-4, H=8, Opacity=63, Blur=15.94, Color=Black.
Once you've positioned all elements the way you want on your tag, add artist copyright and scrap kit maker credit.
You may also add your name at this time or wait until after the animation is added if you are making numerous tags for others.
You can also at this time save as png and be finished.
To animate:
Go to Selections, select all.
Go to edit and copy.
In animation shop, right click and paste as a new animation.
Hold Ctrl key down and tap letter L repeatedly for a total of 13 frames.
Open SimoneAni-TropicalFeverBUG-Noshadow.
Go to Edit, select all.
Go to Edit, click Propagate Paste.
Go to Edit, copy.
Activate your tag.
Go to Edit, select all.
Go to Edit, Paste, Paste into selected frames.
Position the bug wings near the kitty.
See screenshot.

Open SimoneAni-TropicalFeverBUG2-NOshadow.
Go to Edit, select all.
Go to Edit, copy.
Activate your tag.
Go to Edit, select all.
Go to Edit, Paste, Paste into selected frames.
Position the bug wings near the first animation.
See screenshot.

Delete frames 2, 12, and 13.
Or none at all, it's up to you.
You can hold your ctrl key bottom as you click on those frames only.
Once they are highlighted, hit your delete key on keyboard.
Play your animation.
If you are happy, save as gif.
Saturday, April 13, 2013

BLACK CAT
♥♥♥
Please click on TAG to see in full size.
••• Supplies needed to complete this tutorial. •••
________________________________________________________________________
Programs: Paint Shop Pro, I'm using version 10. Animation Shop 3.••• Supplies needed to complete this tutorial. •••
________________________________________________________________________
Plugin : none
Font used: Carpenter
Tube of choice, I'm using 3 different tubes by Angelica S. from SATC.
The black cat is in the scrap kit. The two female tubes are
Rose : HERE and Waiting : HERE
Scrap Kit : "Black Cat" by Angelica S
Mask: by Angelica S and found in the scrap kit.
Animations: by me, download HERE ________________________________________________________________________
Scrap Kit : "Black Cat" by Angelica S
Mask: by Angelica S and found in the scrap kit.
Animations: by me, download HERE ________________________________________________________________________
♥♥♥
Save your tag often. Nothing like working long and hard on a tag and PSP crashes.
♥♥♥
Open element 29, shift + d to duplicate. Close original.
Go to Image, canvas size and change to 650 x 650.
C/P element 53 as a new layer on your tag. Move to the left slightly.
C/P element 13 as a new layer and move this layer to the bottom, behind the green circle frame.
C/P element 16 as a new layer and re-size by 40%. Move to the lower right hand side.
This layer should be at the top.
Open paper 15. Shift + d to duplicate, close original. Re-size the paper by 65% and C/P as a new layer on your tag.
Move this layer down below your circle frame.
Select your magic wand tool with your feather set to zero and your tolerance set to 10.
Make sure your circle frame layer in active and then click in the center.
Go to selections, modify, expand by 10.
Go to selections, invert and activate your paper layer and hit delete on your keyboard.
Go to selections, select none.
C/P
element 39 as a new layer and re-size by 58%. Move over the paper and
below the circle frame, position it slightly to the right.
C/P
element 10 as a new layer and position over frame layer and behind the
top hat layer. Place it to the right side of your tag.
C/P element 47 as a new layer and re-size by 18%. Move to the left hand side.
Duplicate and free rotate by 90 degrees to the left. Move just slightly below the other flower.
C/P element 45 as a new layer and re-size by 18%. Move behind your flower.
Duplicate and free rotate by 90 degrees to the left. Move just slightly below the other flower.
C/P this element again, this time mirror and re-size by 20% and move to below the other flower.
C/P element 21 as a new layer and re-size by 24%. Move to the upper right hand side of your tag.
Add a few more elements to your tag.
I added the martini glass, two different colored ribbons and another flower.
Open
element 07. Using your selection tool, set to rectangle and feather set
to 0, select the last two square frames from quad frame.
Copy and paste as a new layer on your tag and re-size by 80%.
Choose two tubes of choice. Re-size them to your liking.
Using
your selection tool, set to rectangle, make a selection around the
inner frame but make it bigger than the inner frame and smaller than the
outer edges of frame.

Paste your tube as a new layer and move below the frame.
Using your mover tool, place the portion of the tube you want to show thru the frame.
Go to Selections, Invert and hit delete on keyboard.
De-select.
Repeat for the other side of the frame.
Add drop shadow to frame.
You can merge these together.
Make your canvas larger. First click on your crop tool and select "snap crop rectangle to" and double click on your tag.
Now go to Image, canvas size and enter: 780x780
Don't worry we will re-size later.
Open paper of choice. I used paper 04. Duplicate and close original.
Go to the photomasks folder which is included in your kit.
Select mask "mask01PSP" Open in PSP.
Activate your paper. Go to Layers, New Mask Layer, from Image.
Select in the drop down list mask01PSP, click on Source luminance and check Invert mask data.
Apply.
Merge group and copy.
Paste as a new layer on your tag. Move to bottom.
Position to the upper left hand side and duplicate. Mirror.
Merge these two layers.
Duplicate and flip.
Position these two layers to your liking and merge.
Add drop shadow to all your elements and frames.
I used:
V : -3
H : -5
OPACITY : 77
BLUR : 8.70
COLOR : BLACK
I did lower the opacity on a couple of the elements, you can play around with your settings a pick something you like.
You can re-crop your tag now and re-size if you find it too large.
Add your copyright information.
Now to animate.
Go to Selections, select all.
Go to Edit and copy merged. Paste as a new animation in Animation Shop.
Hold your Ctrl key down and repeatedly hit letter L on your keyboard for a total of 12 frames.
You can watch the count on the lower right hand side of your screen in AS.

Open SimoneAni-Black Cat.
Go to Edit, select all.
Go to Edit, copy.
Activate your tag.
Go to Edit, select all.
Go to Edit, make sure Propagate Paste is selected.
Go to Edit, Paste, paste into selected frames.
Position over on the right side over the saxophone.
Click into place.
Go back to SimoneAni- Black. Go to Animation, mirror.
Go to Edit, copy.
Back on your tag, click to activate it.
Go to Edit, paste, paste into selected frames.
Position to the left side of your tag. Try to make sure it's on the same horizontal plane as the first animation.

-OR-
You can make things easier for yourself and use the other full animation with drop shadow.
Your choice. I know some people like the drop shadow and others don't so the option is there.
Play and save.
Don't forget to add your name.
You can see my name tutorial HERE.
Go to File, Save as, enter the name of your file and select the folder to save to.
Now click on Customize:
Under COLORS TAB:
Number of colors: 255 Colors
Create palette by: OPTIMIZED OCTREE
Reduce colors by: Error Diffusion
Under OPTIMIZATIONS TAB:
set a check mark beside the second, third and forth choices. UN-check the 1st and last.
Under PARTIAL TRANSPARENCY:
check Convert pixels less than 92
Yes, blend with this color: change to white #FFFFFF
Click OK. Click Next, next, next, next.
Play your animation.
At times your animation may or will come out terrible. Optimization in Animation Shop is not the greatest.
You can play around will your settings, especially under the Tab: Optimization. I change this setting at times from anywhere between 70 and 100.
Some people add a white background. To add background, go to Animation: Animation Properties, select Opaque and change color to white.
Hope you enjoyed this tutorial,
Hugs Simone
Please, always direct people to my blog to download my animations.
Do not load to any other download site and don't claim as your own.
Tutorial written by SophisticatSimone aka Lorraine Halle on Saturday, April 13, 2013.
Now click on Customize:
Under COLORS TAB:
Number of colors: 255 Colors
Create palette by: OPTIMIZED OCTREE
Reduce colors by: Error Diffusion
Under OPTIMIZATIONS TAB:
set a check mark beside the second, third and forth choices. UN-check the 1st and last.
Under PARTIAL TRANSPARENCY:
check Convert pixels less than 92
Yes, blend with this color: change to white #FFFFFF
Click OK. Click Next, next, next, next.
Play your animation.
At times your animation may or will come out terrible. Optimization in Animation Shop is not the greatest.
You can play around will your settings, especially under the Tab: Optimization. I change this setting at times from anywhere between 70 and 100.
Some people add a white background. To add background, go to Animation: Animation Properties, select Opaque and change color to white.
Hope you enjoyed this tutorial,
Hugs Simone
Please, always direct people to my blog to download my animations.
Do not load to any other download site and don't claim as your own.
Tutorial written by SophisticatSimone aka Lorraine Halle on Saturday, April 13, 2013.

Subscribe to:
Posts
(Atom)
CT TEAM