My Blinkie

Search This Blog
Leave Some ♥
About Me

- Simone aka Lorraine
- Hi everyone! I'm a 52 year old scrap and Paint Shop Pro addict. I've been PSPing since 2004. I love creating and I love sharing. Programs I use: Paint Shop Pro 10 Particle Illusion 3.0 Animation Shop 3.0 CS3 PS 7
Total Pageviews
Saturday, May 18, 2013
♥♥♥
Please click on TAG to see in full size.
••• Supplies needed to complete this tutorial. •••
________________________________________________________________________
Programs: Paint Shop Pro, I'm using version 10. Animation Shop 3.
Plugin : MuRa Copies
Font used: Alice In Wonderland
Tube of choice: I'm using "Beautiful Darkness" by Danny Lee from SATC.
Scrap Kit : I'm using "Darkness" by Bibi's Collection from SATC
Animation: I'm using my own, SimoneAni-My Darkness
________________________________________________________________________
♥♥♥
Save your tag often. Nothing like working long and hard on a tag and PSP crashes.
♥♥♥
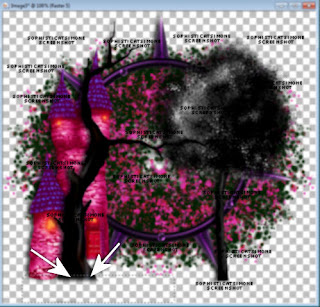
Open element 40 and duplicate. Please remember to always close your originals so you don't lose them.
Re-size all layers by 50%. Now re-size your canvas by 800 x 750. You re-size at the end.
Go to Effects, Plugins, MuRa Copies, Encircle. Enter the following numbers:
8
40
40
0
100
-25
100
0
100
0
0
30
0
OK
Duplicate and merge down. Now move to the far left side. Duplicate and mirror. Merge together.
Copy and paste element 46 as a new layer and move high on the tag, leave in center. Add drop shadow.
Copy and paste element 67 as a new layer, re-size by 70% and move to the left side of tag. Add drop shadow.
Copy and paste element 56 as a new layer and move to the right side of tag and add drop shadow.
Copy and paste element 68 as a new layer and move to the left side of tag. Using your selection tool, remove the extra at the bottom and add drop shadow.

Copy and paste element 41 as a new layer and move to the right side of castle and add drop shadow. Duplicate and re-size by 76%. Move to the far right side of tag.
Copy and paste your tube as a new layer and re-size if needed. Add drop shadow.
Copy and paste element 57 as a new layer, move to lower portion of tag. Add drop shadow.
Copy and paste element 70 as a new layer, move a little lower so your tube isn't overly covered. Duplicate and merge down.
Copy and paste elements 24 and 73 as new elements and move them both to the right hand side of tag. Add drop shadow to each.
C/P element 1 as new layer and re-size by 50%. Move to left side and over tree trunk. Add Drop shadow.
Add any other element you feel would add to the tag.
Add artist copyright and scrap kit maker name.
Merge visible.
To Animate:
Go to Selections, select all.
Go to Edit and copy. Paste as a new animation in Animation Shop.
Hold your Ctrl key down and repeatedly hit letter L on your keyboard for a total of 19 frames.
You can watch the count on the lower right hand side of your screen in AS.
Open SimoneAni-My Darkness
Go to Edit, select all.
Go to Edit, copy.
Activate your tag.
Go to Edit, select all.
Go to Edit, make sure Propagate Paste is selected.
Go to Edit, Paste, paste into selected frames.
Position on your tag and click into place.
Play and save.
Don't forget to add your name.
You can see my name tutorial HERE.
To save:
Go to File, Save as, enter the name of your file and select the folder to save to.
Now click on Customize:
Under COLORS TAB:
Number of colors: 255 Colors
Create palette by: OPTIMIZED OCTREE
Reduce colors by: Error Diffusion
Under OPTIMIZATIONS TAB:
set a check mark beside the second, third and forth choices. UN-check the 1st and last.
Under PARTIAL TRANSPARENCY:
check Convert pixels less than 92
Yes, blend with this color: change to white #FFFFFF
Click OK. Click Next, next, next, next.
Play your animation.
At times your animation may or will come out terrible. Optimization in Animation Shop is not the greatest.
You can play around will your settings, especially under the Tab: Optimization. I change this setting at times from anywhere between 70 and 100.
Some people add a white background. To add background, go to Animation: Animation Properties, select Opaque and change color to white.
Hope you enjoyed this tutorial,
Hugs Simone
Please, always direct people to my blog to download my animations.
Do not load to any other download site and don't claim as your own.
Tutorial written by SophisticatSimone aka Lorraine Halle on Saturday, May 18, 2013.
Please click on TAG to see in full size.
••• Supplies needed to complete this tutorial. •••
________________________________________________________________________
Programs: Paint Shop Pro, I'm using version 10. Animation Shop 3.
Plugin : MuRa Copies
Font used: Alice In Wonderland
Tube of choice: I'm using "Beautiful Darkness" by Danny Lee from SATC.
Scrap Kit : I'm using "Darkness" by Bibi's Collection from SATC
Animation: I'm using my own, SimoneAni-My Darkness
________________________________________________________________________
♥♥♥
Save your tag often. Nothing like working long and hard on a tag and PSP crashes.
♥♥♥
Open element 40 and duplicate. Please remember to always close your originals so you don't lose them.
Re-size all layers by 50%. Now re-size your canvas by 800 x 750. You re-size at the end.
Go to Effects, Plugins, MuRa Copies, Encircle. Enter the following numbers:
8
40
40
0
100
-25
100
0
100
0
0
30
0
OK
Duplicate and merge down. Now move to the far left side. Duplicate and mirror. Merge together.
Copy and paste element 46 as a new layer and move high on the tag, leave in center. Add drop shadow.
Copy and paste element 67 as a new layer, re-size by 70% and move to the left side of tag. Add drop shadow.
Copy and paste element 56 as a new layer and move to the right side of tag and add drop shadow.
Copy and paste element 68 as a new layer and move to the left side of tag. Using your selection tool, remove the extra at the bottom and add drop shadow.

Copy and paste element 41 as a new layer and move to the right side of castle and add drop shadow. Duplicate and re-size by 76%. Move to the far right side of tag.
Copy and paste your tube as a new layer and re-size if needed. Add drop shadow.
Copy and paste element 57 as a new layer, move to lower portion of tag. Add drop shadow.
Copy and paste element 70 as a new layer, move a little lower so your tube isn't overly covered. Duplicate and merge down.
Copy and paste elements 24 and 73 as new elements and move them both to the right hand side of tag. Add drop shadow to each.
C/P element 1 as new layer and re-size by 50%. Move to left side and over tree trunk. Add Drop shadow.
Add any other element you feel would add to the tag.
Add artist copyright and scrap kit maker name.
Merge visible.
To Animate:
Go to Selections, select all.
Go to Edit and copy. Paste as a new animation in Animation Shop.
Hold your Ctrl key down and repeatedly hit letter L on your keyboard for a total of 19 frames.
You can watch the count on the lower right hand side of your screen in AS.
Open SimoneAni-My Darkness
Go to Edit, select all.
Go to Edit, copy.
Activate your tag.
Go to Edit, select all.
Go to Edit, make sure Propagate Paste is selected.
Go to Edit, Paste, paste into selected frames.
Position on your tag and click into place.
Play and save.
Don't forget to add your name.
You can see my name tutorial HERE.
To save:
Go to File, Save as, enter the name of your file and select the folder to save to.
Now click on Customize:
Under COLORS TAB:
Number of colors: 255 Colors
Create palette by: OPTIMIZED OCTREE
Reduce colors by: Error Diffusion
Under OPTIMIZATIONS TAB:
set a check mark beside the second, third and forth choices. UN-check the 1st and last.
Under PARTIAL TRANSPARENCY:
check Convert pixels less than 92
Yes, blend with this color: change to white #FFFFFF
Click OK. Click Next, next, next, next.
Play your animation.
At times your animation may or will come out terrible. Optimization in Animation Shop is not the greatest.
You can play around will your settings, especially under the Tab: Optimization. I change this setting at times from anywhere between 70 and 100.
Some people add a white background. To add background, go to Animation: Animation Properties, select Opaque and change color to white.
Hope you enjoyed this tutorial,
Hugs Simone
Please, always direct people to my blog to download my animations.
Do not load to any other download site and don't claim as your own.
Tutorial written by SophisticatSimone aka Lorraine Halle on Saturday, May 18, 2013.
Subscribe to:
Post Comments
(Atom)
Categories
- 2 animations same tag using Photoshop (2)
- 2 animations using PSP and AS (1)
- adding 2 animations to tag (2)
- Al Rio (1)
- aldodark (1)
- Alex McMillan (4)
- Alex Prihodko (1)
- AmyMarie Kits (2)
- Angelica S (6)
- Animation (63)
- ARMY (1)
- Barbara Jensen (2)
- Baseball (1)
- Bibi's Collection Kit (38)
- bling (9)
- BLOOD (1)
- bubbles (12)
- CDO Tutorial (1)
- Christine Marie Kotlark (6)
- Christmas (1)
- circles (1)
- Cowgirl (1)
- CU Animations (1)
- Danny Lee (6)
- Design by Joan (3)
- Diana Gali (9)
- Disturbed Scraps (9)
- Easter (1)
- Fairy Dust (3)
- Fire (3)
- Fish (1)
- Forum Set (2)
- Freebie Kit (1)
- FTU Kit (1)
- Glitter (17)
- Goth (9)
- Grunge (6)
- Gunshot (1)
- Hania Designs (1)
- Heatbeatz Creationz (2)
- Jay Trembly (4)
- Jose Cano Tubes (25)
- July 4th (1)
- Lady Mishka Tubes (2)
- LizquisScraps (7)
- Marc Duval (1)
- Mask Tutorial (1)
- Max-13-Tulmes (1)
- Meine Bastelwelt (1)
- Misticheskaya (5)
- Money (1)
- Music (1)
- P-O Concept Kits (4)
- Particle Illusion (1)
- PFD (2)
- PFD Tutorial (1)
- Pink (1)
- Pinup Bombshells (3)
- PIRATE (1)
- Popcorn (1)
- PSP tutorial (1)
- ptu animation (5)
- PTU kit (45)
- PTU tube (46)
- PTU Tutorial (1)
- Rock n Roll (3)
- Roses (1)
- S&Co Store (1)
- SATC (5)
- Scrapz n Pleazure (1)
- SkyScraps Kits (25)
- SkyScraps Tubes (8)
- Sparkle (5)
- Spazz (1)
- Spring (5)
- stars (1)
- Steam Punk (1)
- Summer (1)
- Sweet Occasion Designs (1)
- Teaching Tutorial (5)
- The Hunter (8)
- Timeline Banner (3)
- Tiny Turtle Designs Kits (6)
- Tutorial (43)
- tuts by Rene (1)
- USA (1)
- VeryMany (6)
- Video Tutorial (1)
- waterfall (1)
- ZlataM Tube (5)

0 comments:
Post a Comment